Control panel & ingesting PNR
This article explains the additional features available in the top panel of the Reservation Processing page – including the menu that appears when using checkboxes to select multiple instances.
Checkbox interaction
To access these features, use the buttons located at the top of the page and the checkboxes on the left side of each row.
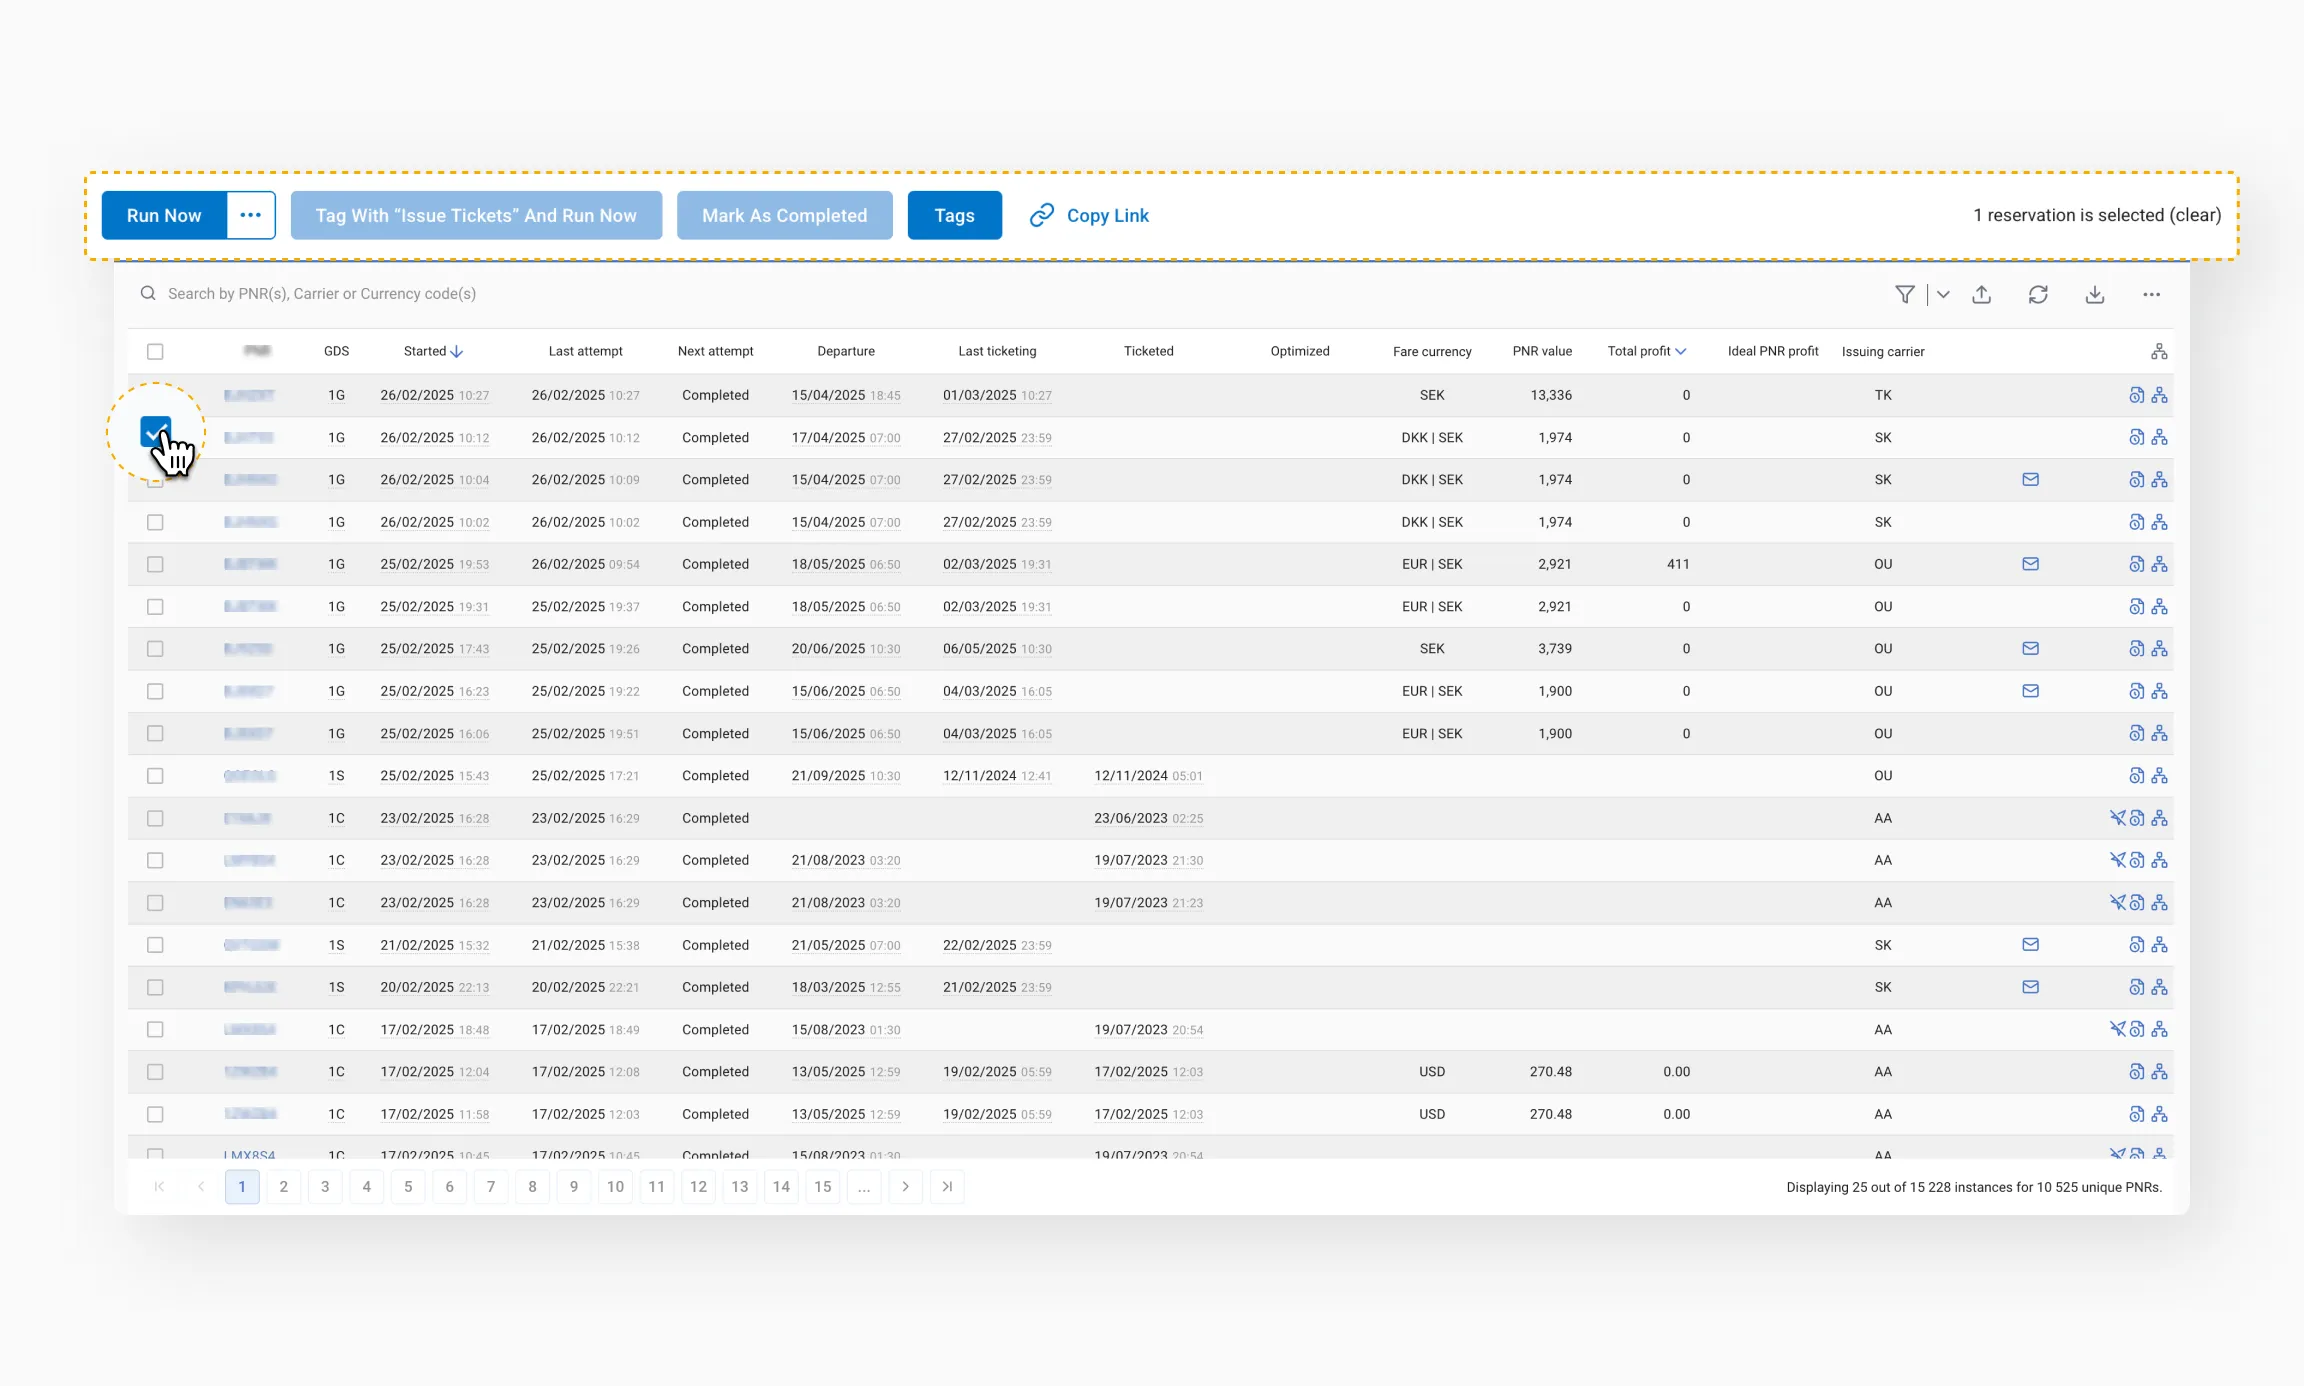
Run Now
Launch selected PNRs for their associated instances – either immediately or with a delayed start.
This feature is especially useful for:
- Testing – when the scheme version is updated or PNR data has changed, and you need to reprocess the same PNR using the same scheme
- Retrying after failure – for example, if a GDS outage caused errors, you can relaunch multiple failed instances in bulk
Tag with “Issue Tickets” and Run Now
Tags the selected instance(s) with Issue Tickets and triggers processing.
For this to work, the scheme must include the Ticketing Request Exist condition. When the workflow reaches this step, it routes the booking to the ticket issuance path. If the step is not included in the scheme, the action button will be disabled.
Mark As Completed
Manually sets the selected instance's status to Completed. The system will stop processing the instance at its current step (e.g., Pause or Repeat). Once marked as Completed, no further calls will be made.
ℹ Note: If this PNR later re-enters the source queue for this scheme (e.g., a GDS queue), processing will restart for this instance.
Tags
Quickly assign tags to one or more selected instances. Tags can be applied either to an instance or to the entire reservation.
ℹ Note: Tags assigned using this button do not appear in the processing history but are displayed as icons at the end of the instance row.
Copying link to selected PNRs
You can copy a link to the selected instances.
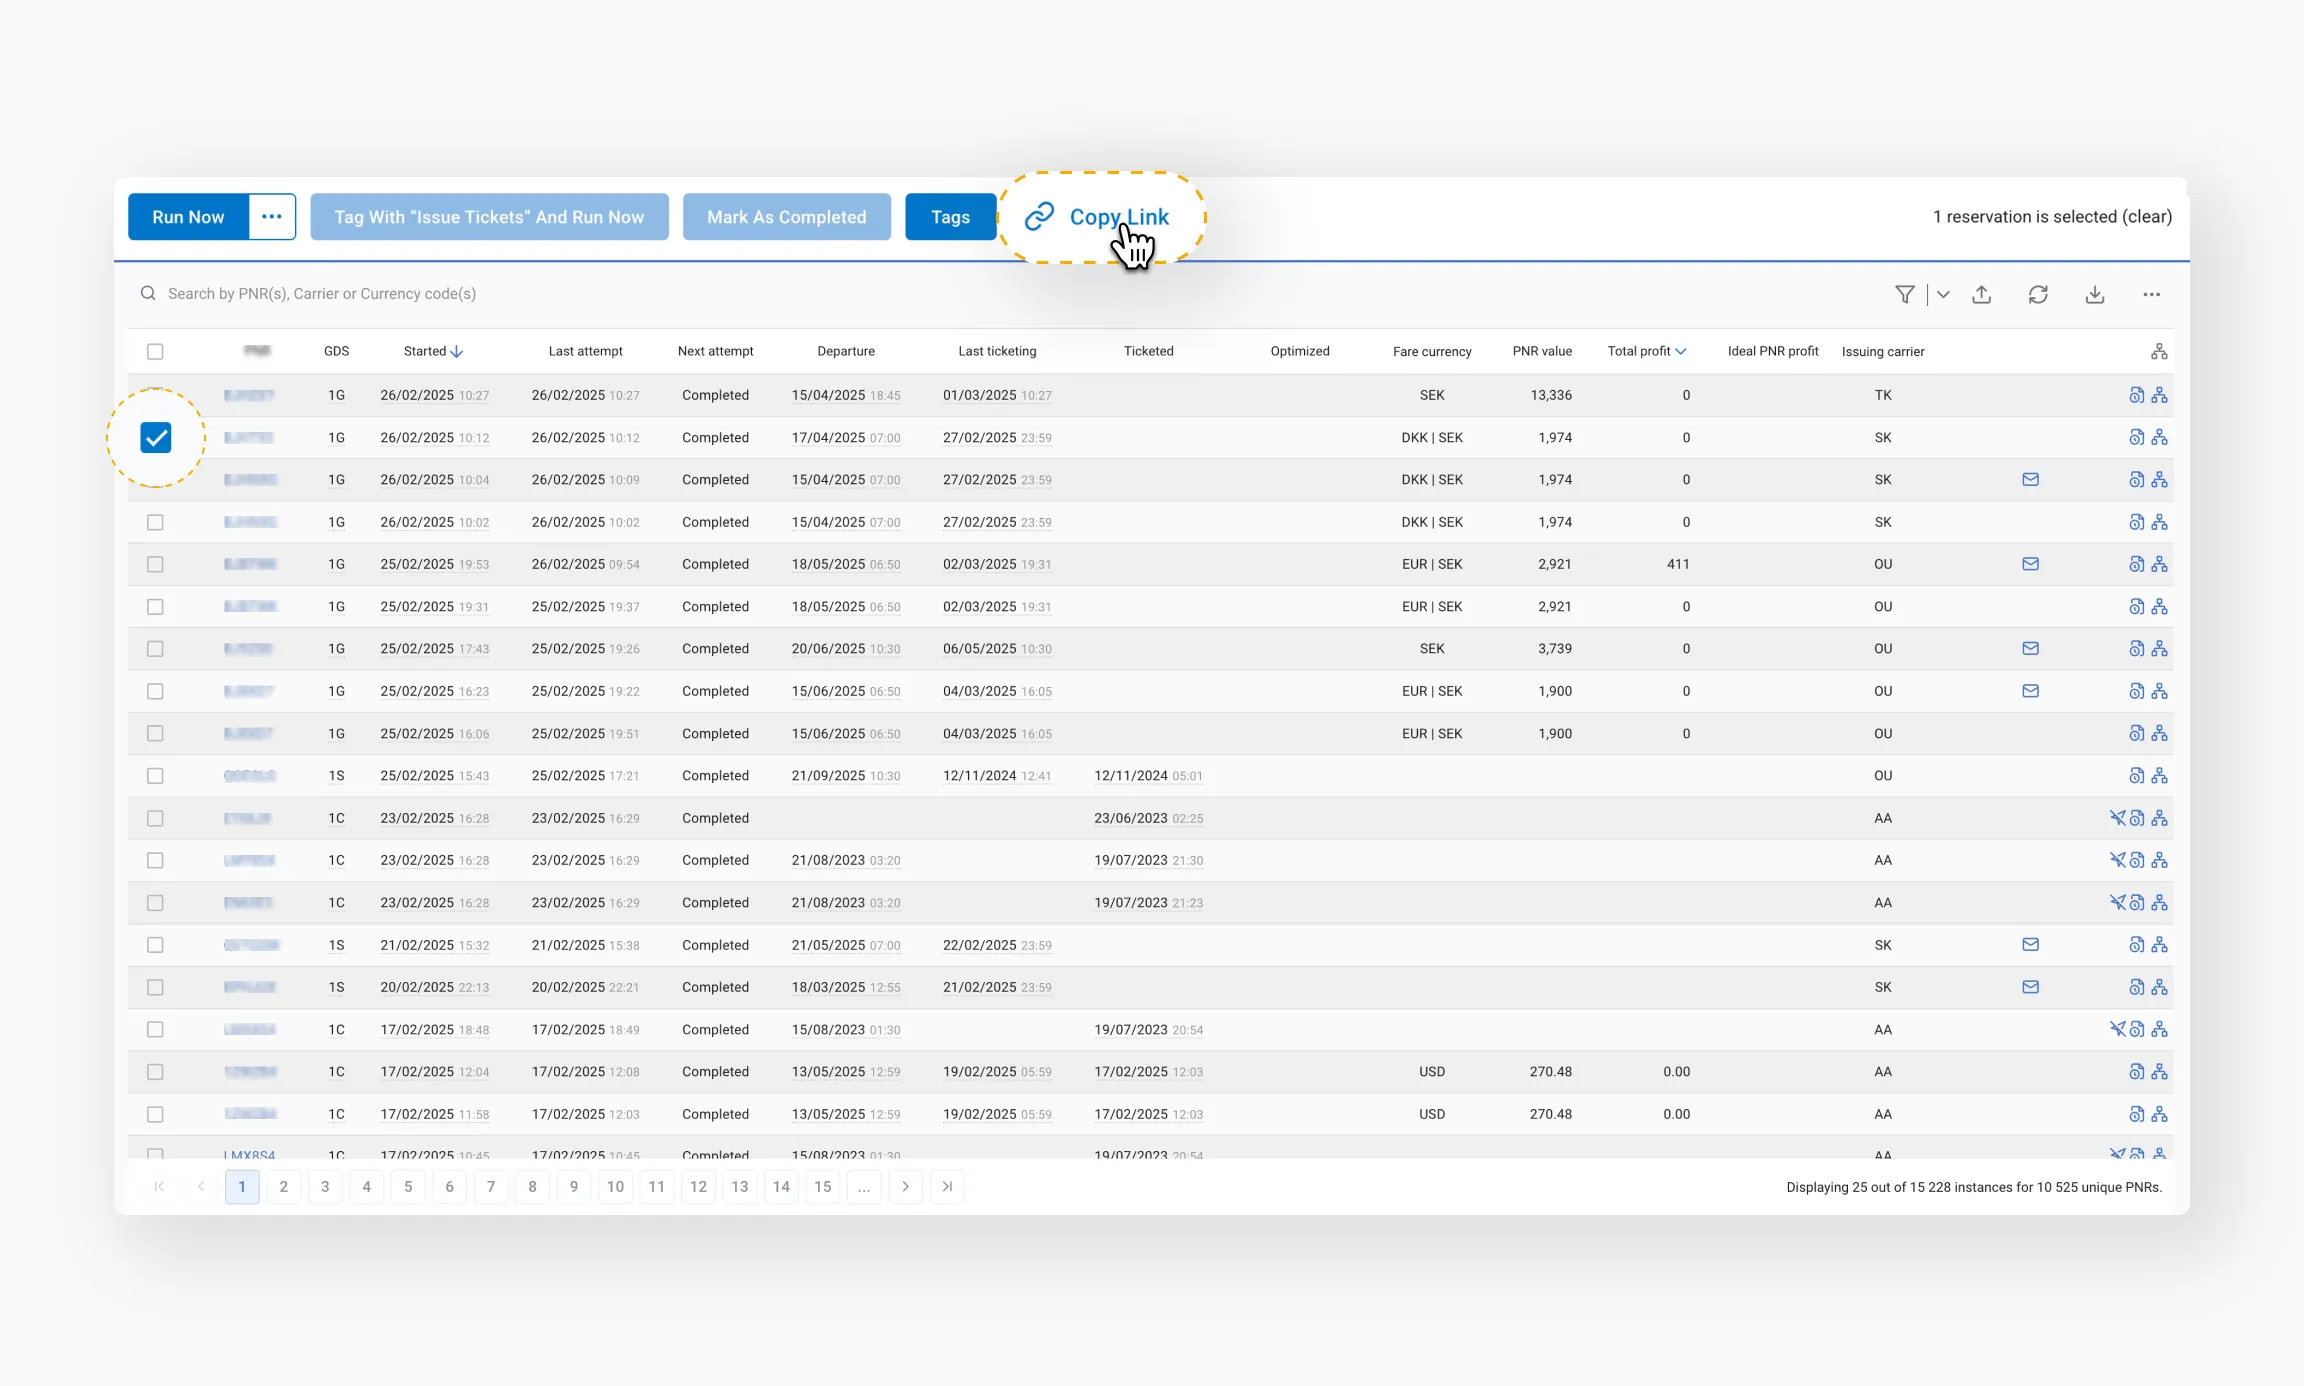
When someone follows the link, only those PNRs selected via checkbox (and any active filters) will be pre-selected.
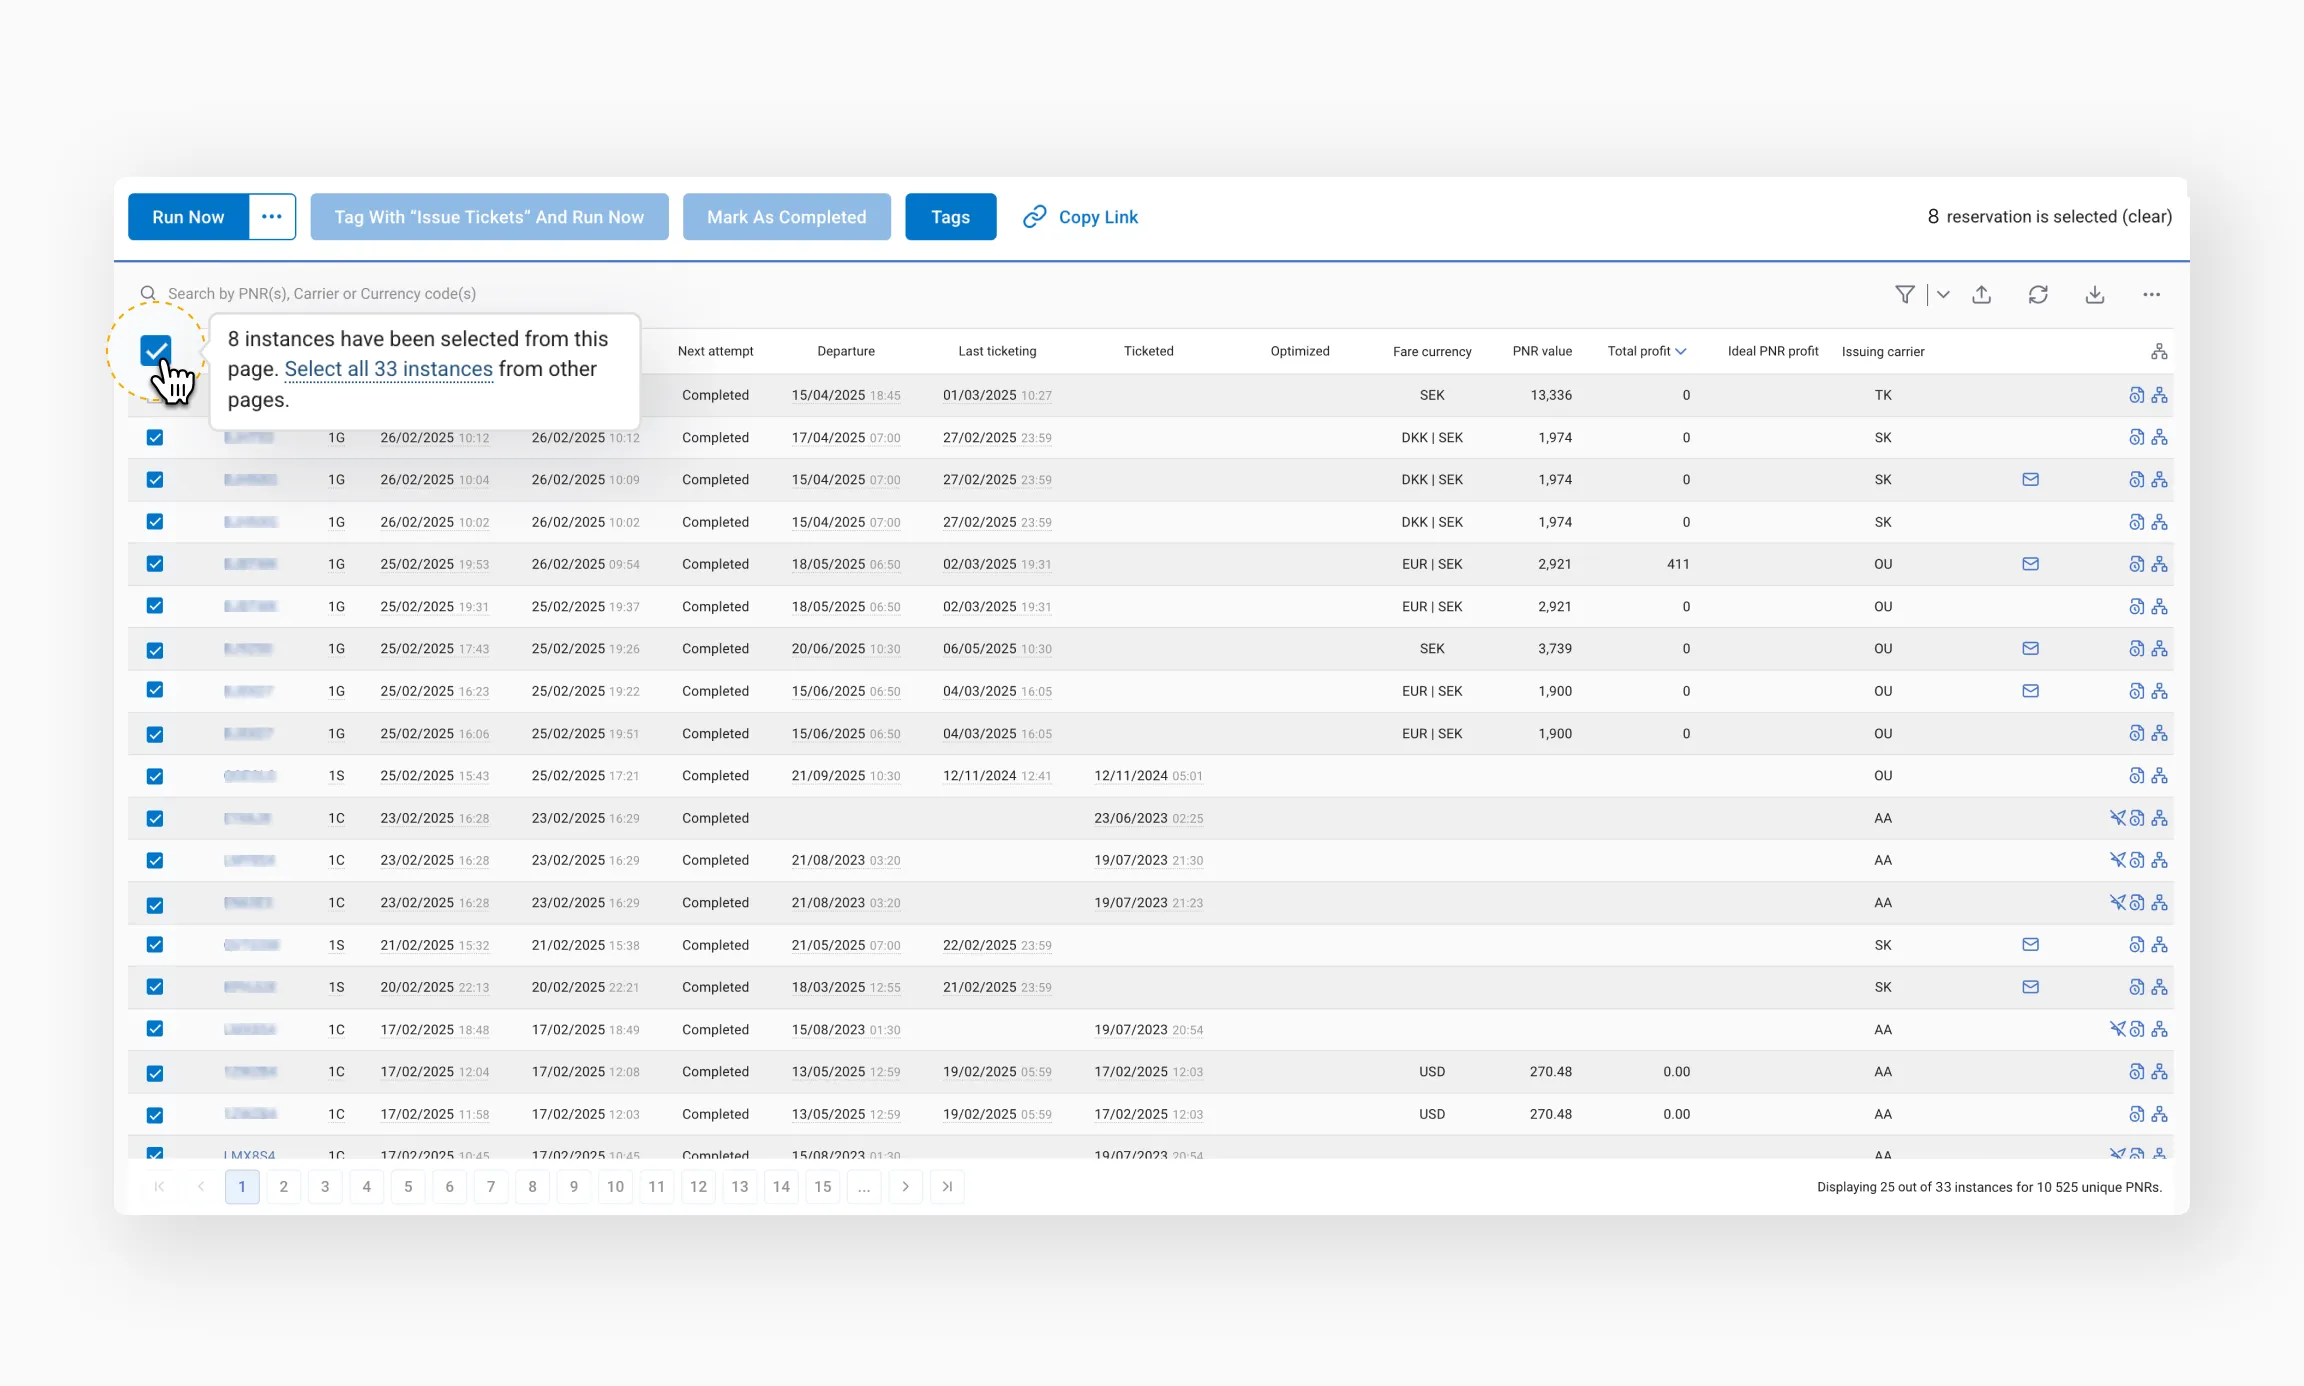
This is especially useful when many instances are found – more than can fit on the current page.
Export and real-time updates
Export to Excel
Downloads instances as an Excel file. If you have specific instances selected using the checkboxes, only those will be exported. If you selected PNRs using Select all reservations, only the visible rows on the current page will be exported. To export all results, click Export directly.
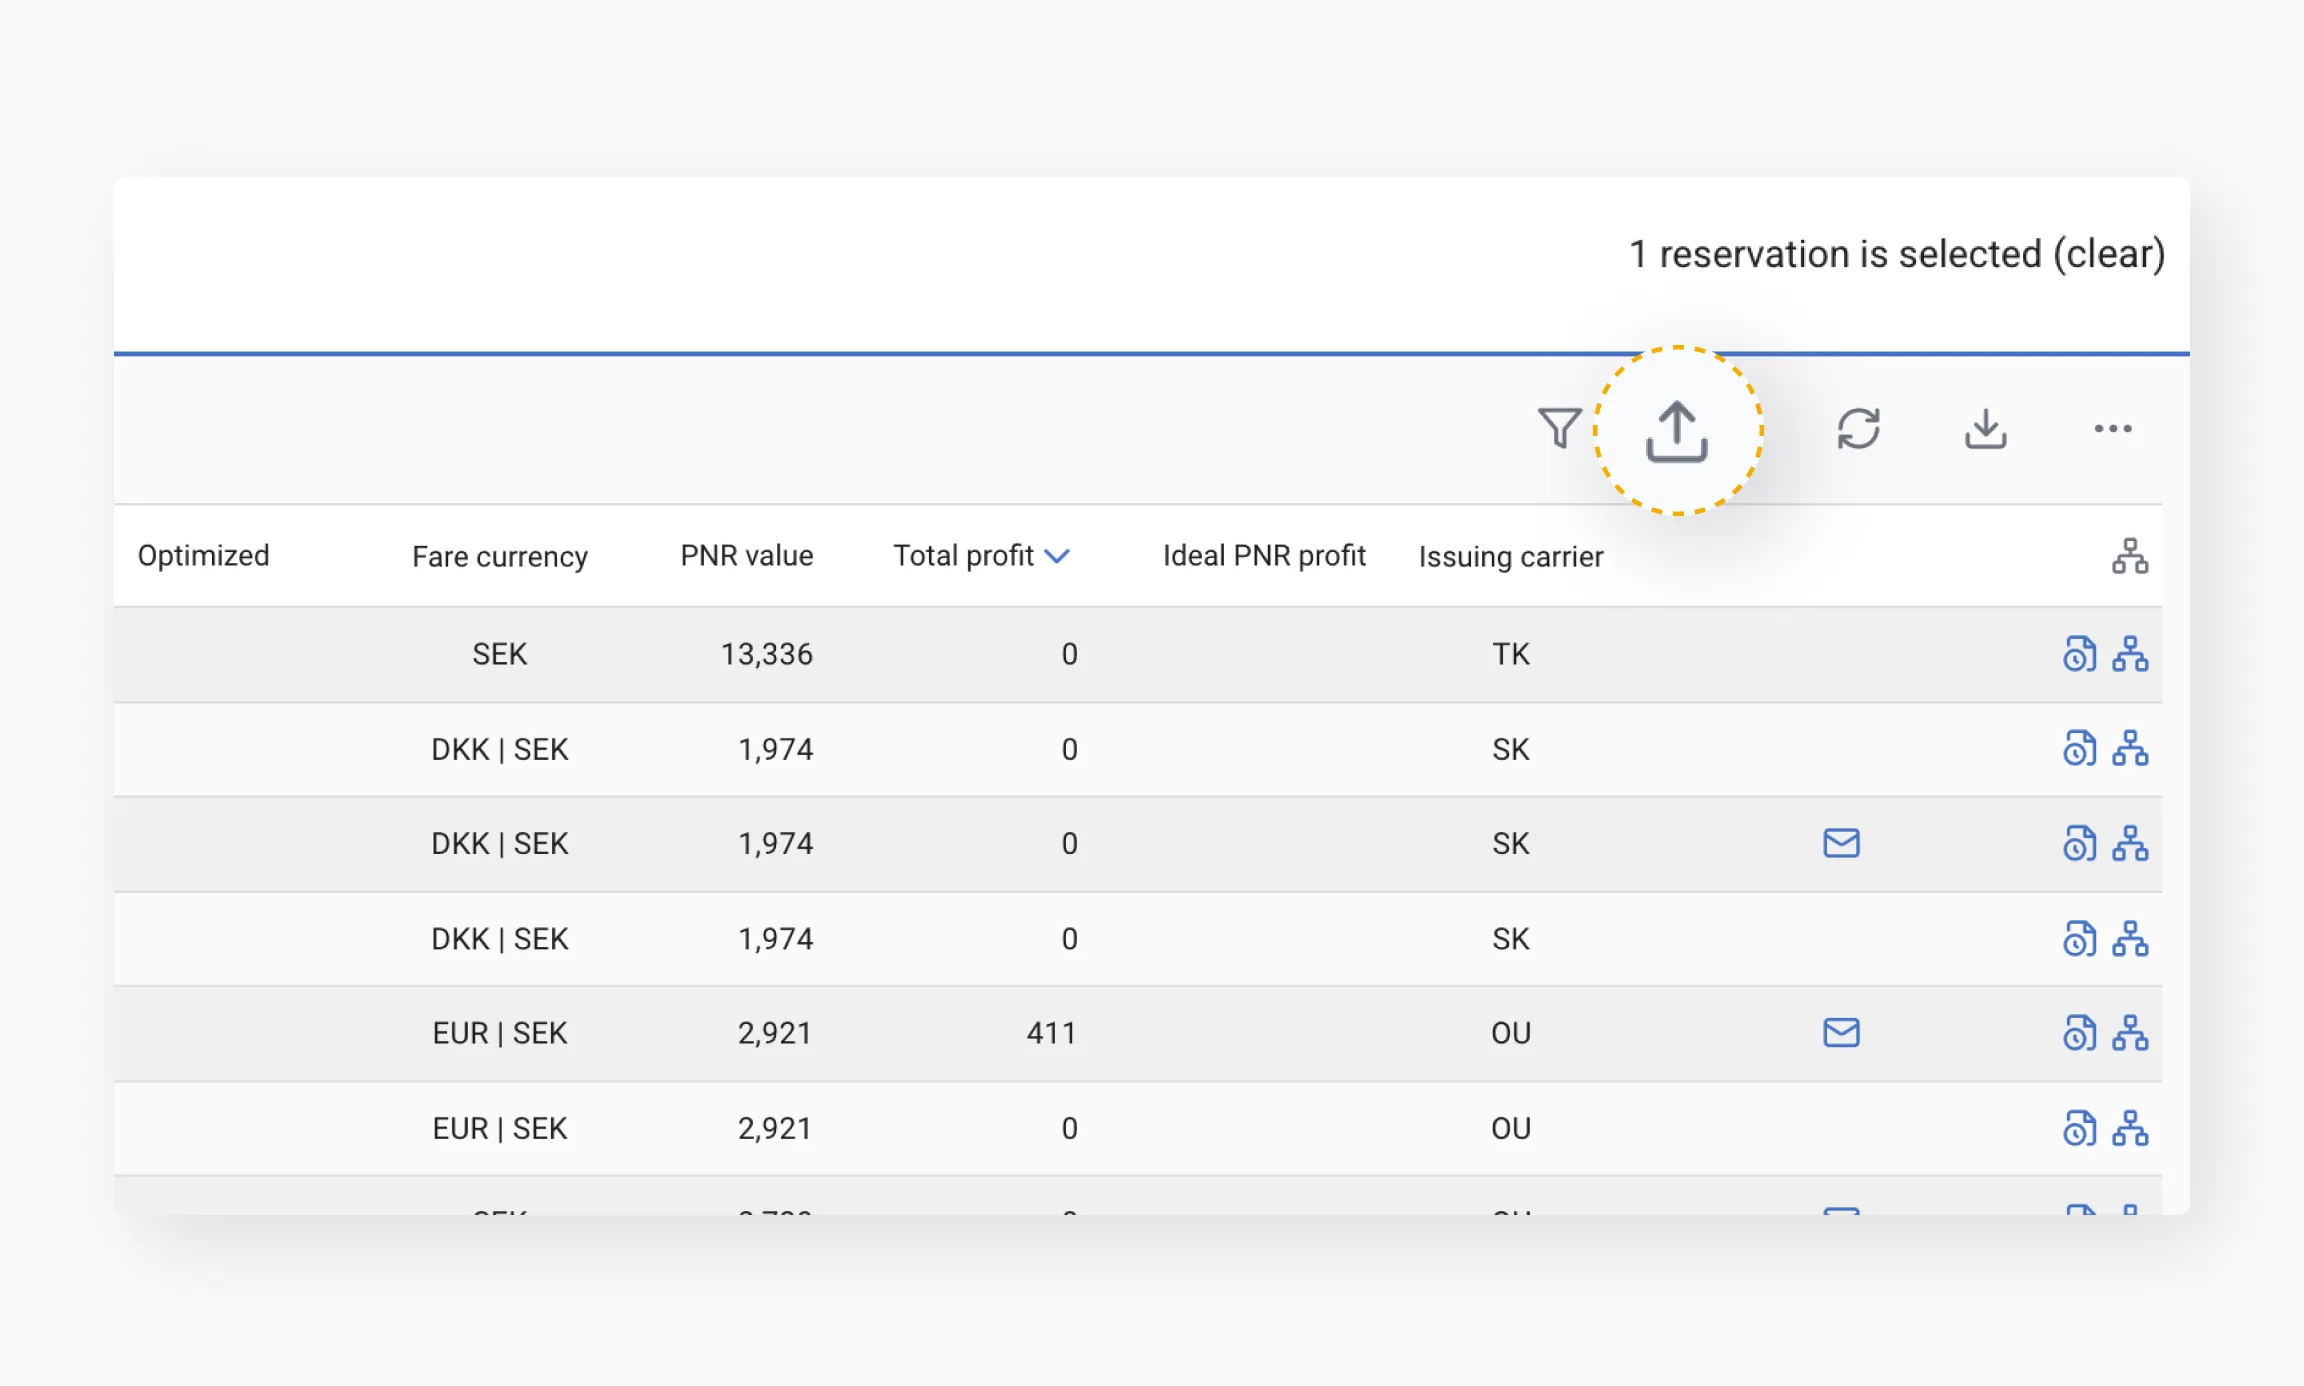
Exporting PNR data to Excel lets you quickly share filtered information with your team or management and easily review a large volume of data without staying in the system.
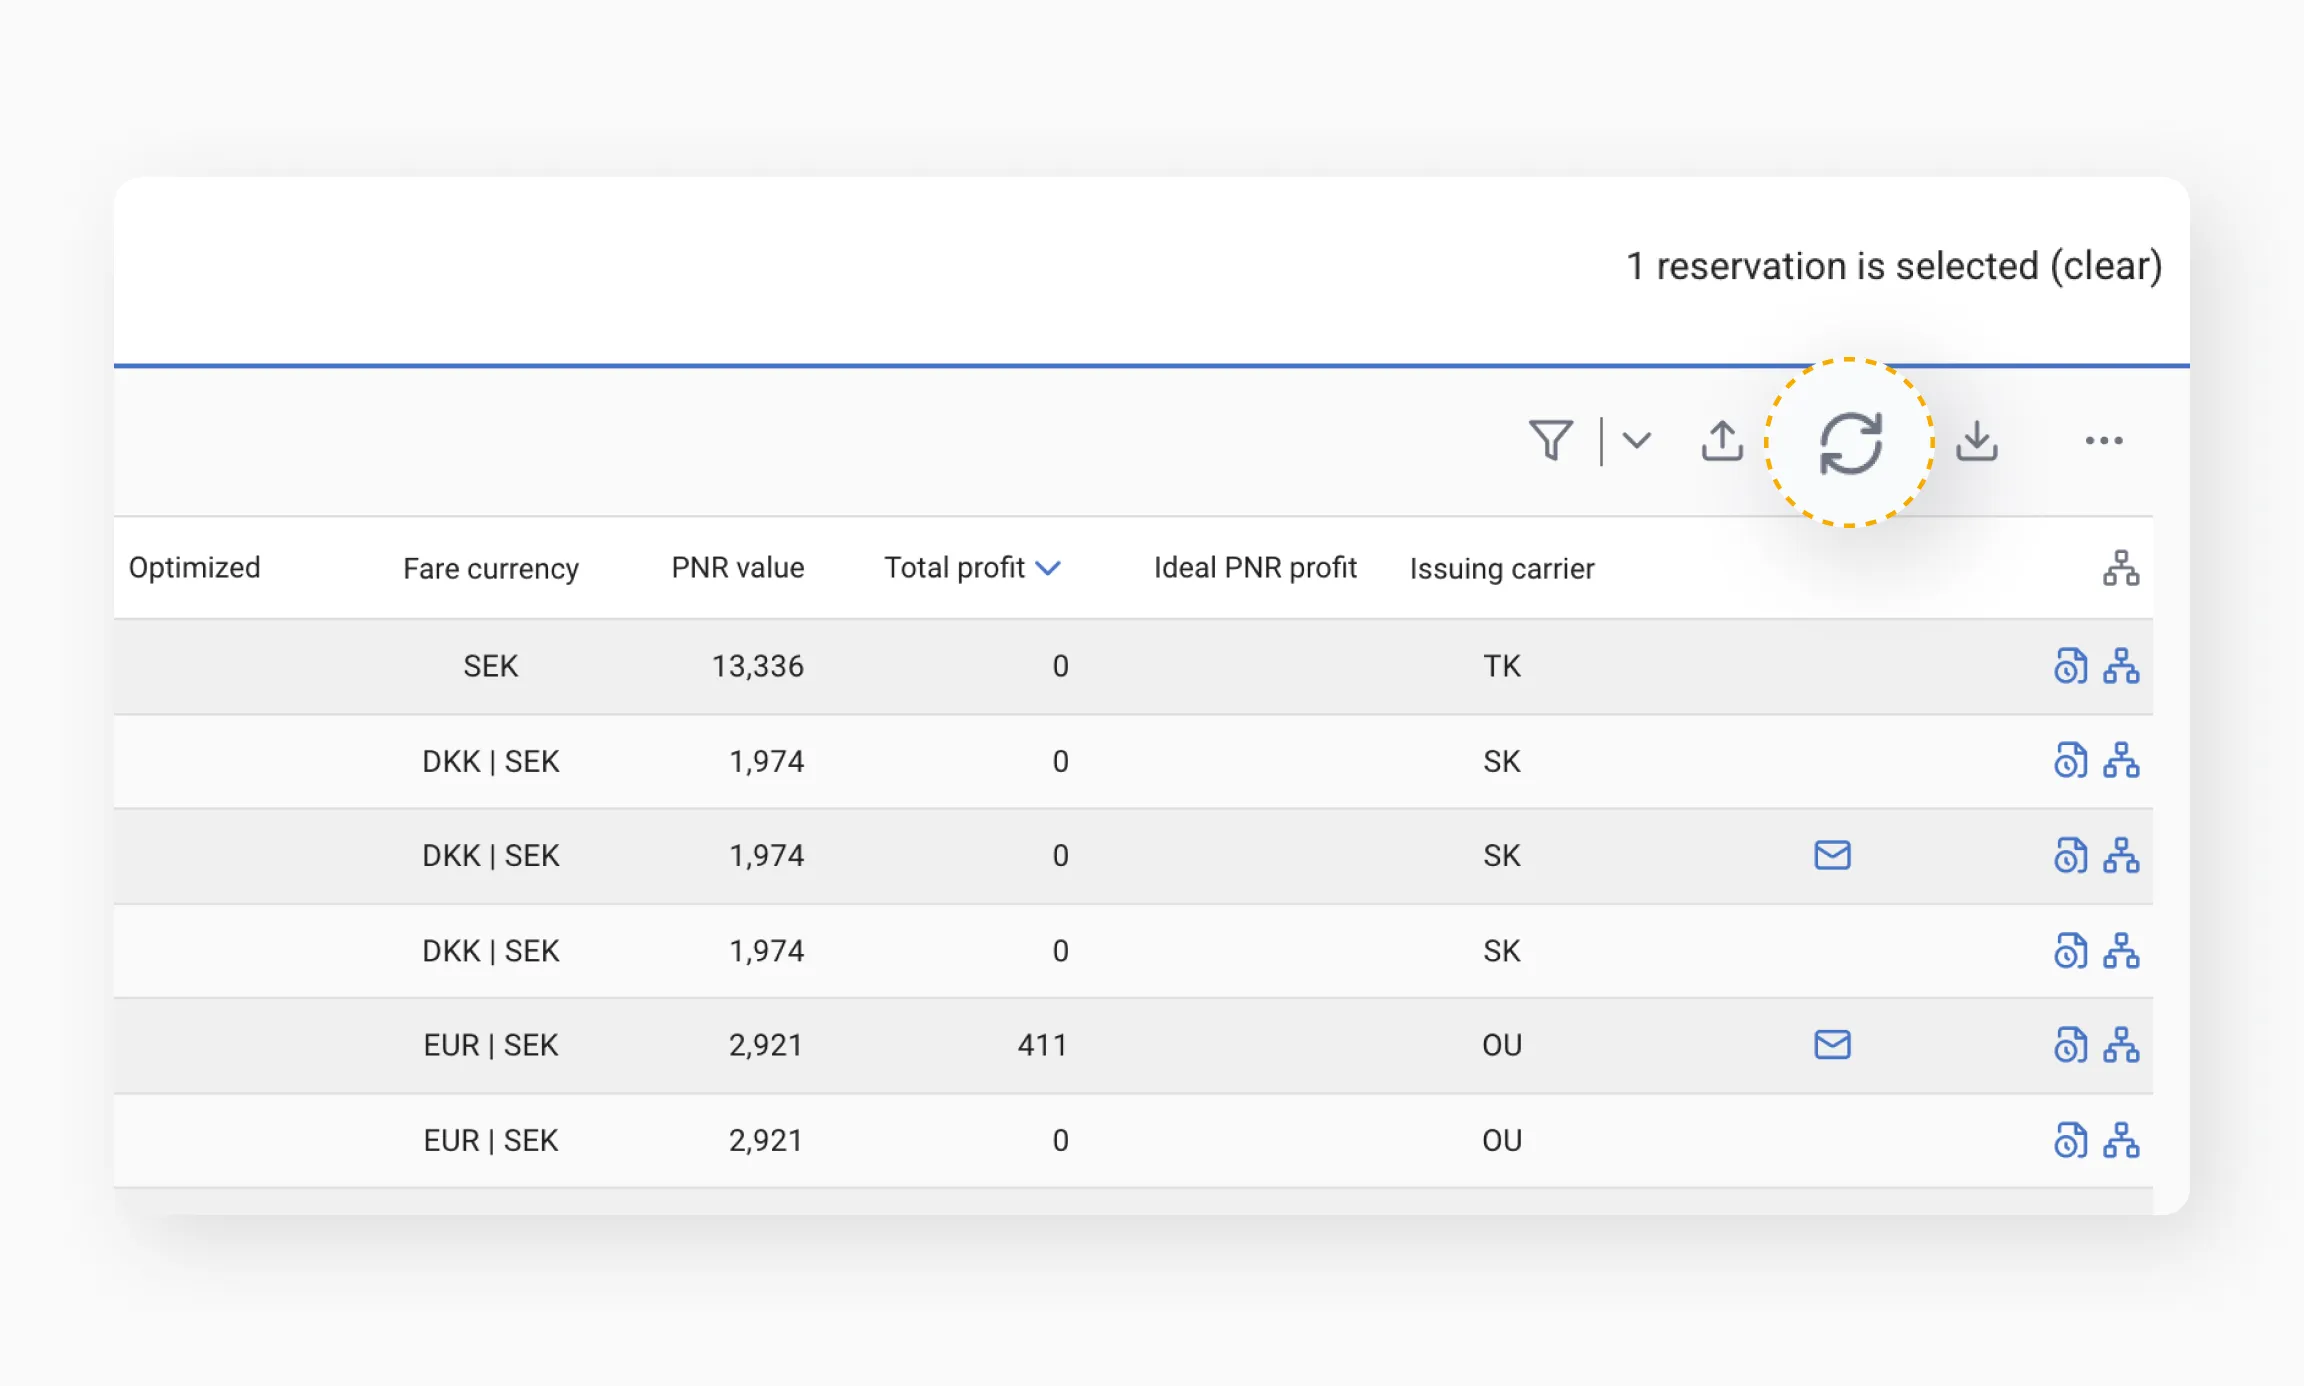
Refresh
The data displayed on the page reflects the state at the time it was initially loaded. New instances may appear during your session, so use the Refresh icon to update the list and see the latest results.
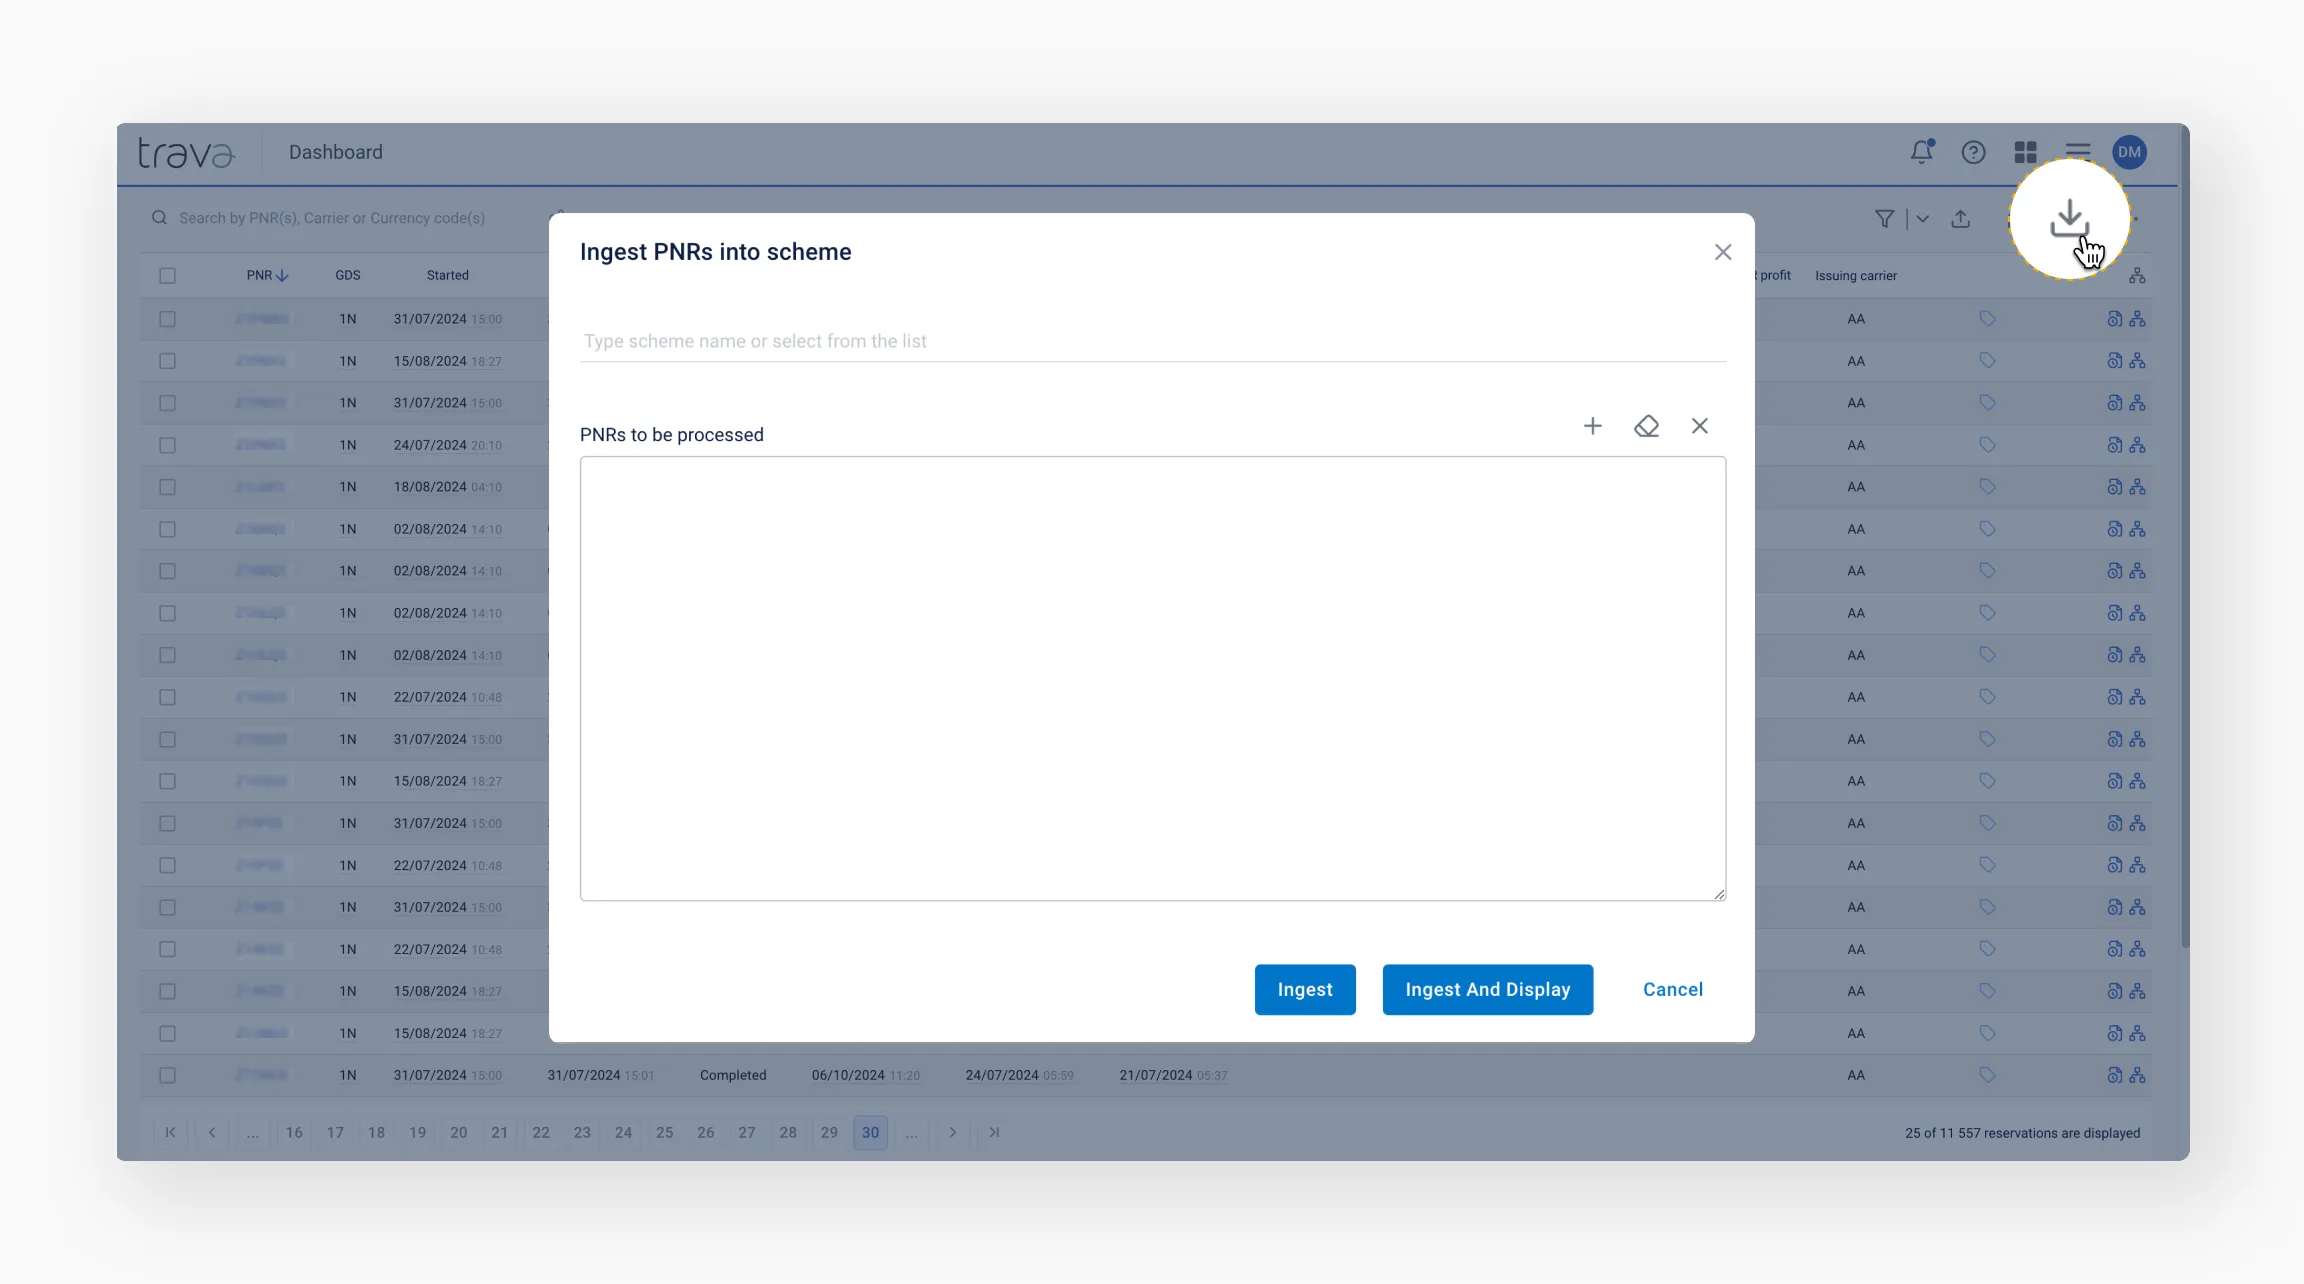
Ingesting PNRs
Use the Ingest PNRs button to manually process specific PNRs.
In the modal that appears:
- Select a scheme from the drop-down menu
- Enter one or more PNRs manually, separated by spaces
You can also:
- Add PNRs from the dashboard
- Add PNRs from a file (XLSX, TXT)
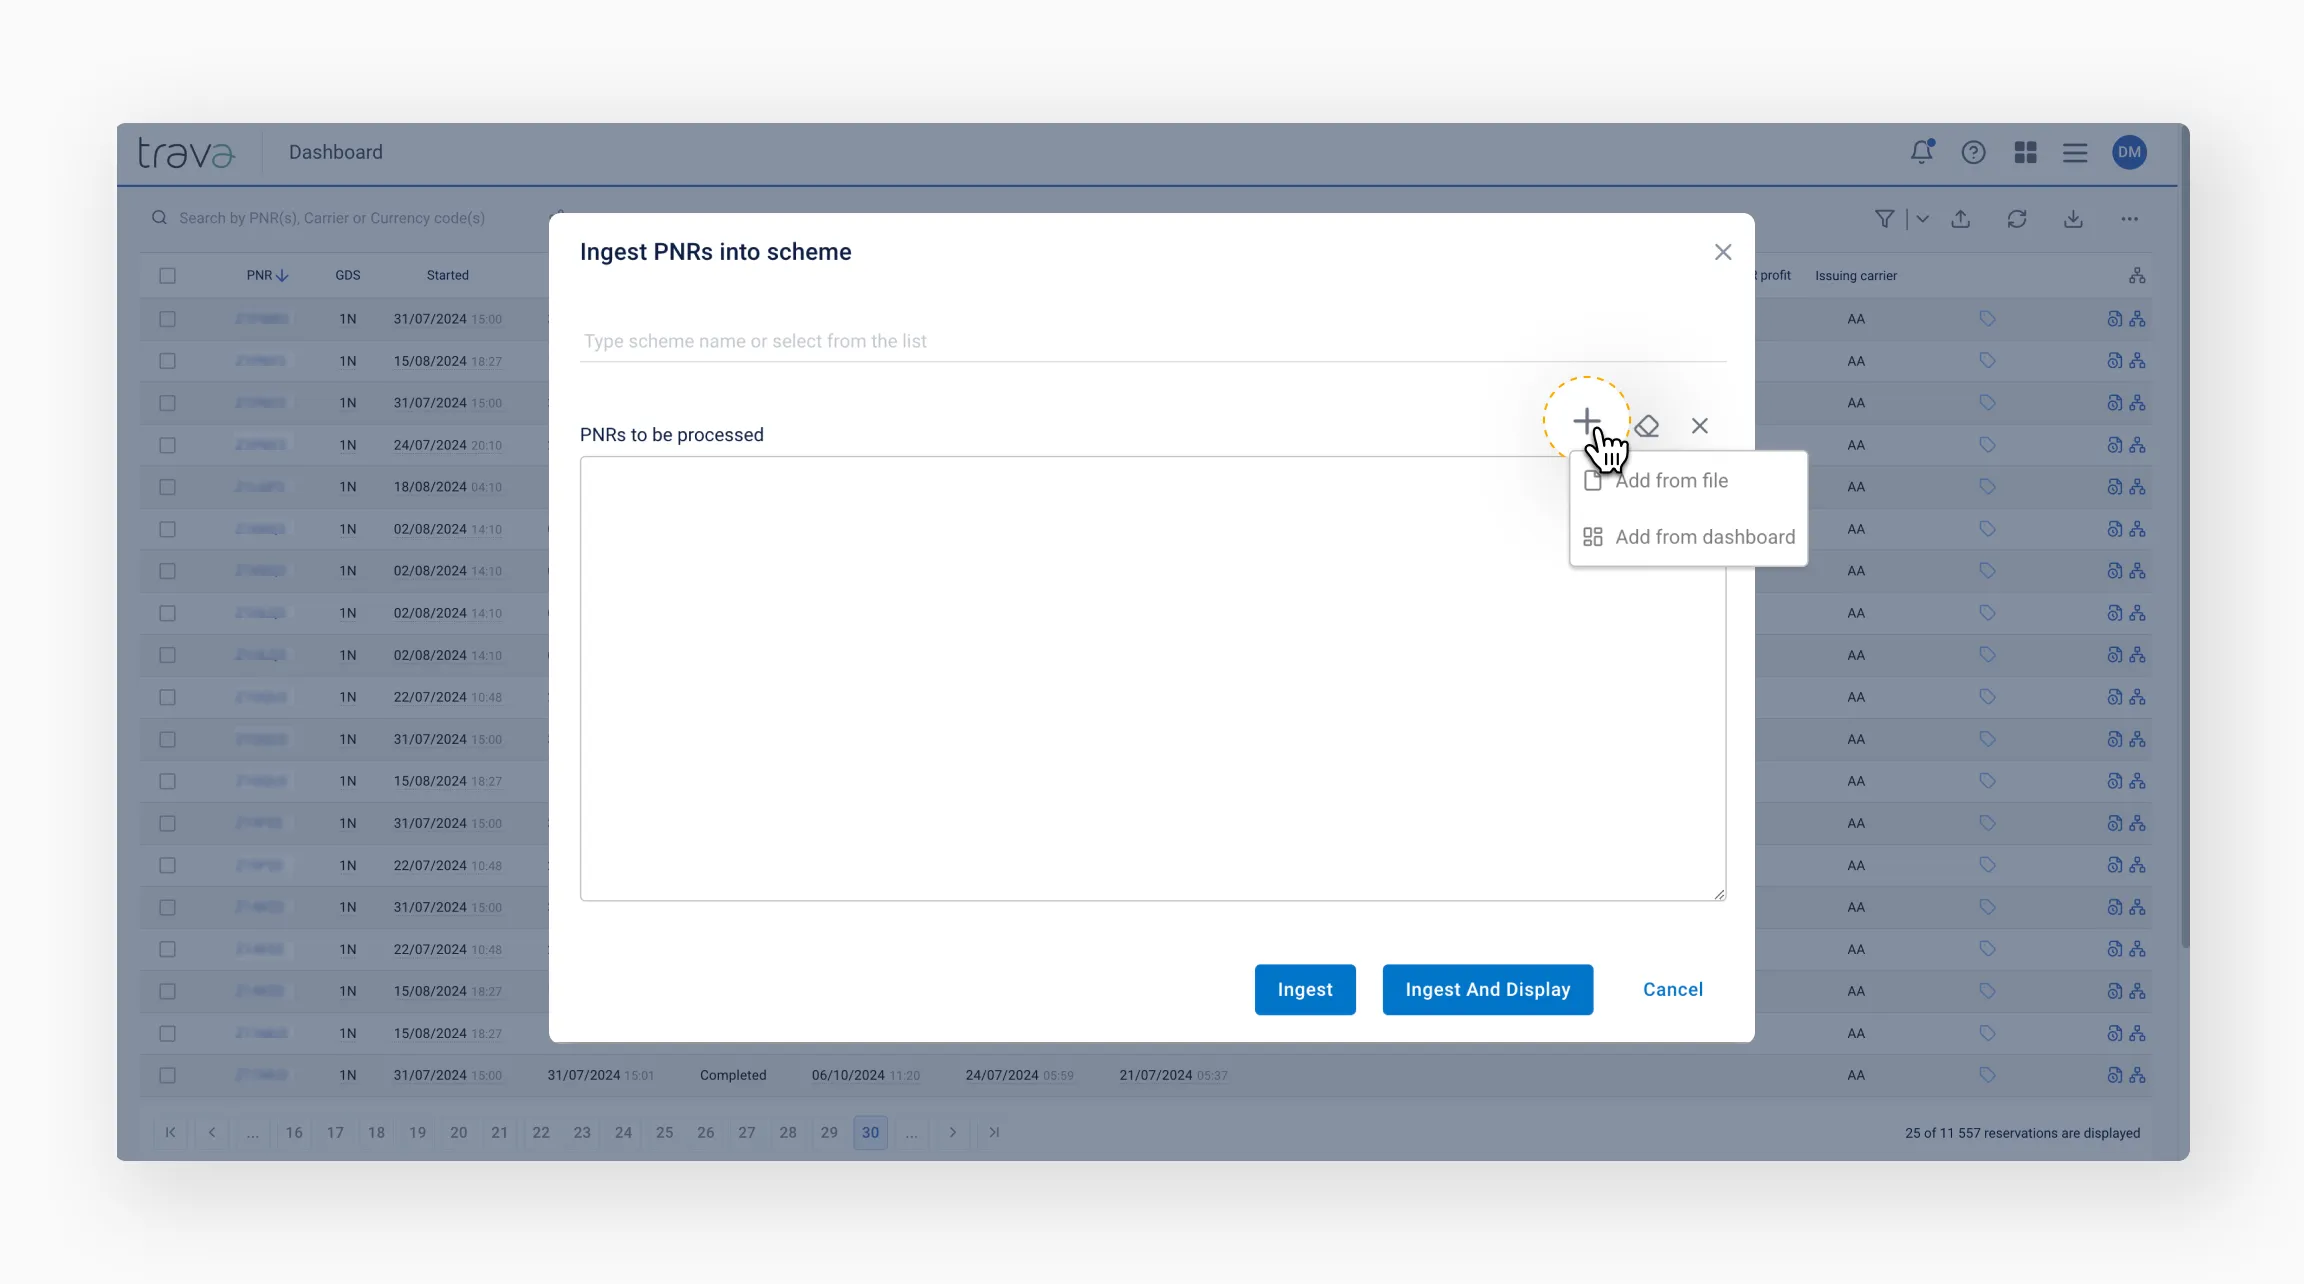
When you copy selected PNRs and open the modal, their numbers will be added automatically.

This function is useful when PNRs selected based on specific criteria need to be processed in bulk – such as using a particular scheme to perform a designated action or for testing purposes.
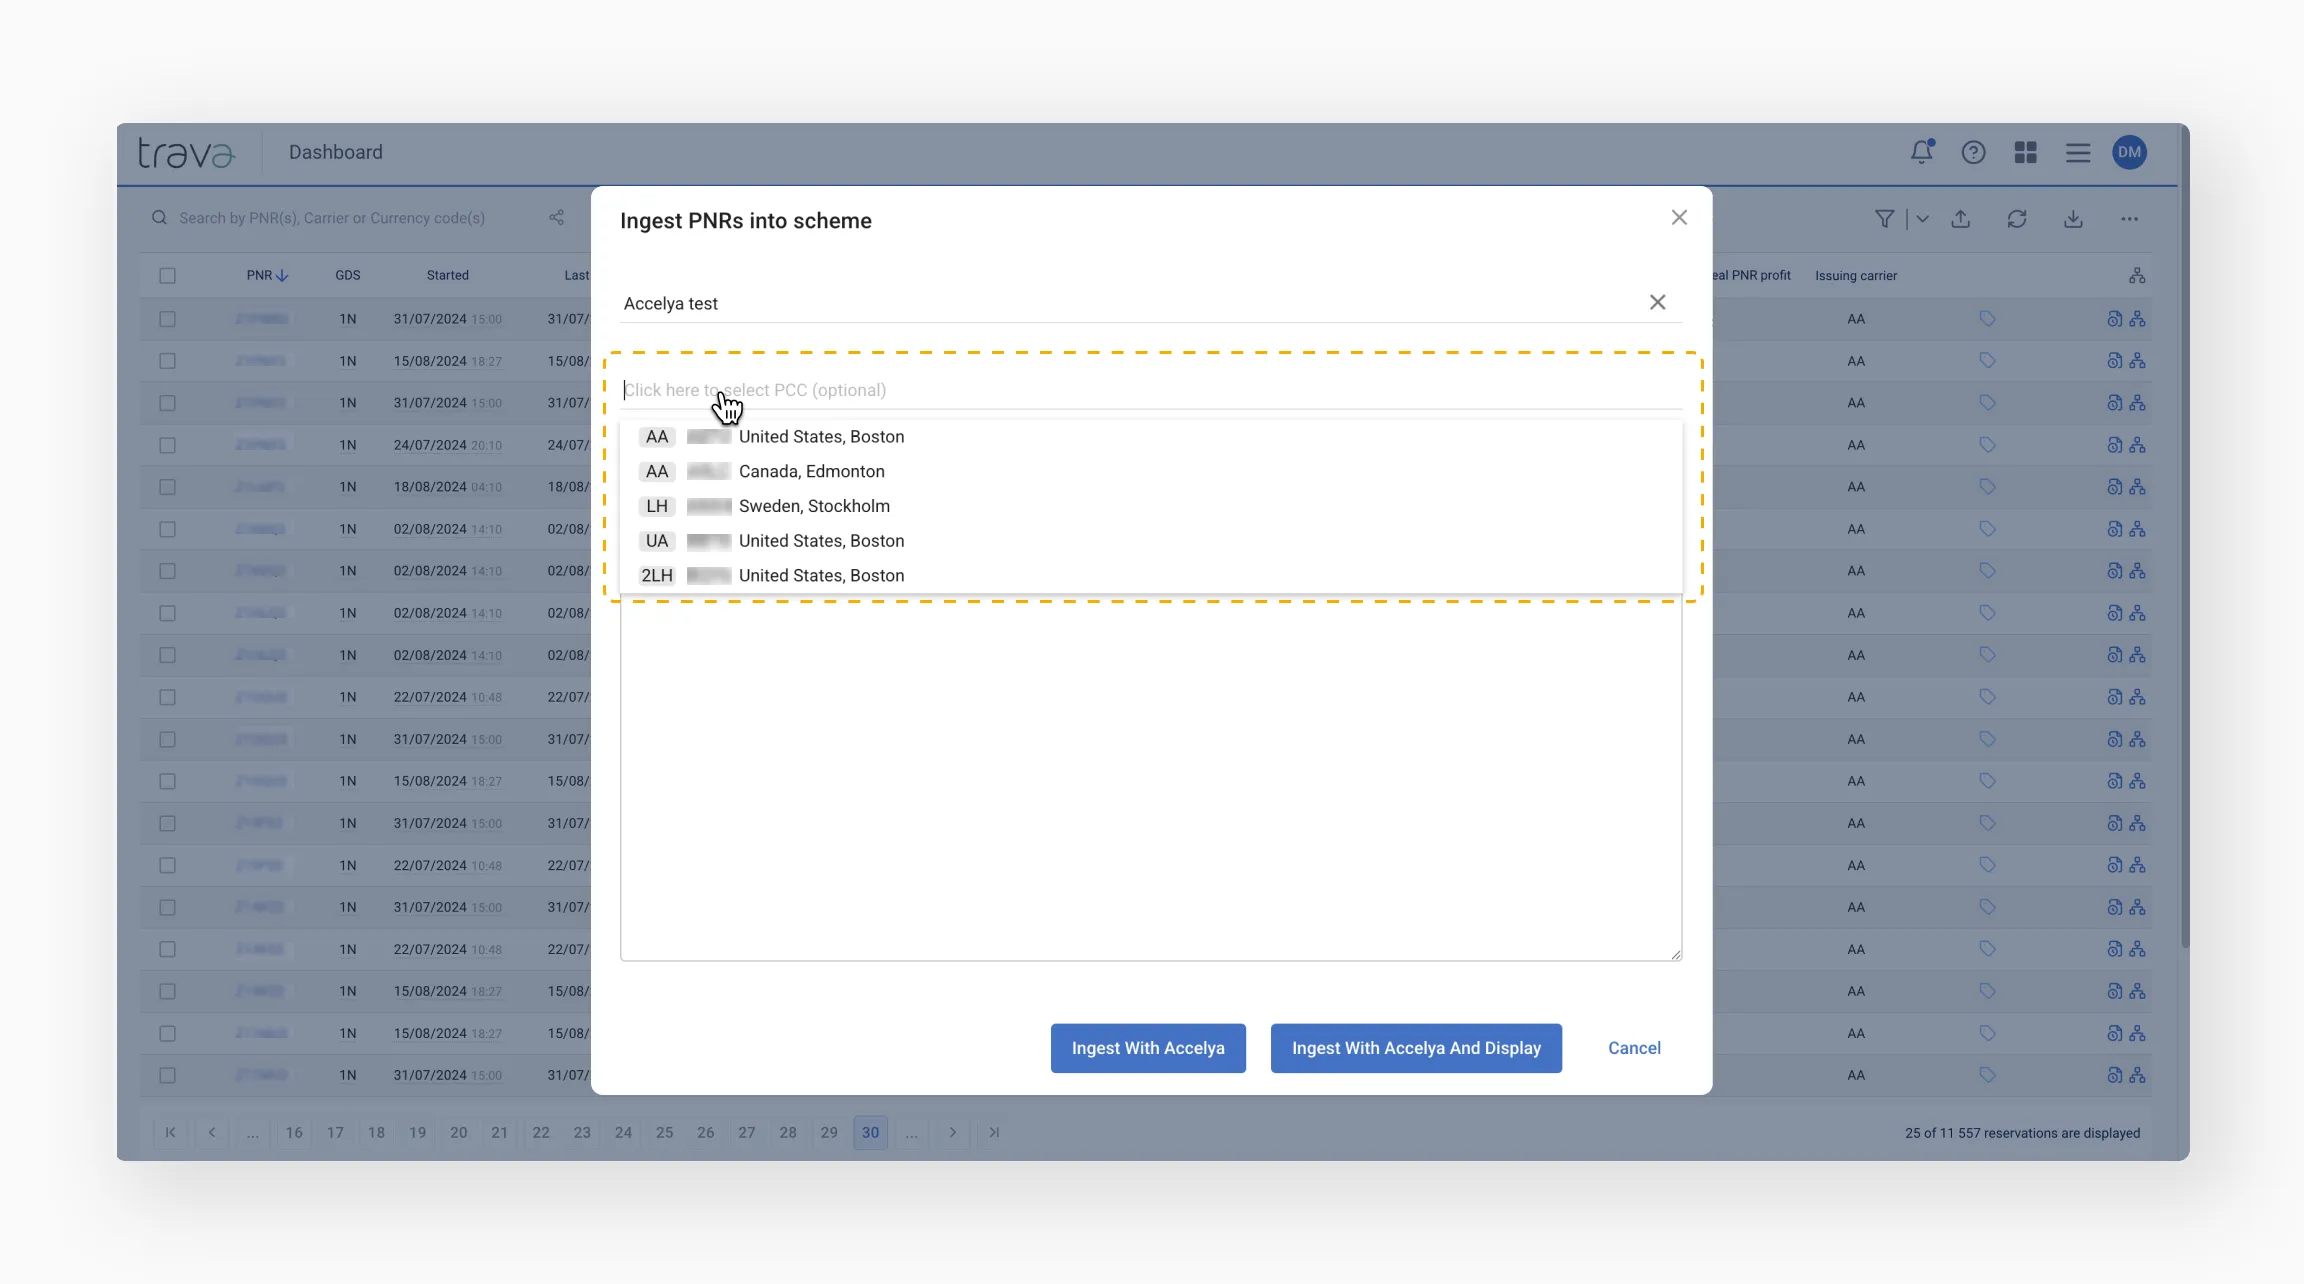
For some scheme types, you may also be asked to select a processing office if the scheme is not linked to a specific GDS.
Final tips
- Double-check filters before triggering actions to avoid processing the wrong set of PNRs
- Use test PNRs when experimenting with new schemes or settings
- Watch for status indicators and system messages to confirm successful ingestion or flag errors early
- Review processing history if something doesn’t work as expected – it often holds the clue
- Document your changes, especially when adjusting scheme logic or parameters, so your team stays aligned