Build your first workflow
Learn step by step how to build, configure, and activate your first automation scheme.
Step 1: Enter scheme name and choose its type
Open the Functionality menu and go to the Schemes tab.
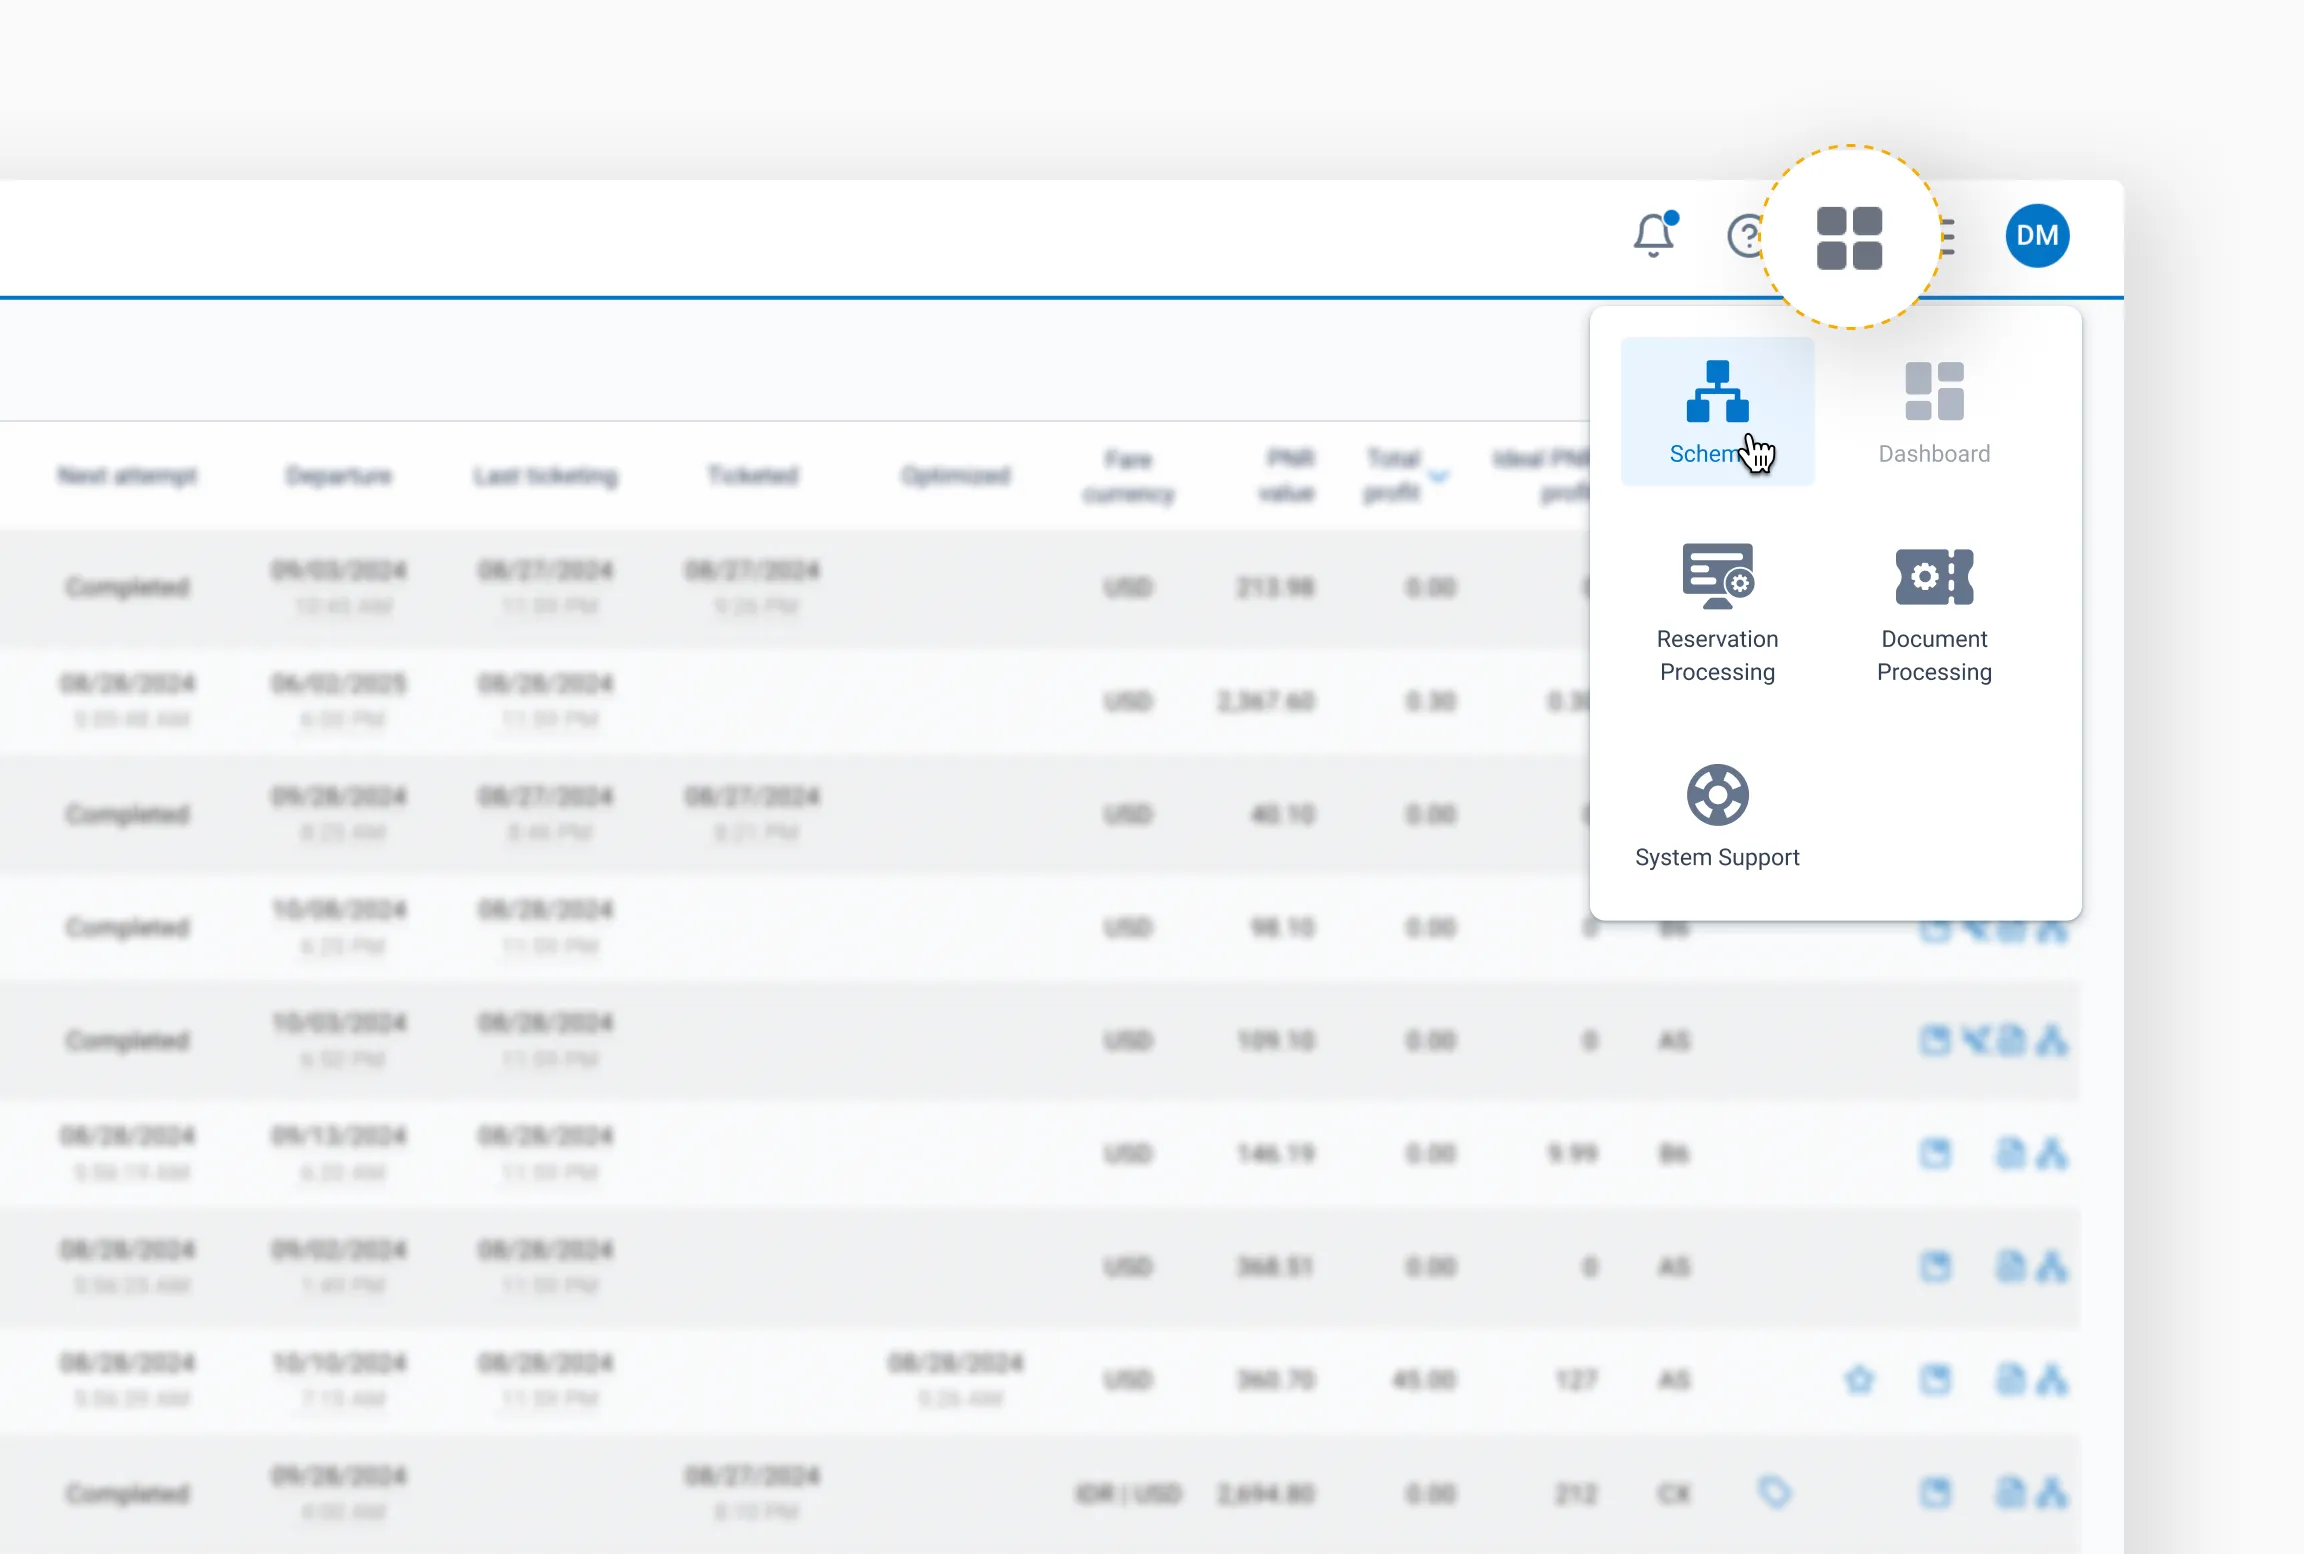
Then, click New Scheme.
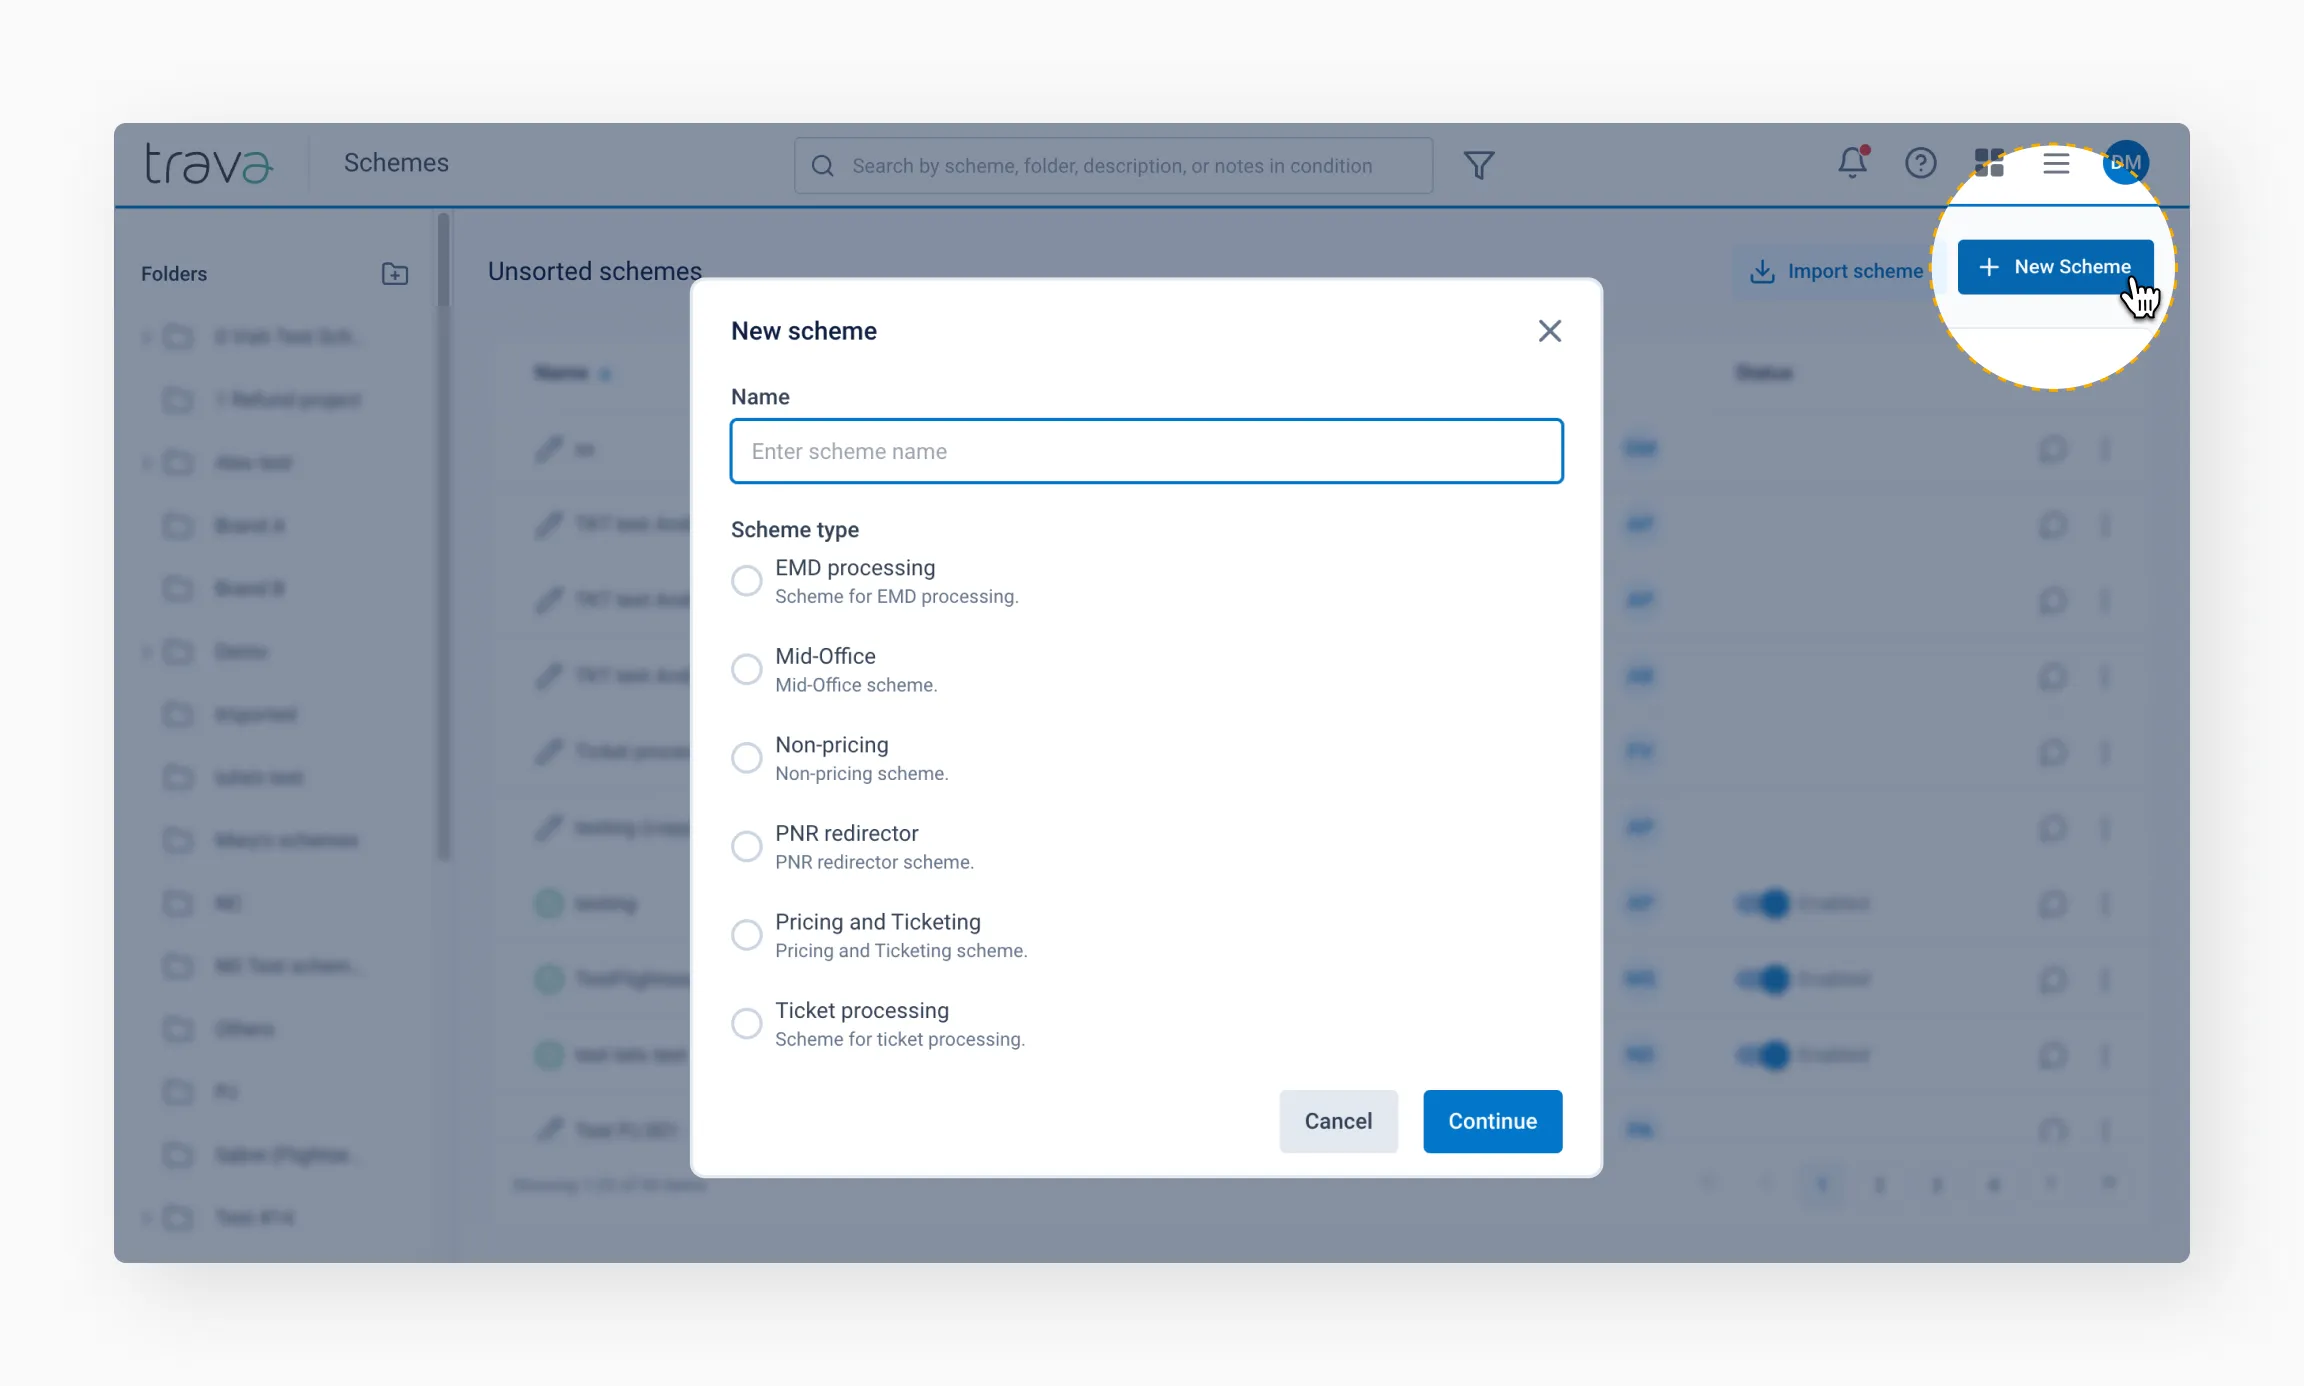
In the window that appears:
- Enter a name for your scheme. Use clear, descriptive keywords related to the process. This will help you find it easily as your list of schemes grows.
- Select the scheme type. Each scheme type (and corresponding GDS) has its own functionality and a unique set of workflow components.
⚠️ Once you start building a scheme, its type cannot be changed. Choose carefully based on your needs.
When you're ready, click Continue.
Step 2: Set the workflow properties
After pressing Continue, the Scheme properties window will open.
In the Main tab, you'll need to specify:
- GDS
- PCC or OID
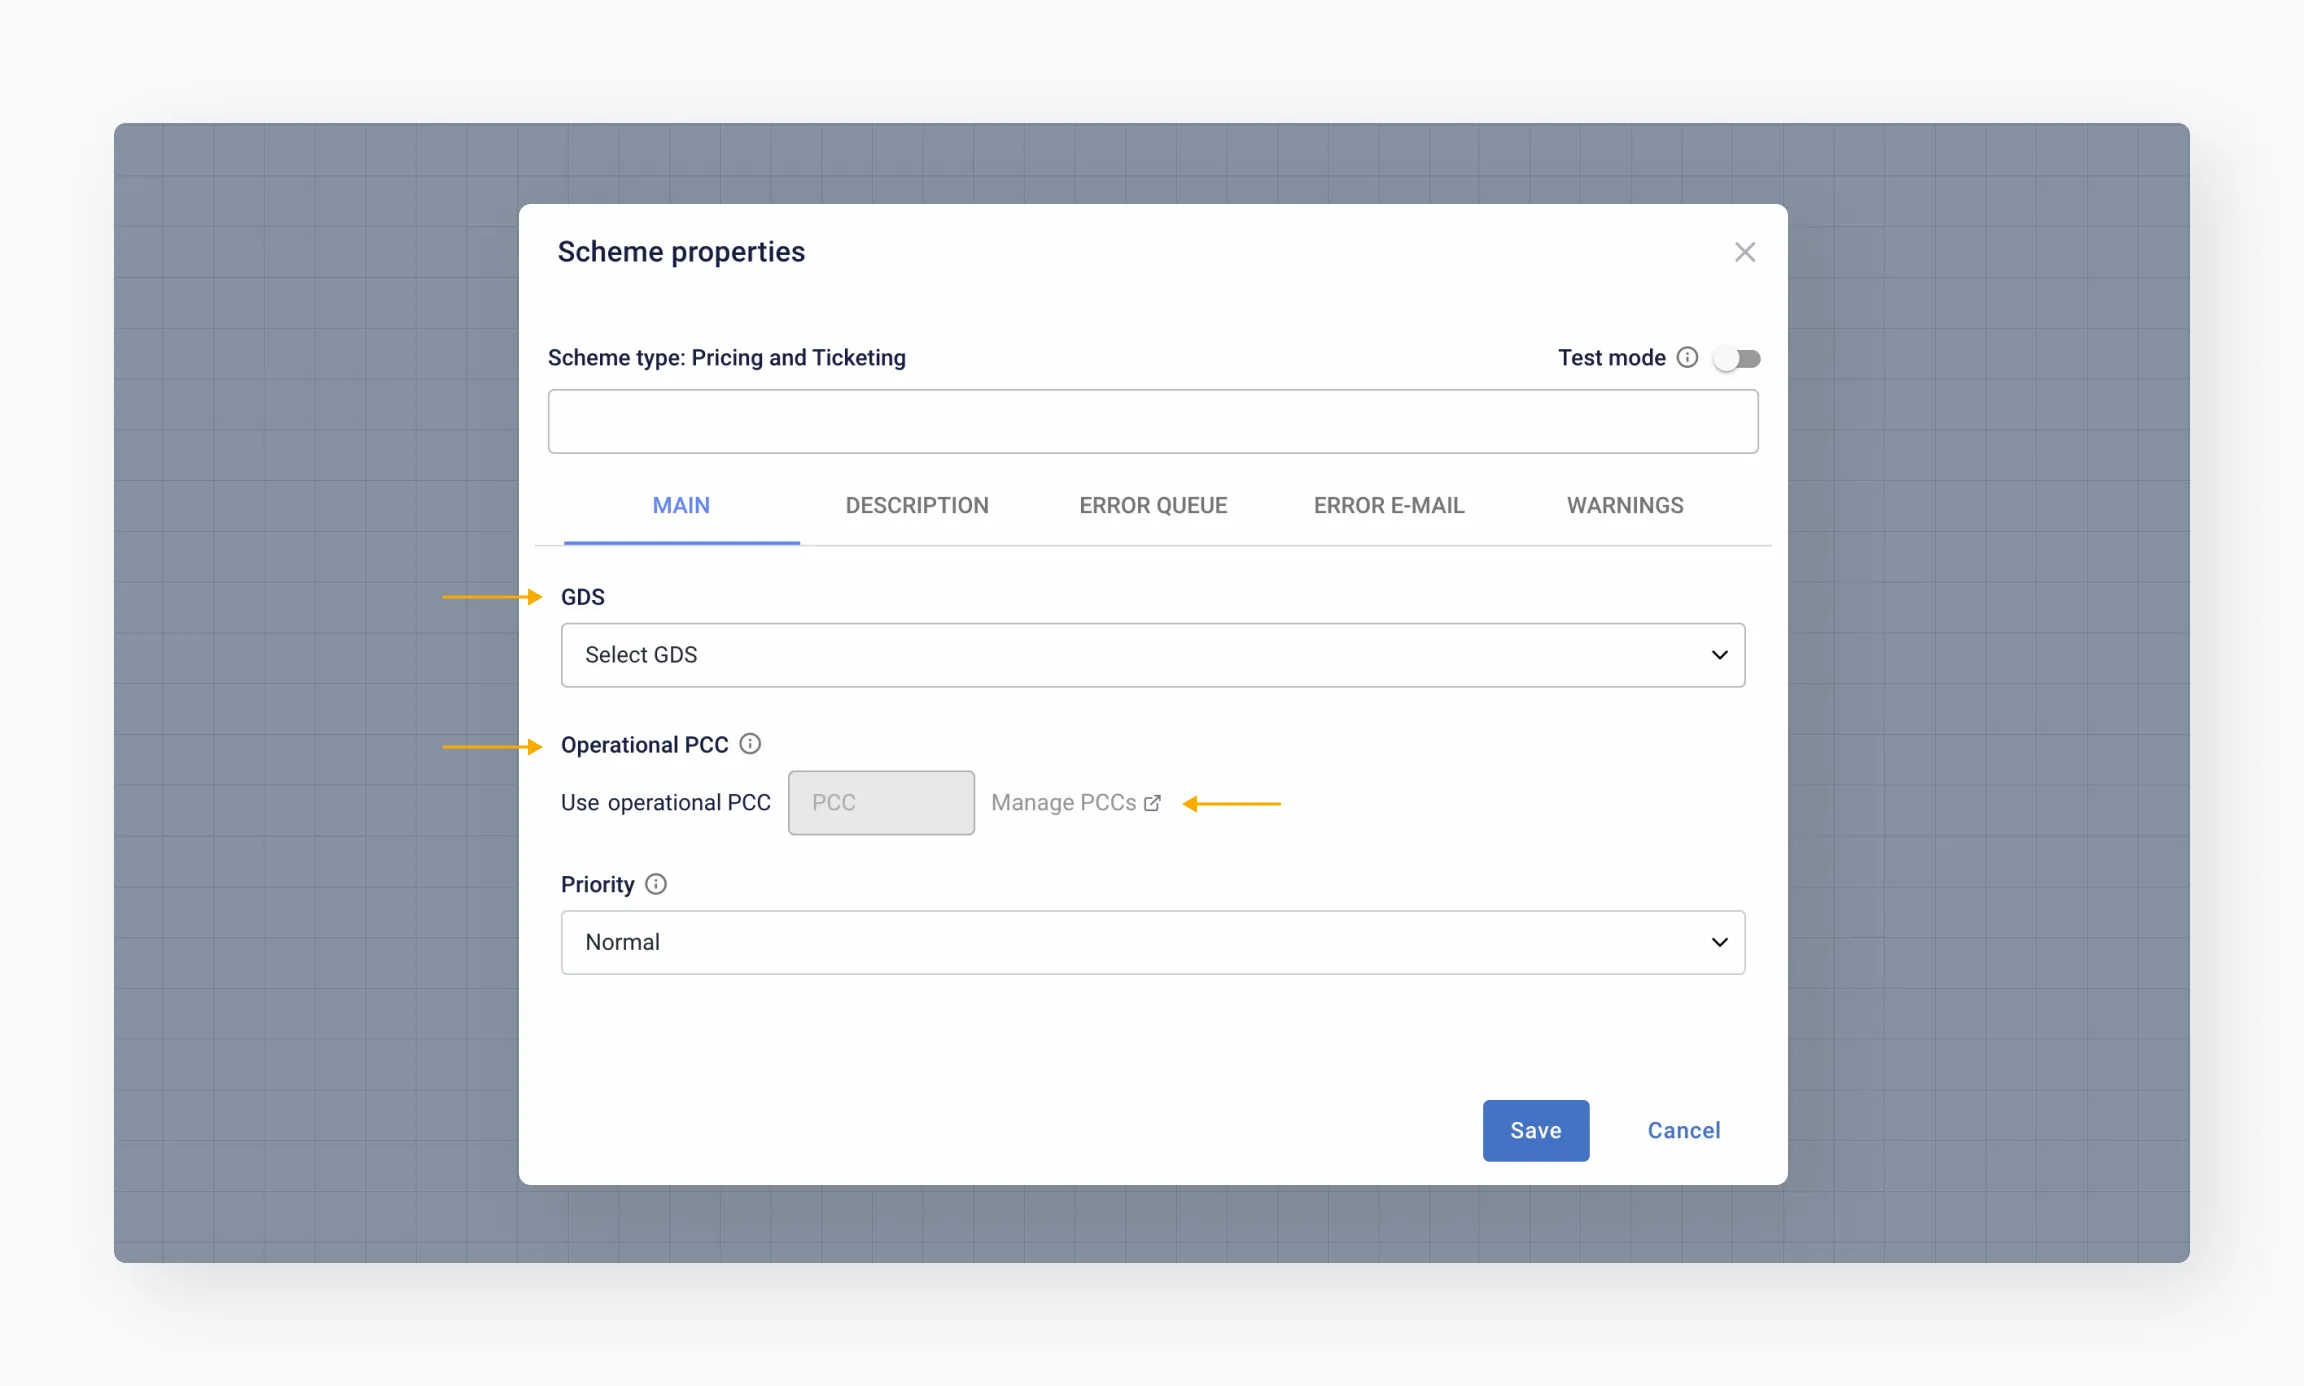
GDS
Select a GDS from the drop-down list. Once the scheme is activated and the first object is processed, the GDS cannot be changed. If you need to use a different GDS later, you'll have to create a new scheme. Choose carefully.
Operational PCC/OID
PCC and OID are listed according to the contents of the Offices tab. The availability of PCC or OID fields depends on the GDS you've selected. If the required office is not listed, you can add it manually by clicking Manage PCC.
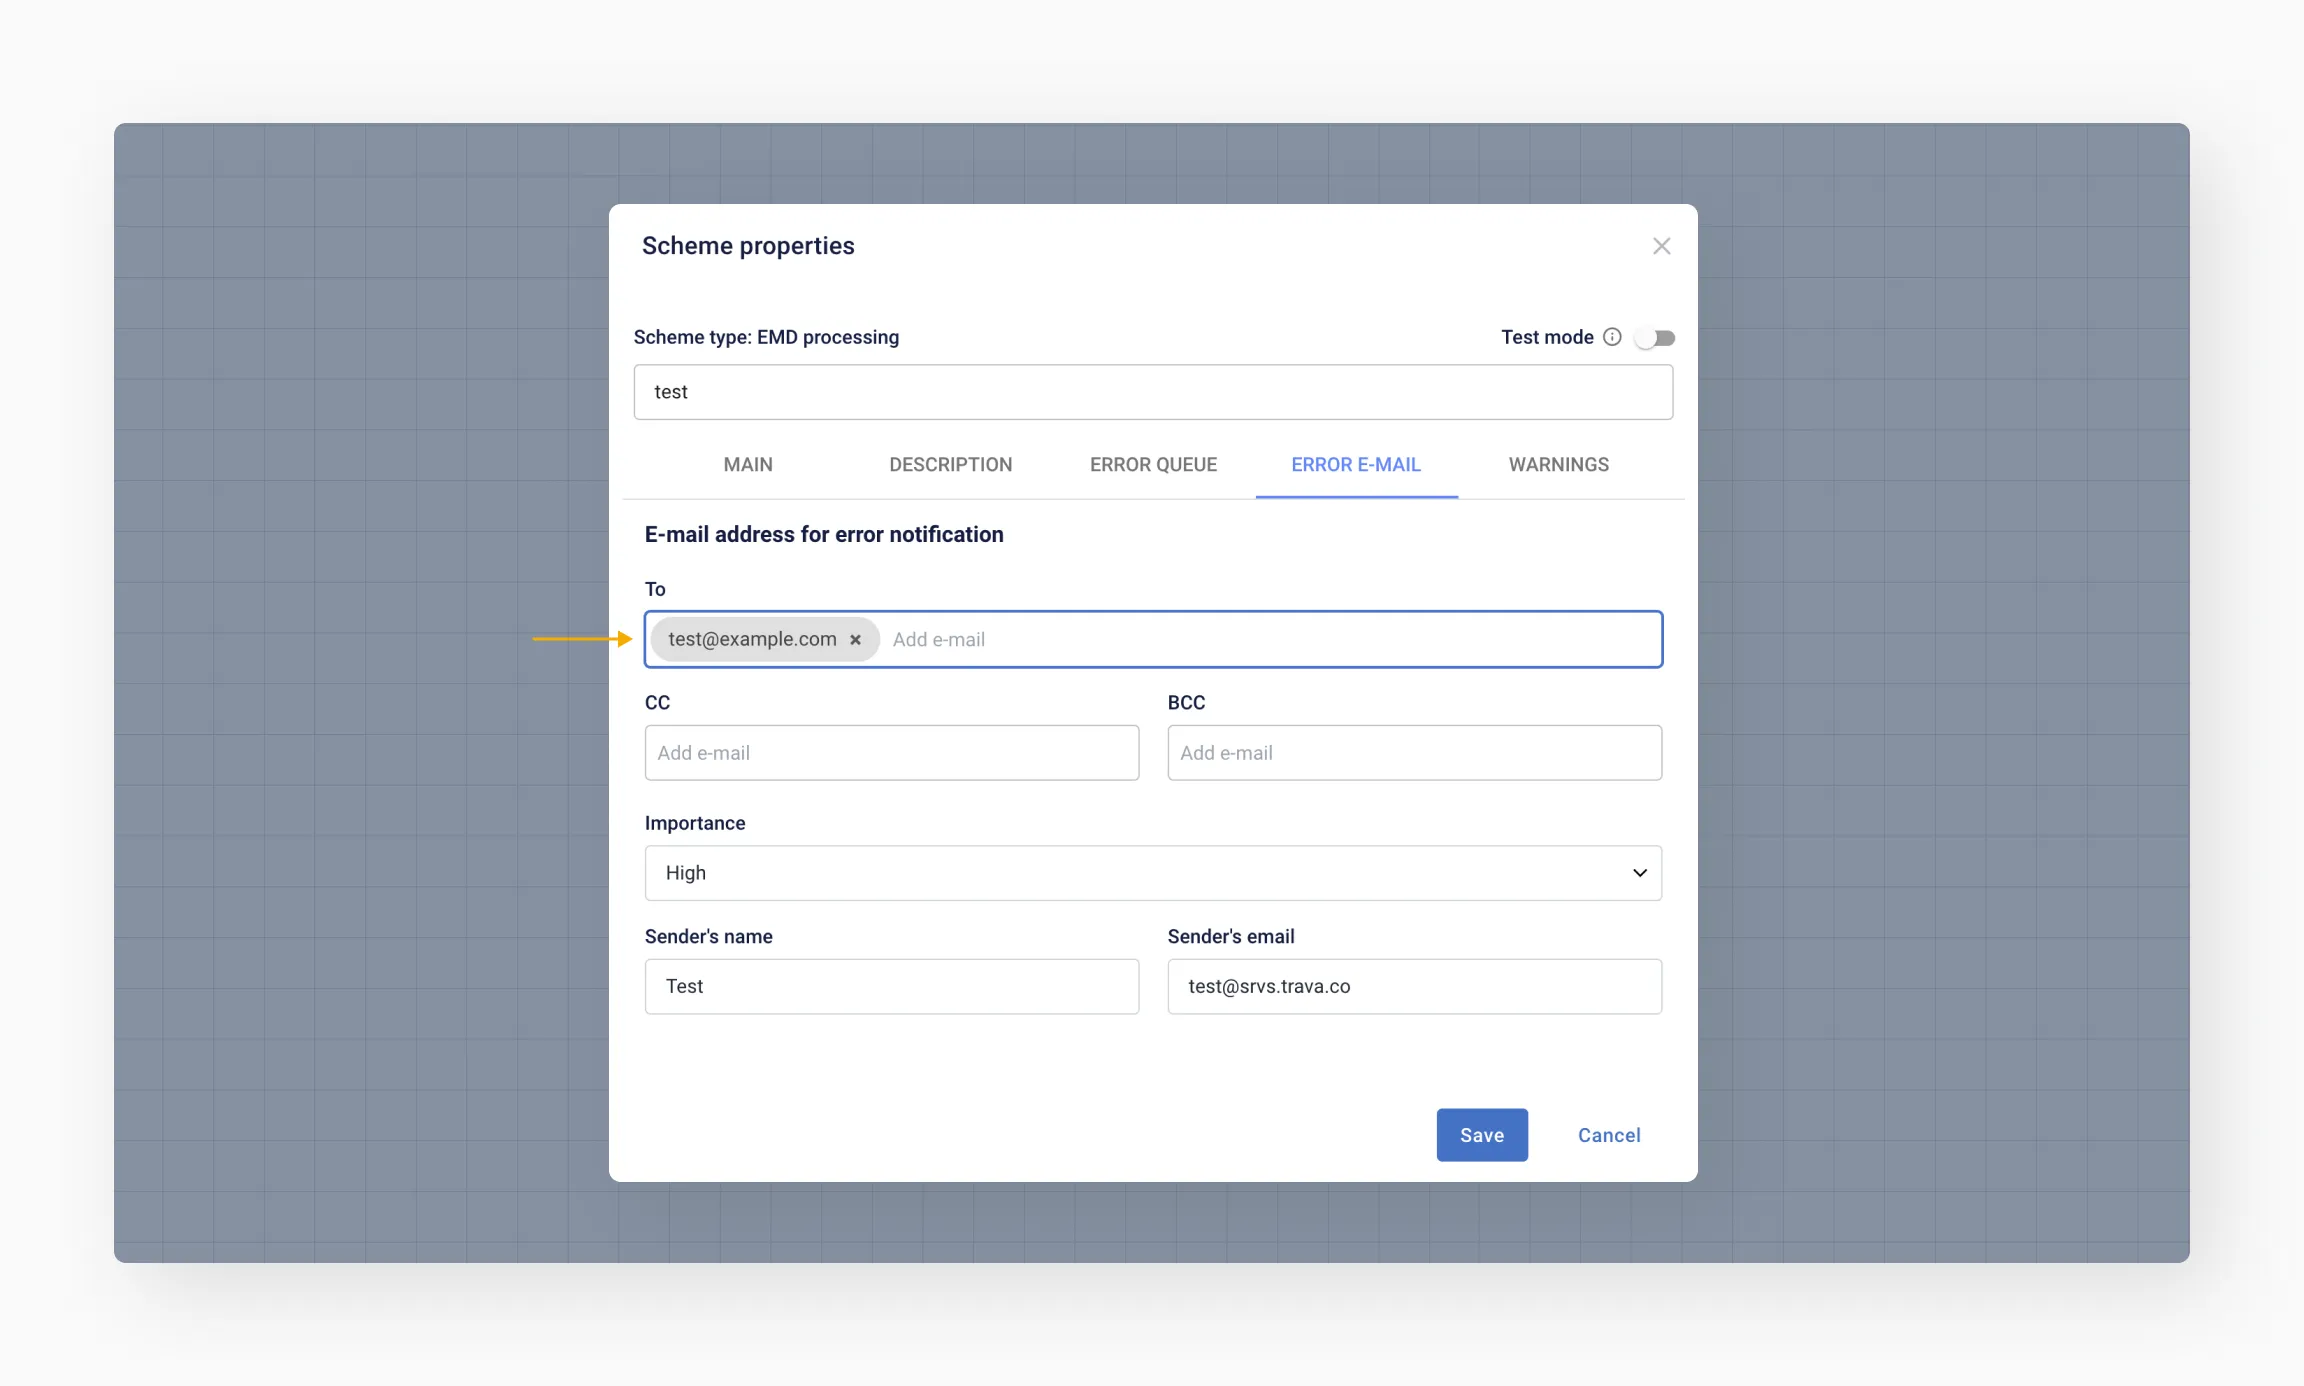
Error notifications
In the Error E-Mail tab, enter the email address where you want to receive system error notifications.
Secondary tabs
You can also configure additional properties. These tabs are optional:
- Description
- Error Queue
- Warnings
When you're done filling in the required properties, click Save.
Test mode
In the upper-right corner, you'll see a Test mode toggle.
When enabled, it allows you to test the scheme using real bookings – without making any actual changes to them.

Step 3: Build your workflow
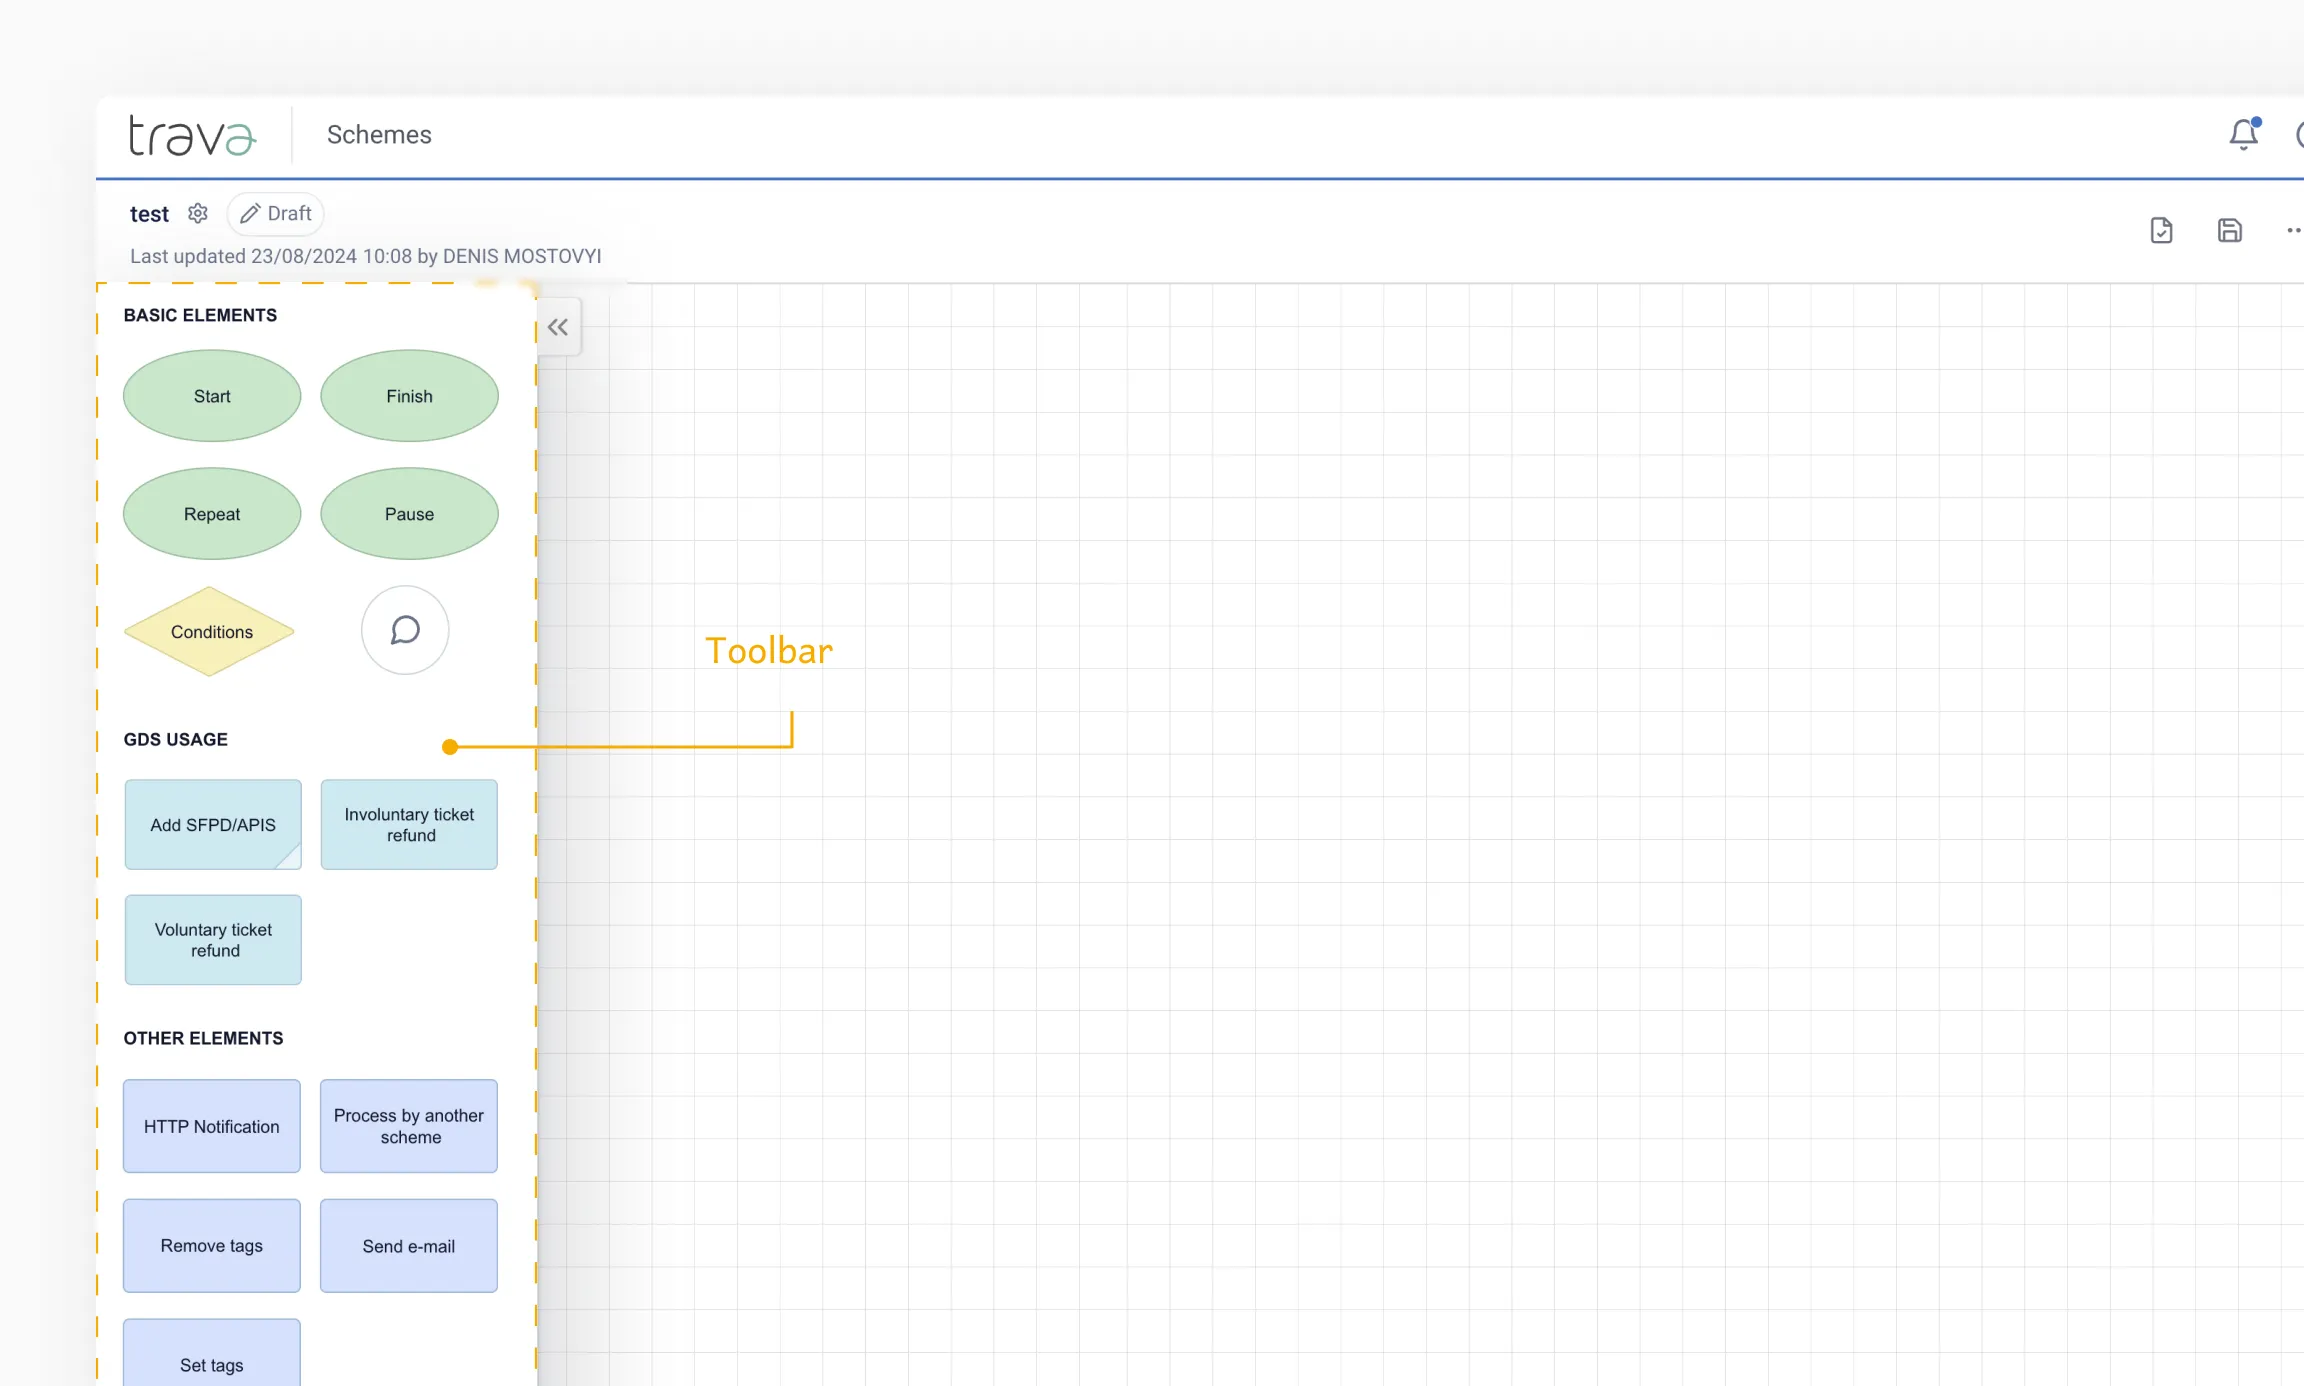
After saving the properties, the Scheme editor will open.
In the top-left corner, you'll see the scheme name, the Scheme properties button, and the current status.
Below that, you'll find the Toolbar menu, organized into three categories:
- Basic elements
- GDS usage
- Other elements
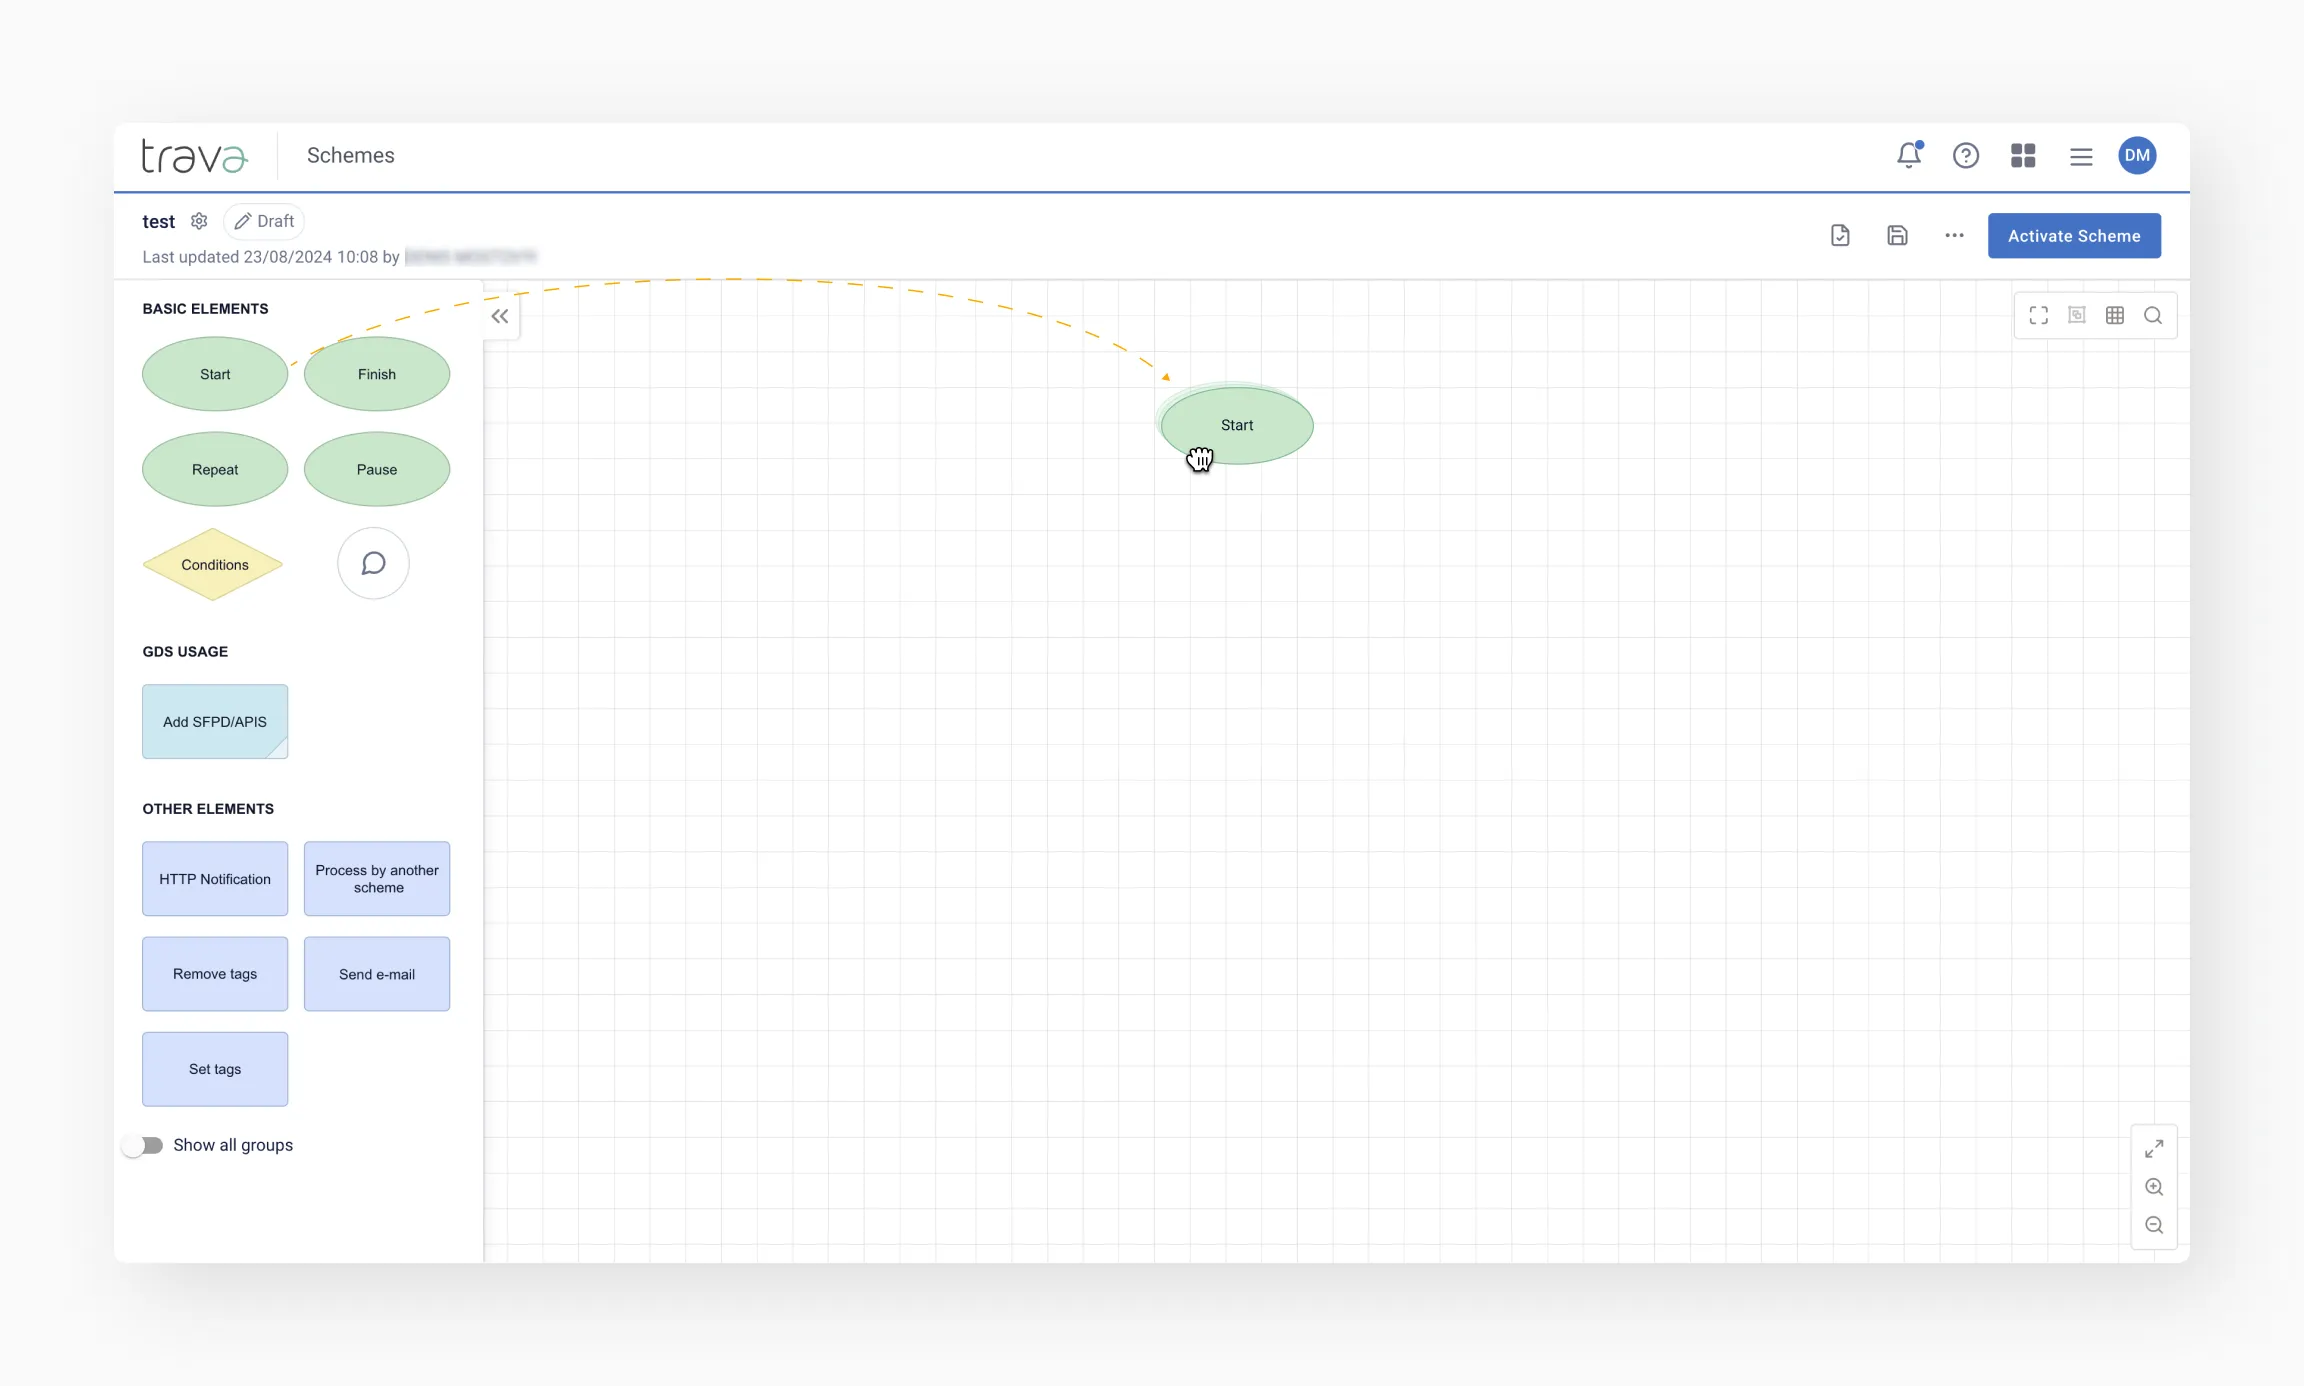
To add an element to the Canvas, click the desired element in the menu column, then click anywhere in the workspace to place it.
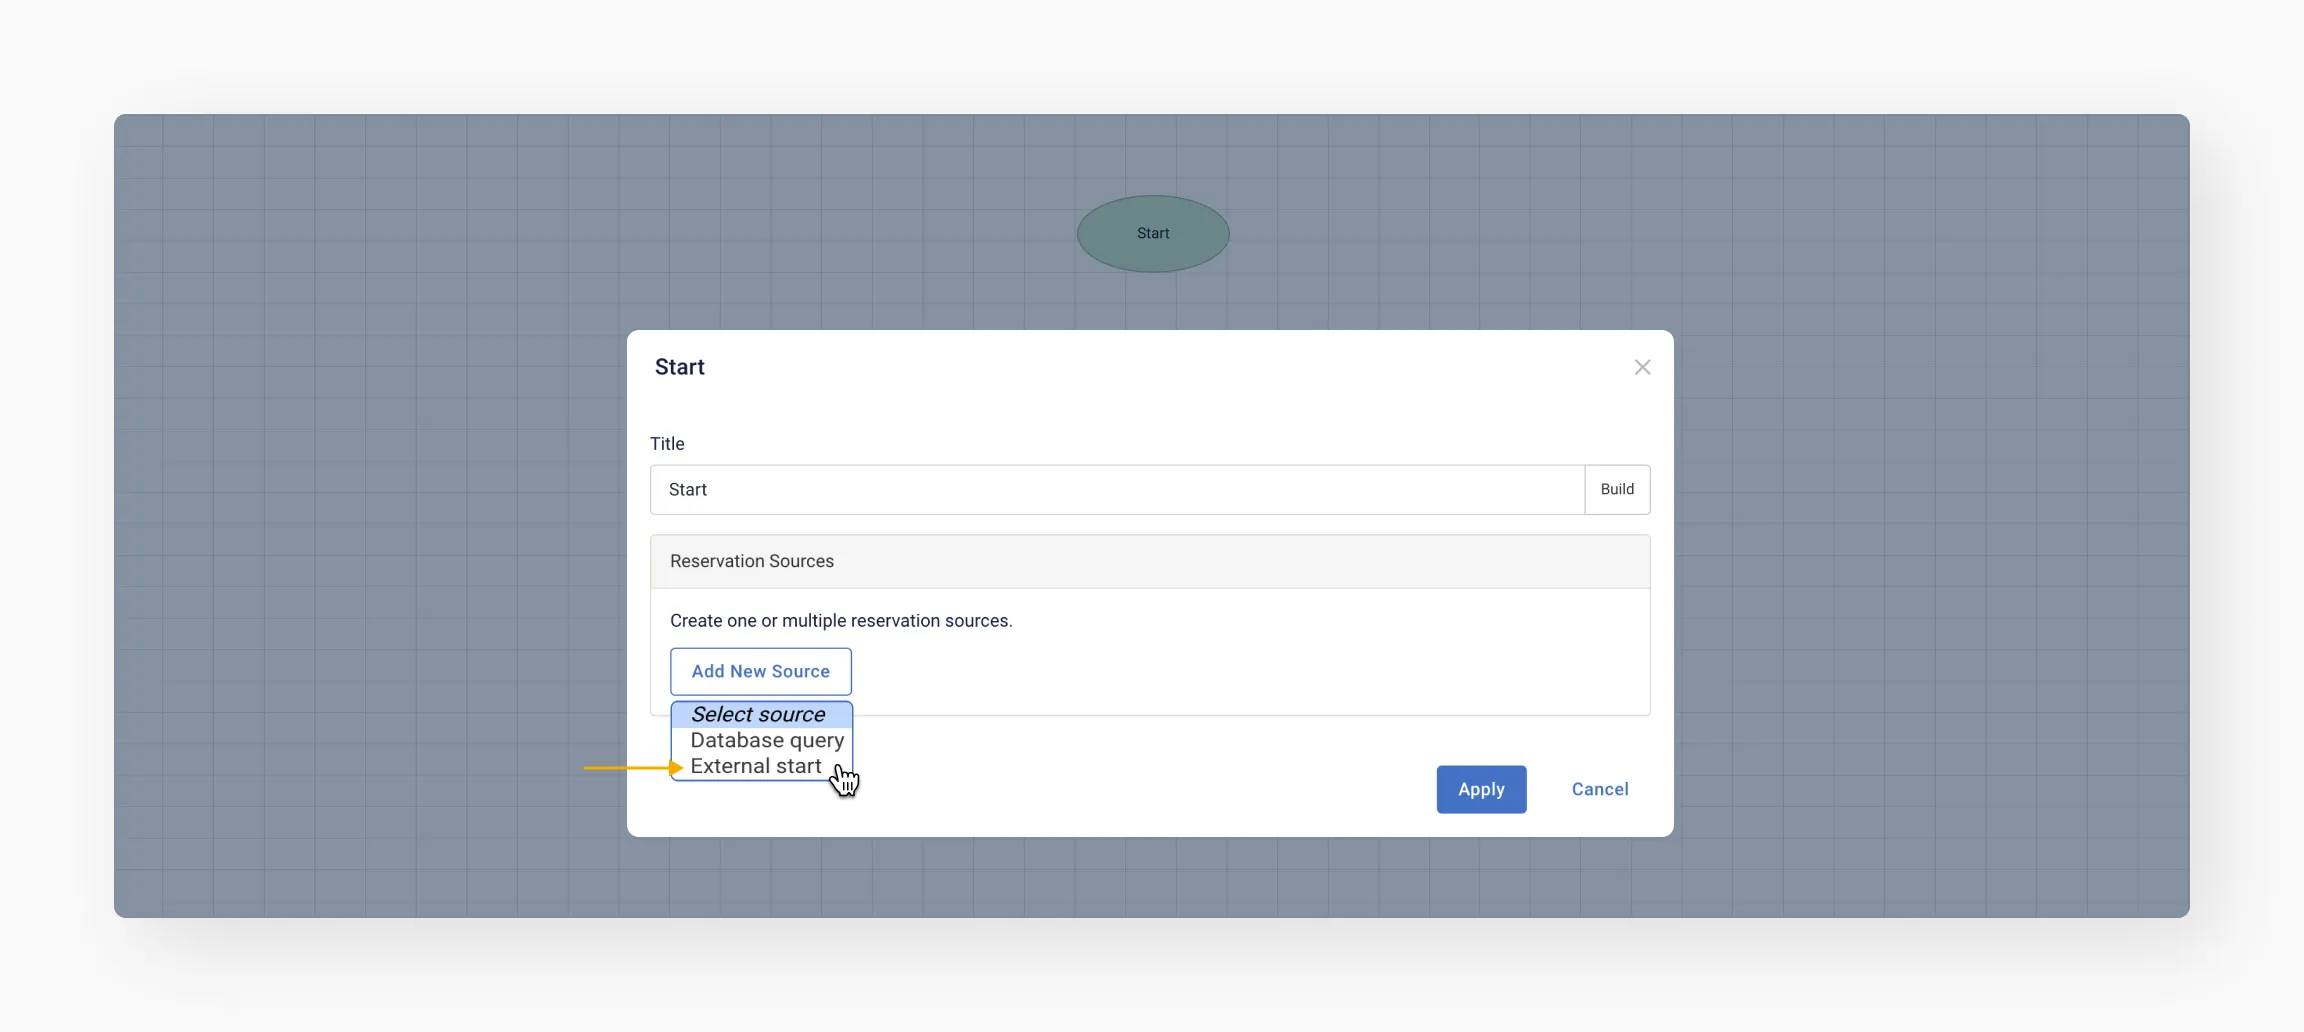
To configure an element, double-click it. In the window that opens, set the desired values.
For the Start element, select External start as the source. This allows you to manually ingest a PNR without automatically connecting to any sources.
You can also run the scheme in Test mode to test the flow without modifying the actual PNR.
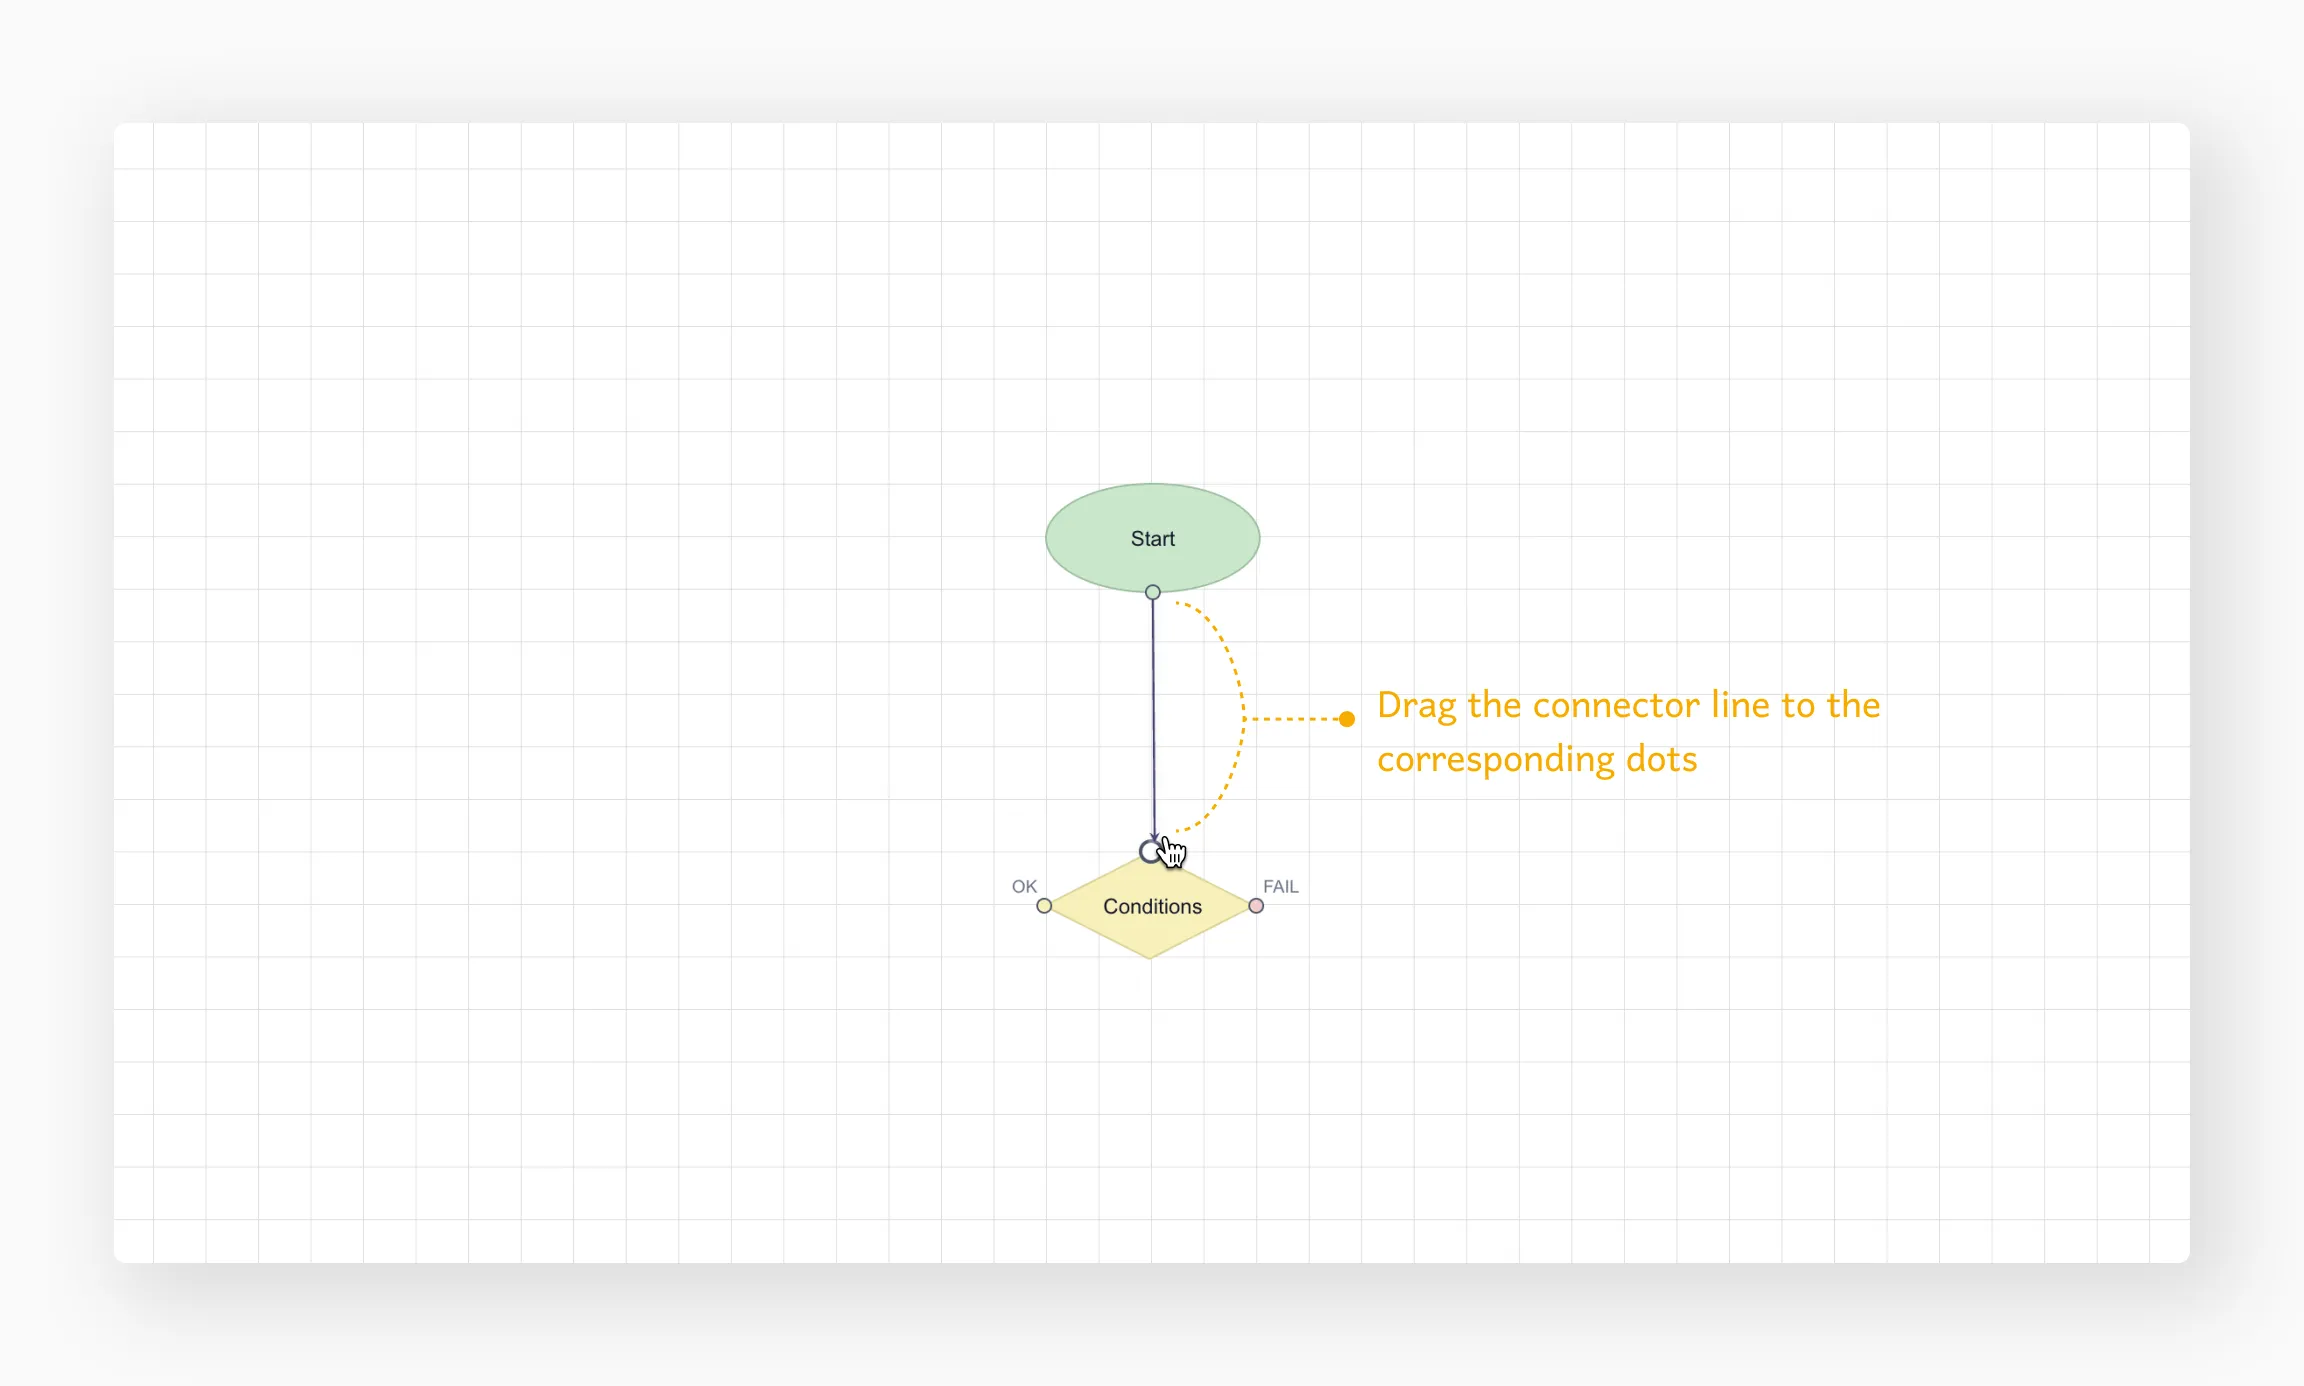
To connect elements, hover over the source element, hold the left mouse button, and drag the arrow to the target element.
To delete an element, double-click it and click the Trash bin icon in the menu that appears.
To duplicate an element, select it and press Ctrl+C, then Ctrl+V.
Step 4: Complete your workflow
Depending on your use case, a scheme can branch into multiple paths with different endpoints. Regardless of the structure, each branch – and the scheme as a whole – should have a clear and logical conclusion.
Once your scheme is complete, it's time to test how it works.
💡 We recommend saving your scheme regularly while building it. Before closing the page, make sure to save your work by clicking the Save button or pressing Ctrl+S.

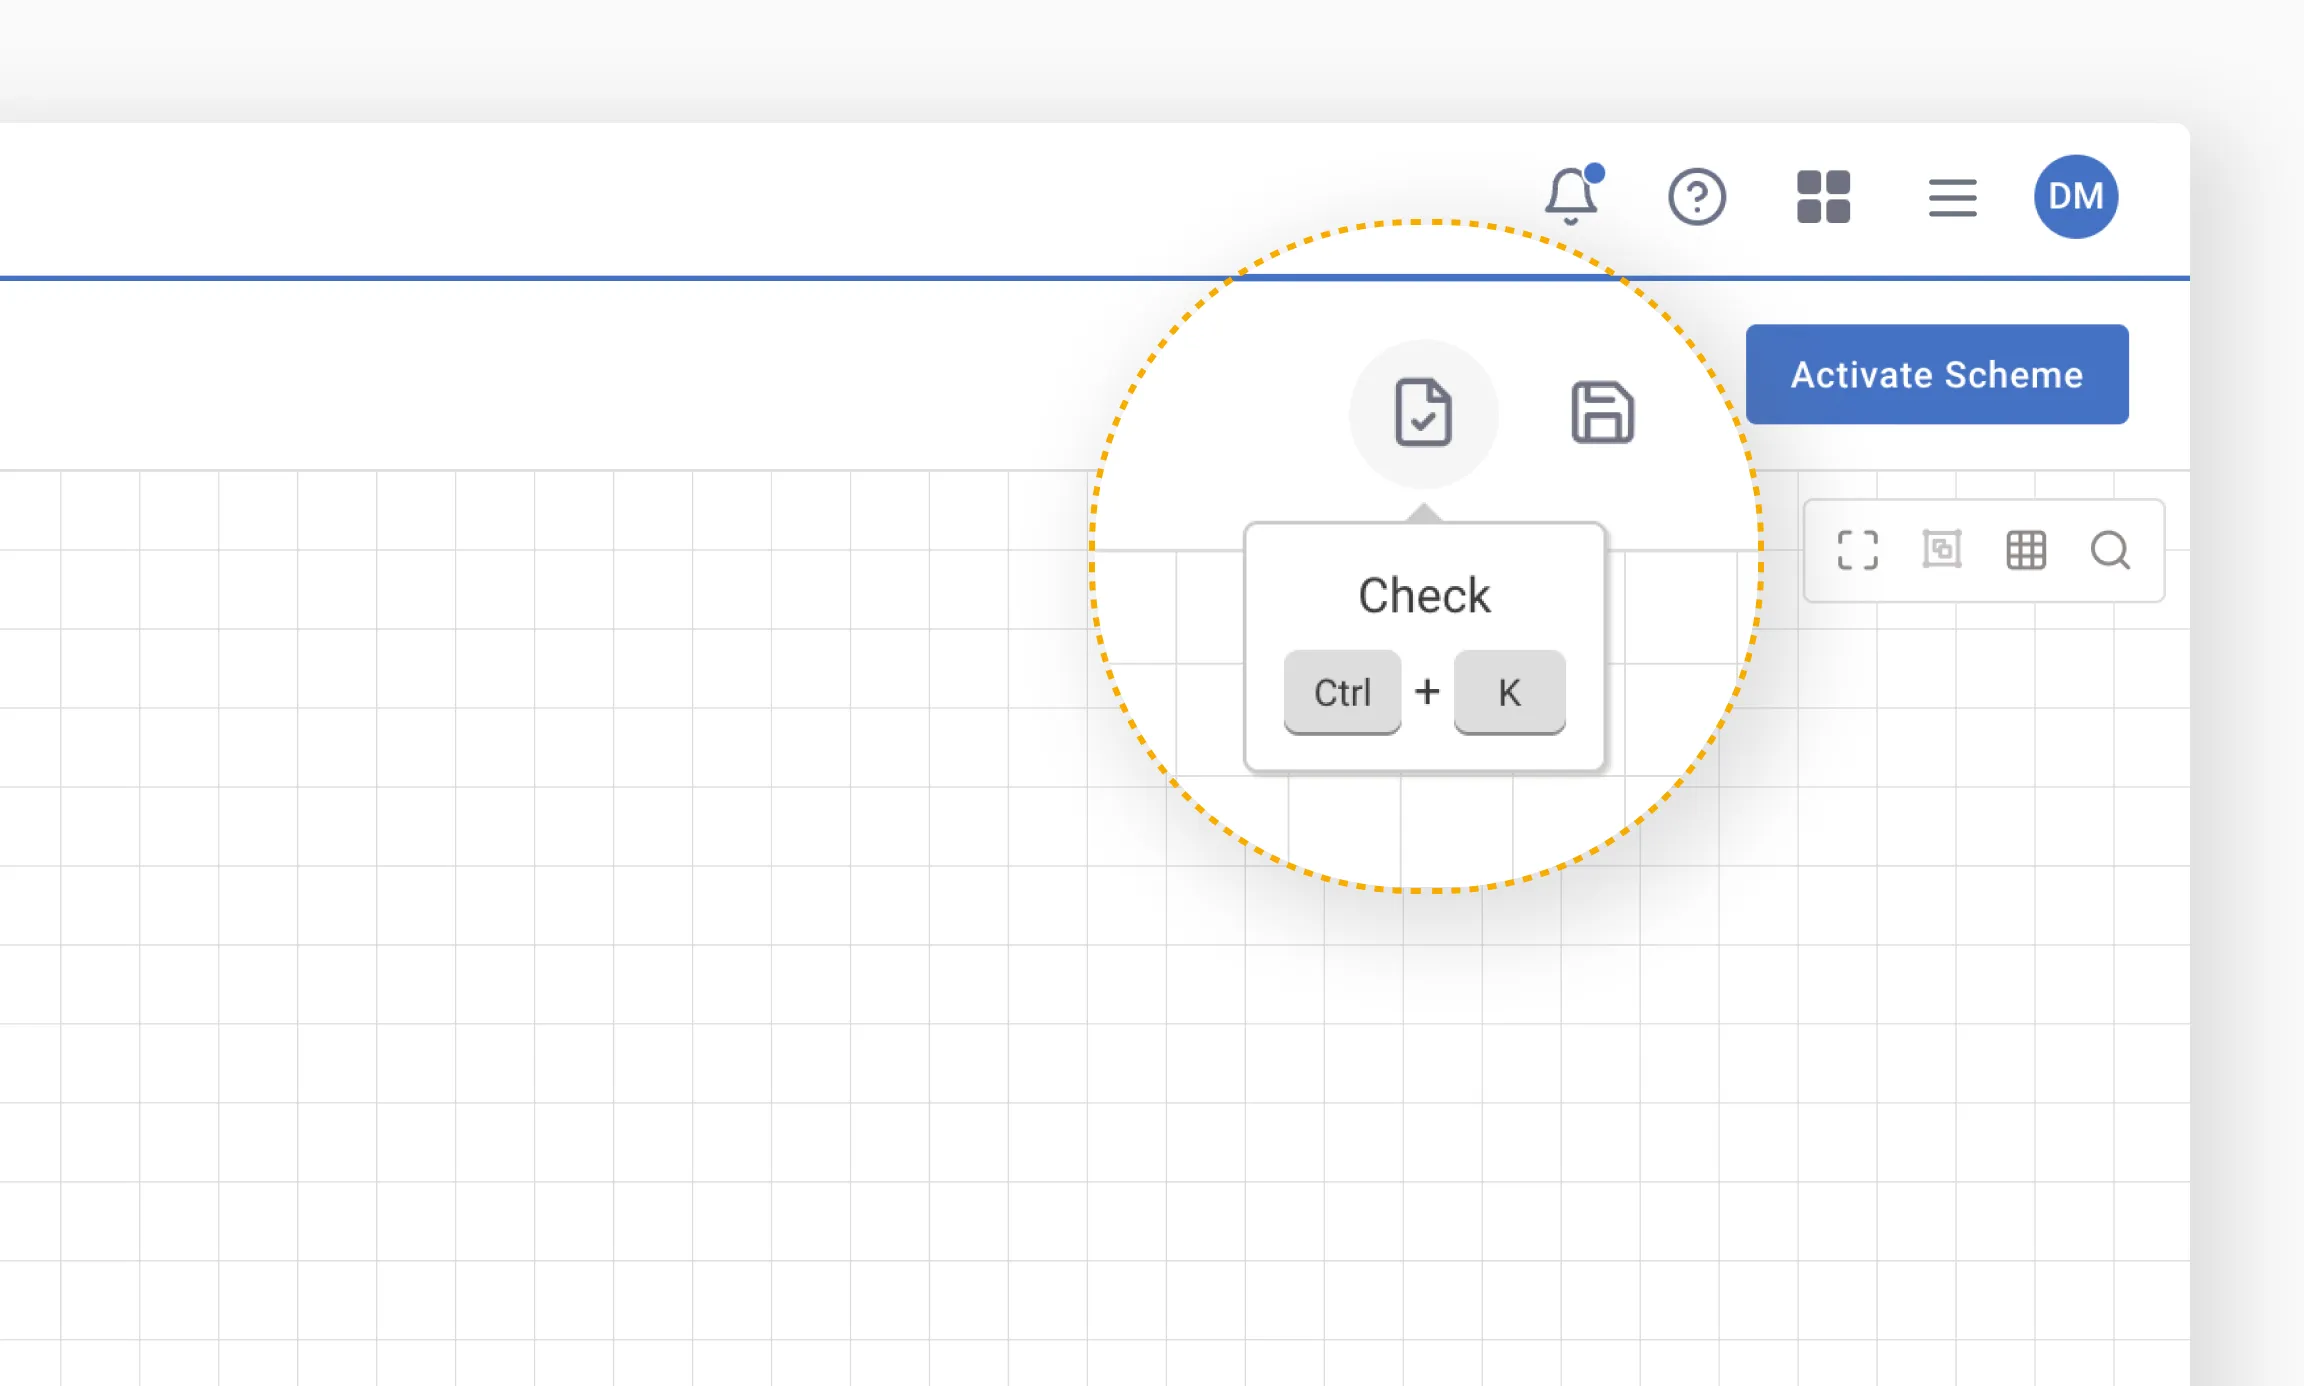
Step 5: Run a check
You can run a check at any stage while building your scheme. To do this, click Check (Ctrl+K). If there are any configuration errors, a pop-up window will appear with a notification.
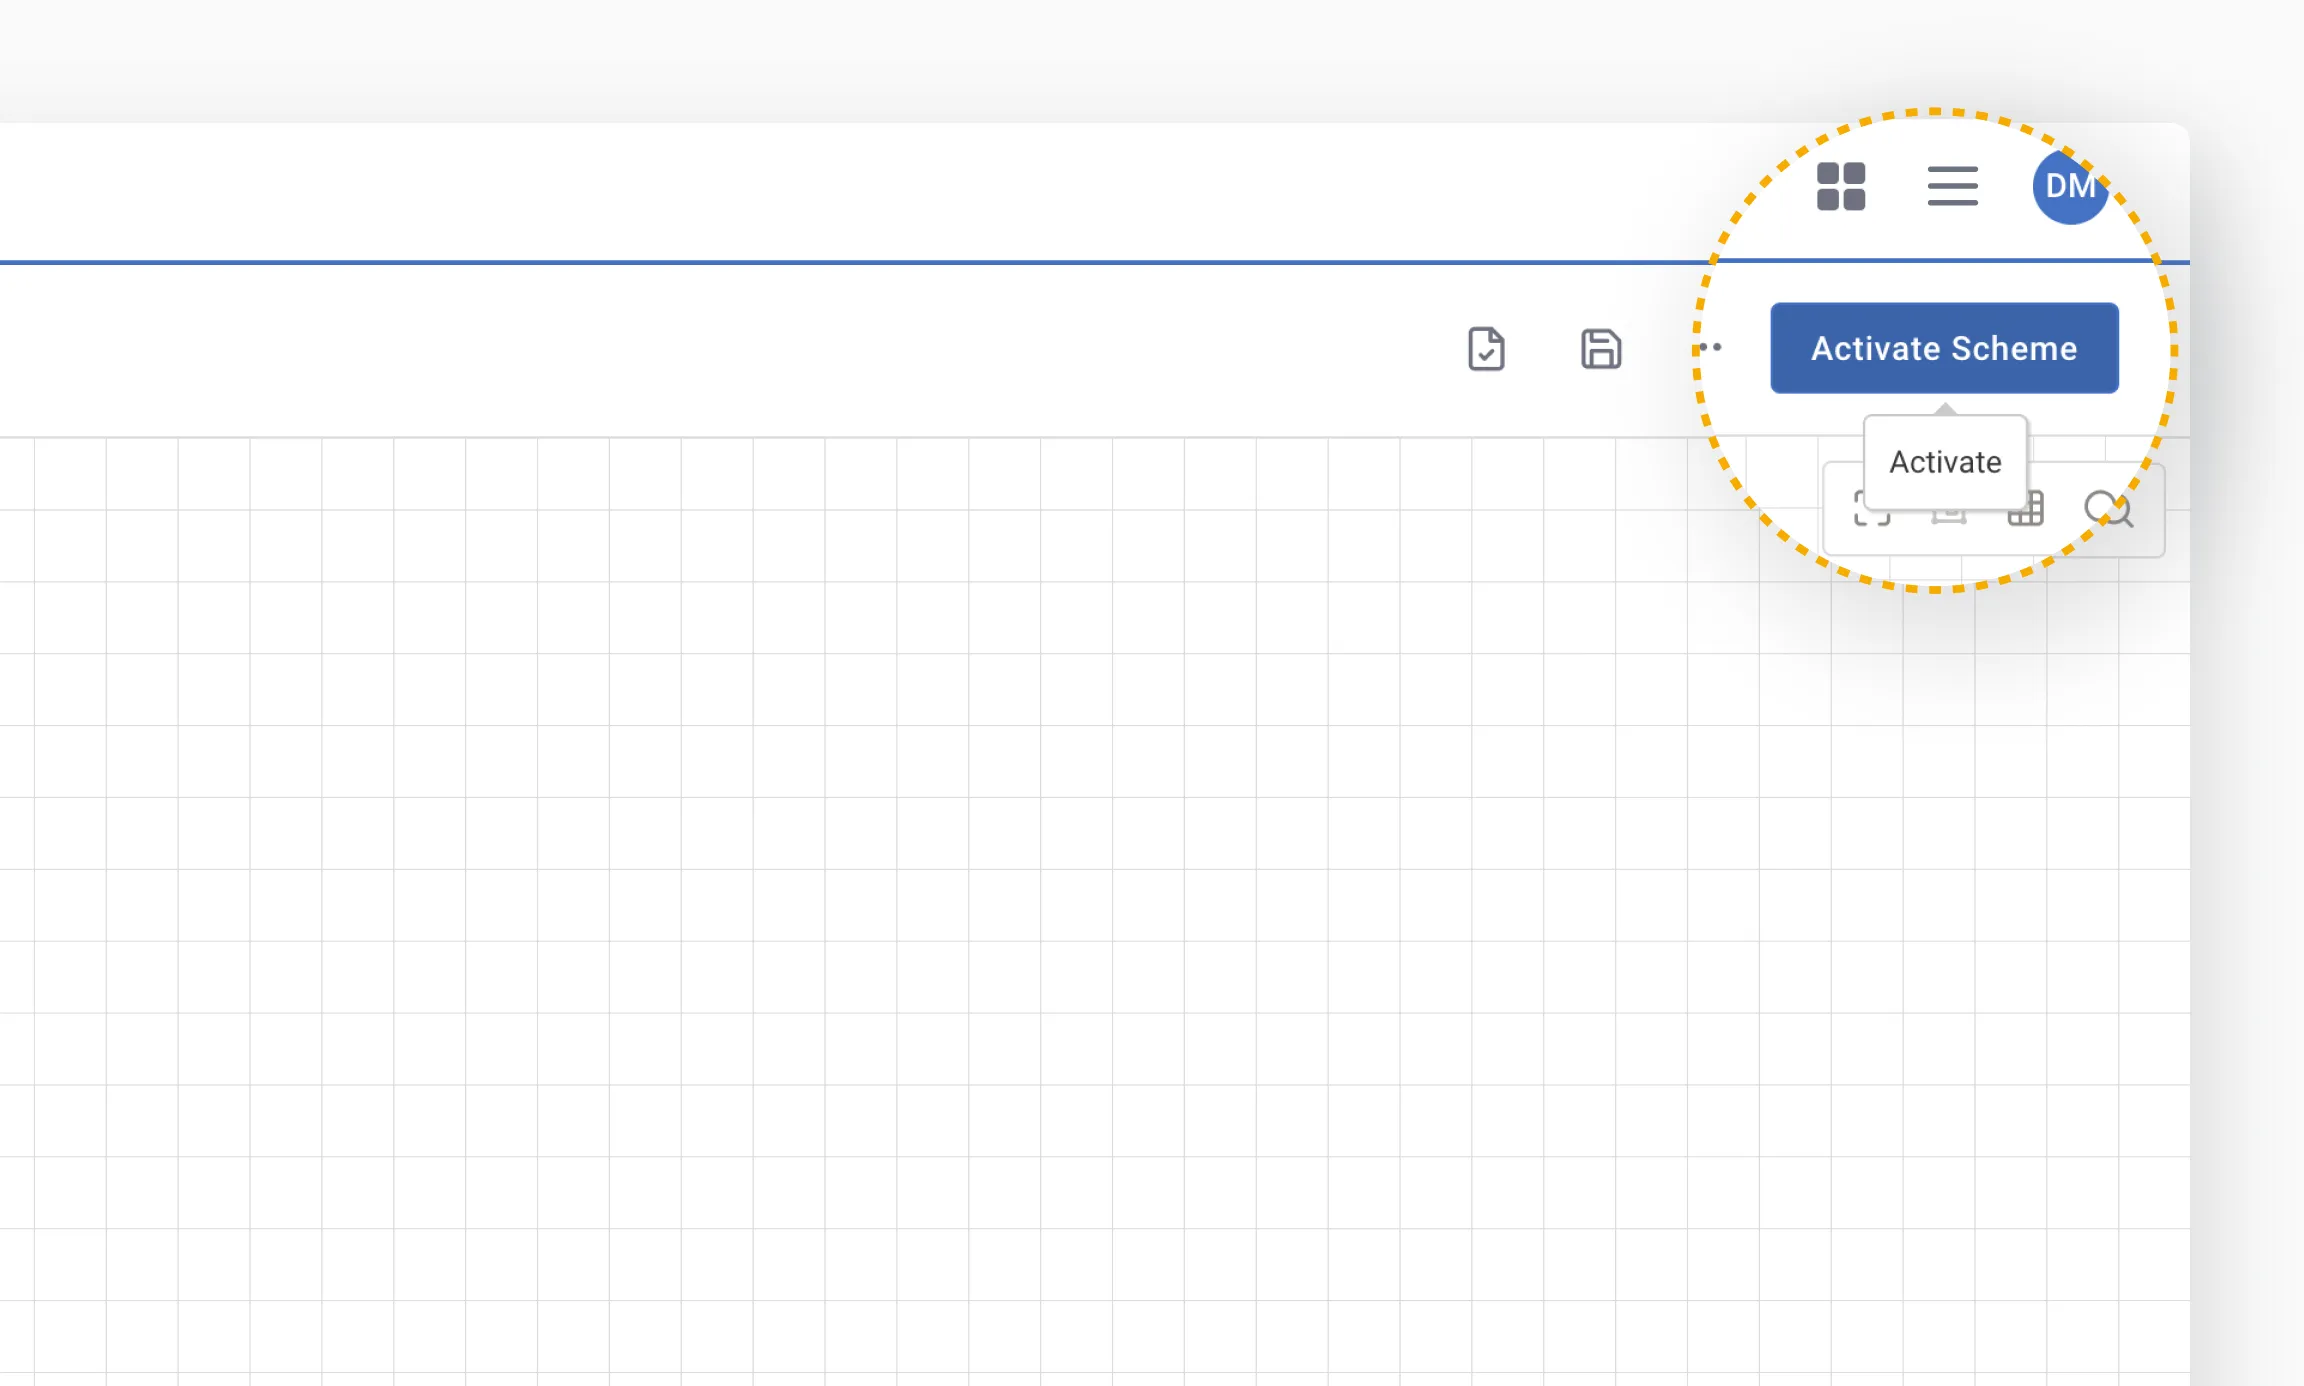
Step 6: Activate your workflow
Once your scheme is ready, click Activate Scheme to launch it. The process will run in either normal or test mode, depending on the settings you selected earlier.
Step 7: Make edits
You can edit your scheme both before and after activation. To do so, click the scheme name in the Schemes list. Then, in the window that opens, click Edit Scheme in the top-right corner.
After making changes, click Save (Ctrl+S) and reactivate the scheme (see step 6).
💡 We recommend activating the scheme only after all necessary changes have been made. This helps prevent errors during PNR processing.
Once activated, a new version of the scheme will be created, and PNRs will be processed according to the updated logic.
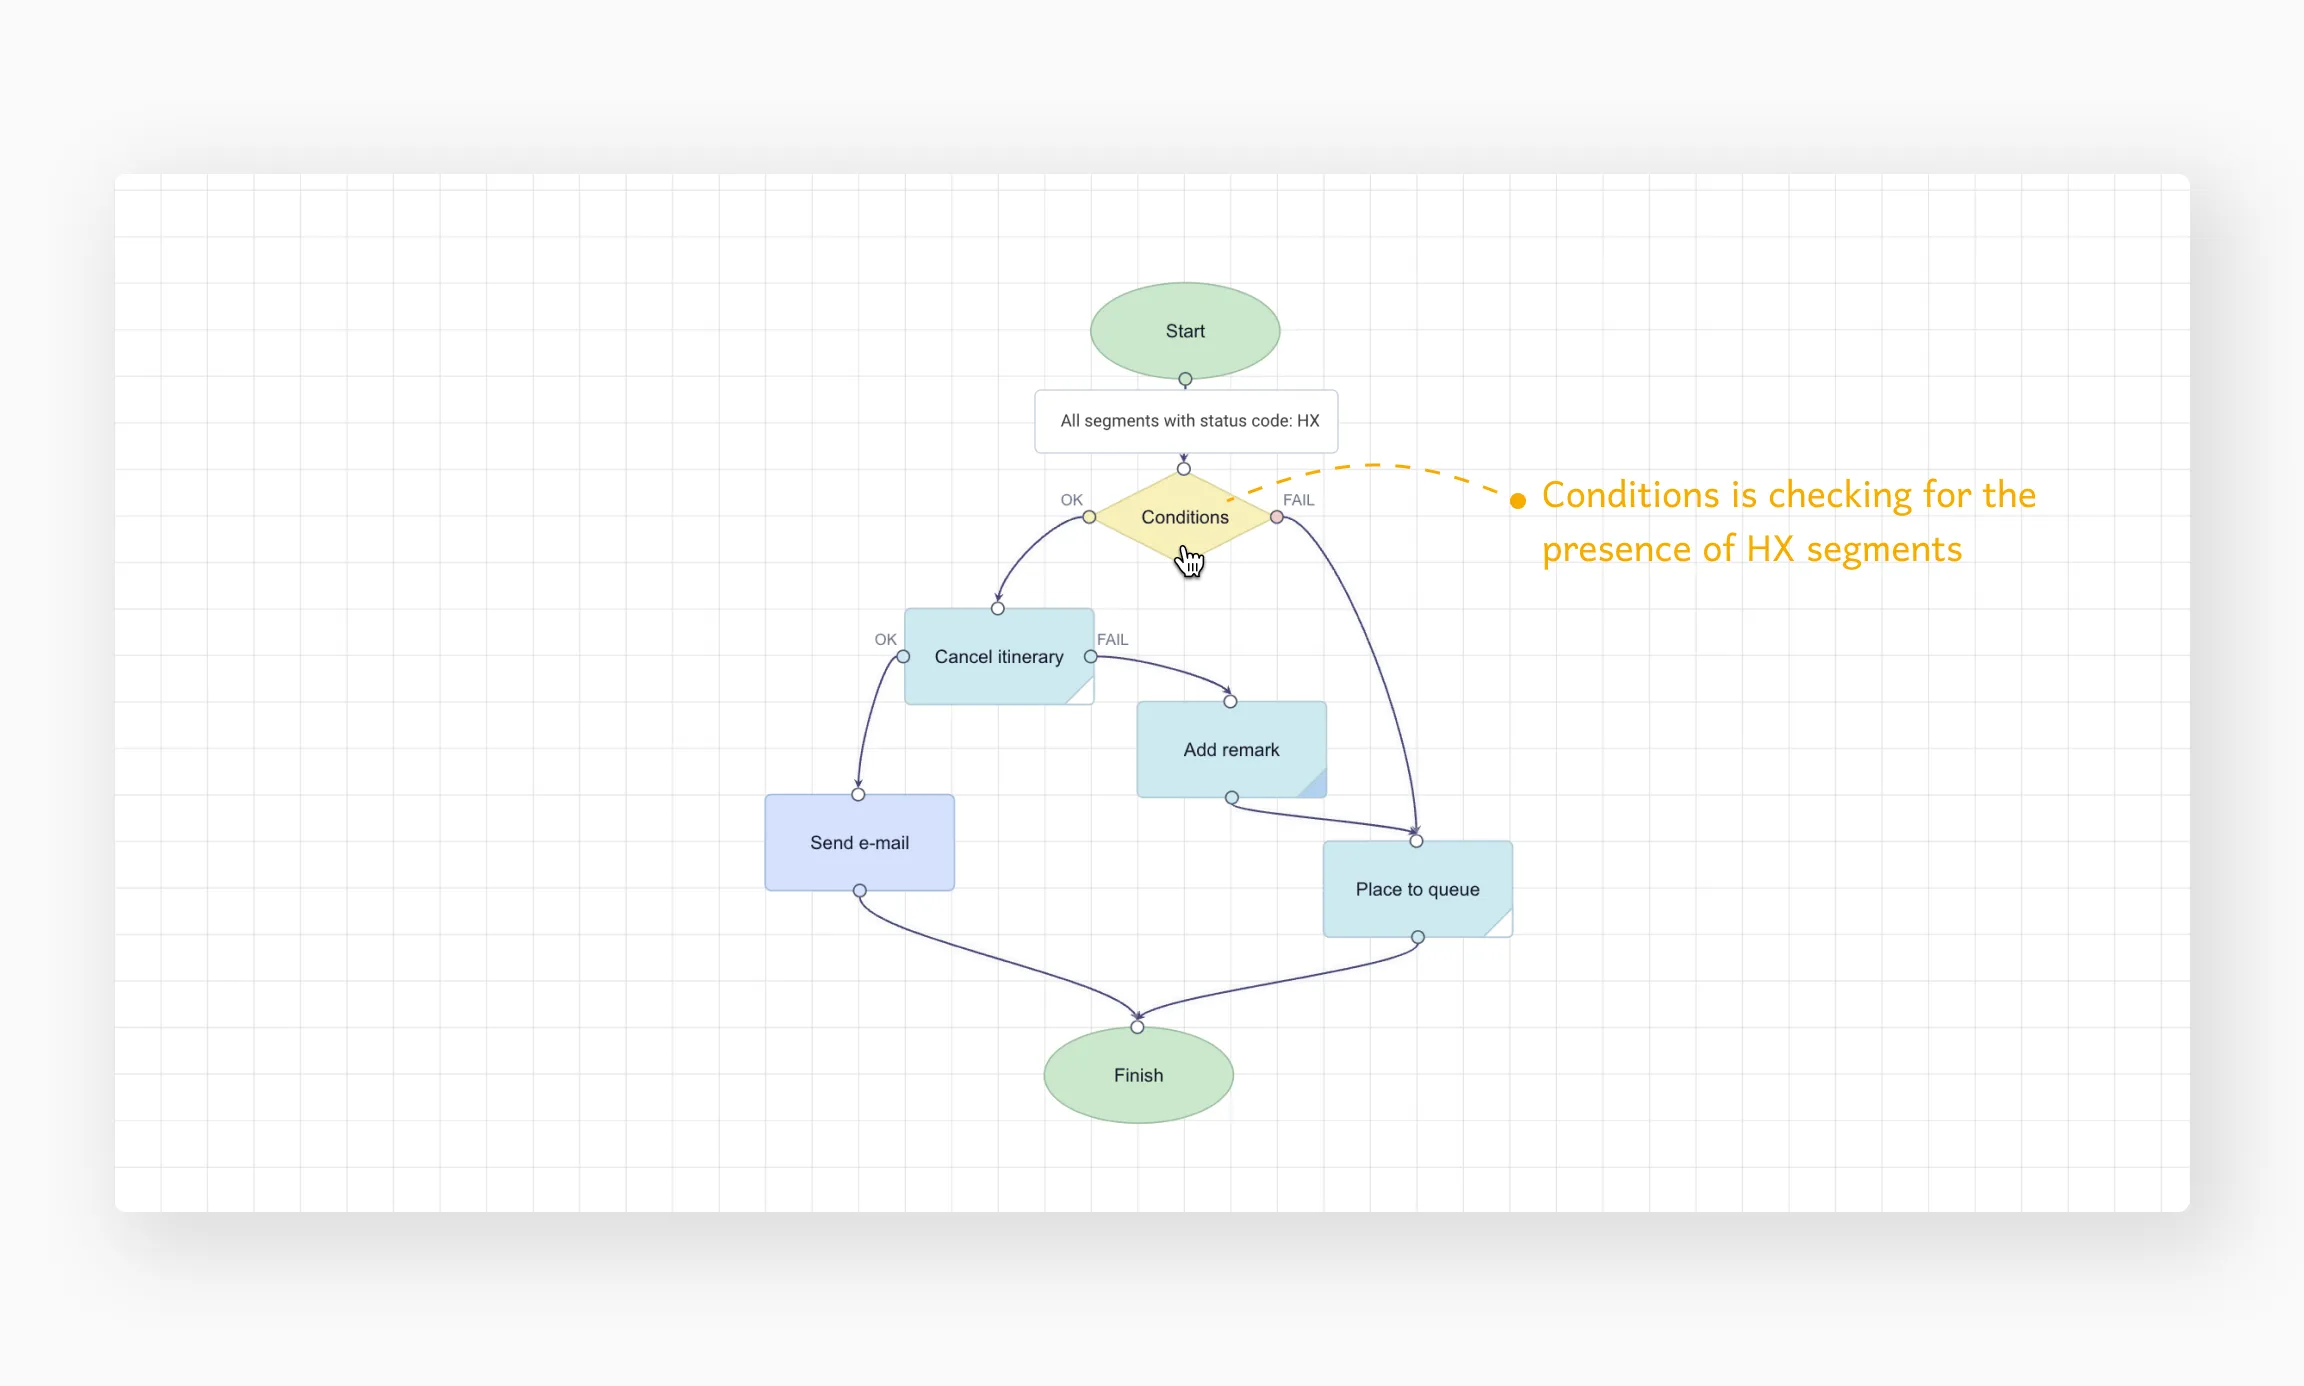
Example
In the example below, the Conditions element checks for the presence of HX segments. If such segments are detected, the workflow proceeds with the OK path, and the booking will eventually be cancelled.
- If the cancellation is successful, the client will receive a notification.
- If the cancellation fails, a remark will be added to the PNR, and the booking will be placed in a queue.