The Canvas is the main workspace where automation schemes are built. Here, you design the logical flow of processing by adding, connecting, grouping, and configuring elements. This article explains how schemes are structured on the Canvas and how to work with elements efficiently.
The Canvas provides a visual environment for creating a single scheme whose properties and settings were defined in the previous steps.
Here, you can:
- Build logical processing chains
- Arrange and configure conditions and actions
- Connect steps into a complete logical workflow
- Prepare a scheme for validation and activation
A scheme can only be activated if all elements are properly connected and configured.
Every scheme follows a consistent structure: available elements depend on the selected scheme type, and their functionality becomes active once they are added to the canvas.
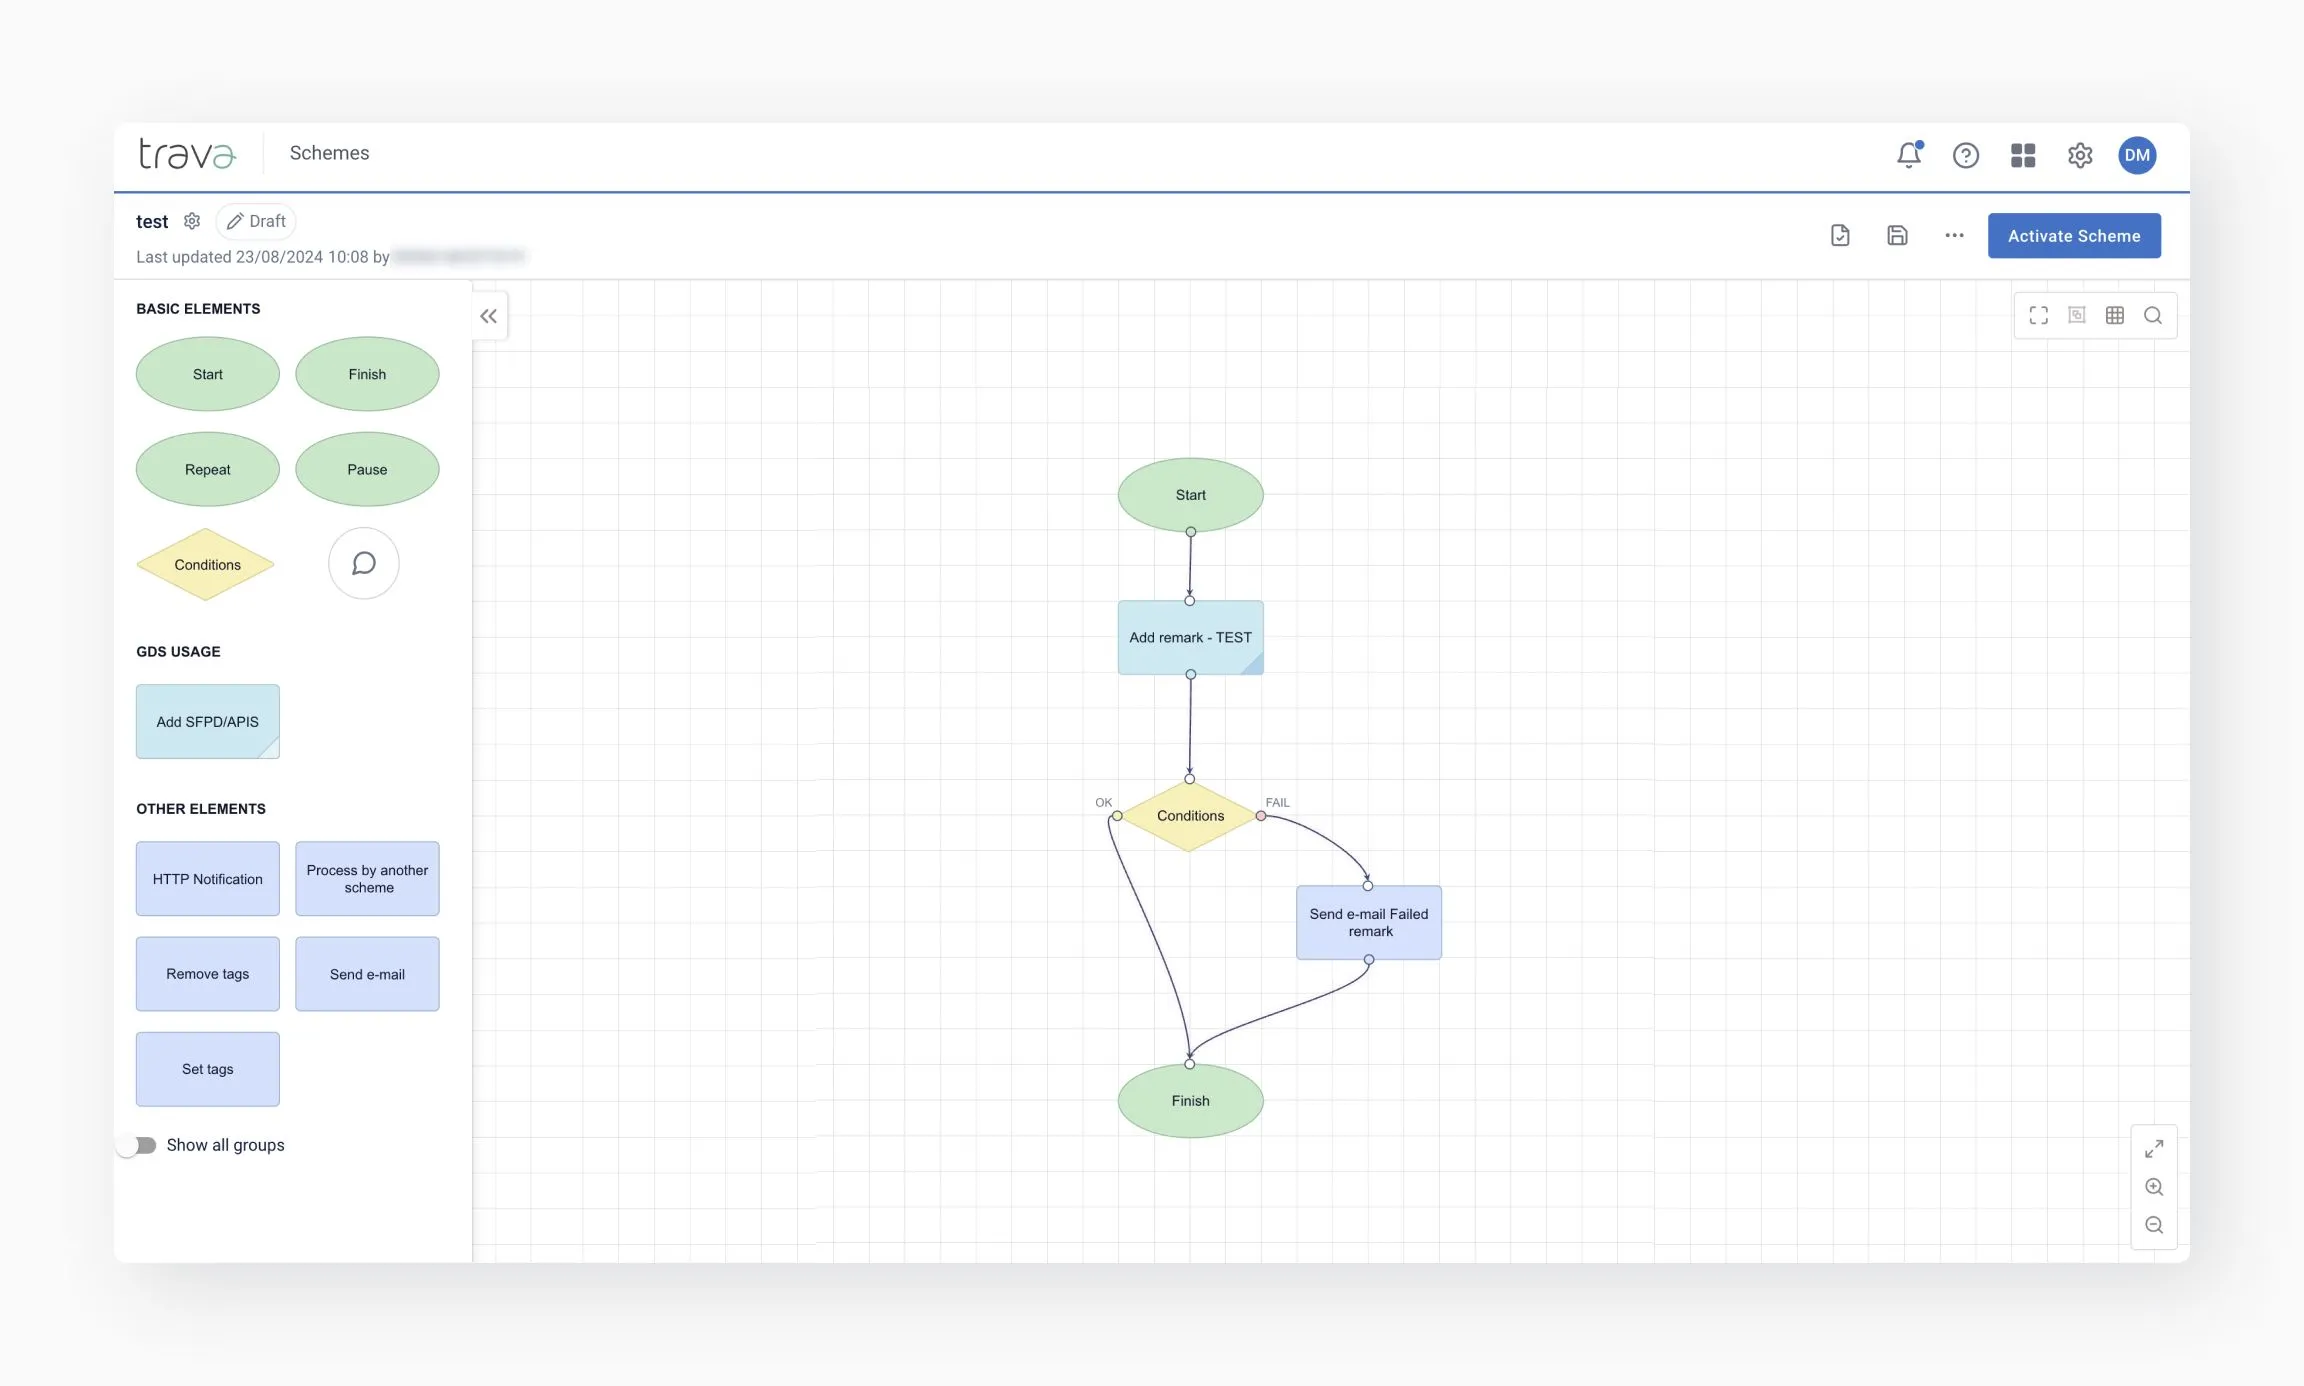
Start defines the entry point of the workflow and the source of data. For pricing schemes, this includes PNR evaluation parameters.
Learn more: Reservation Sources and PNR Pricing Settings
Conditions and actions form the core logic of the scheme:
- Conditions evaluate data and split the flow using OK / FAIL paths
- GDS usage elements perform operations within the GDS
- Other elements extend functionality without interacting with the GDS
Finish marks the logical completion of the workflow and indicates that no further actions are required.
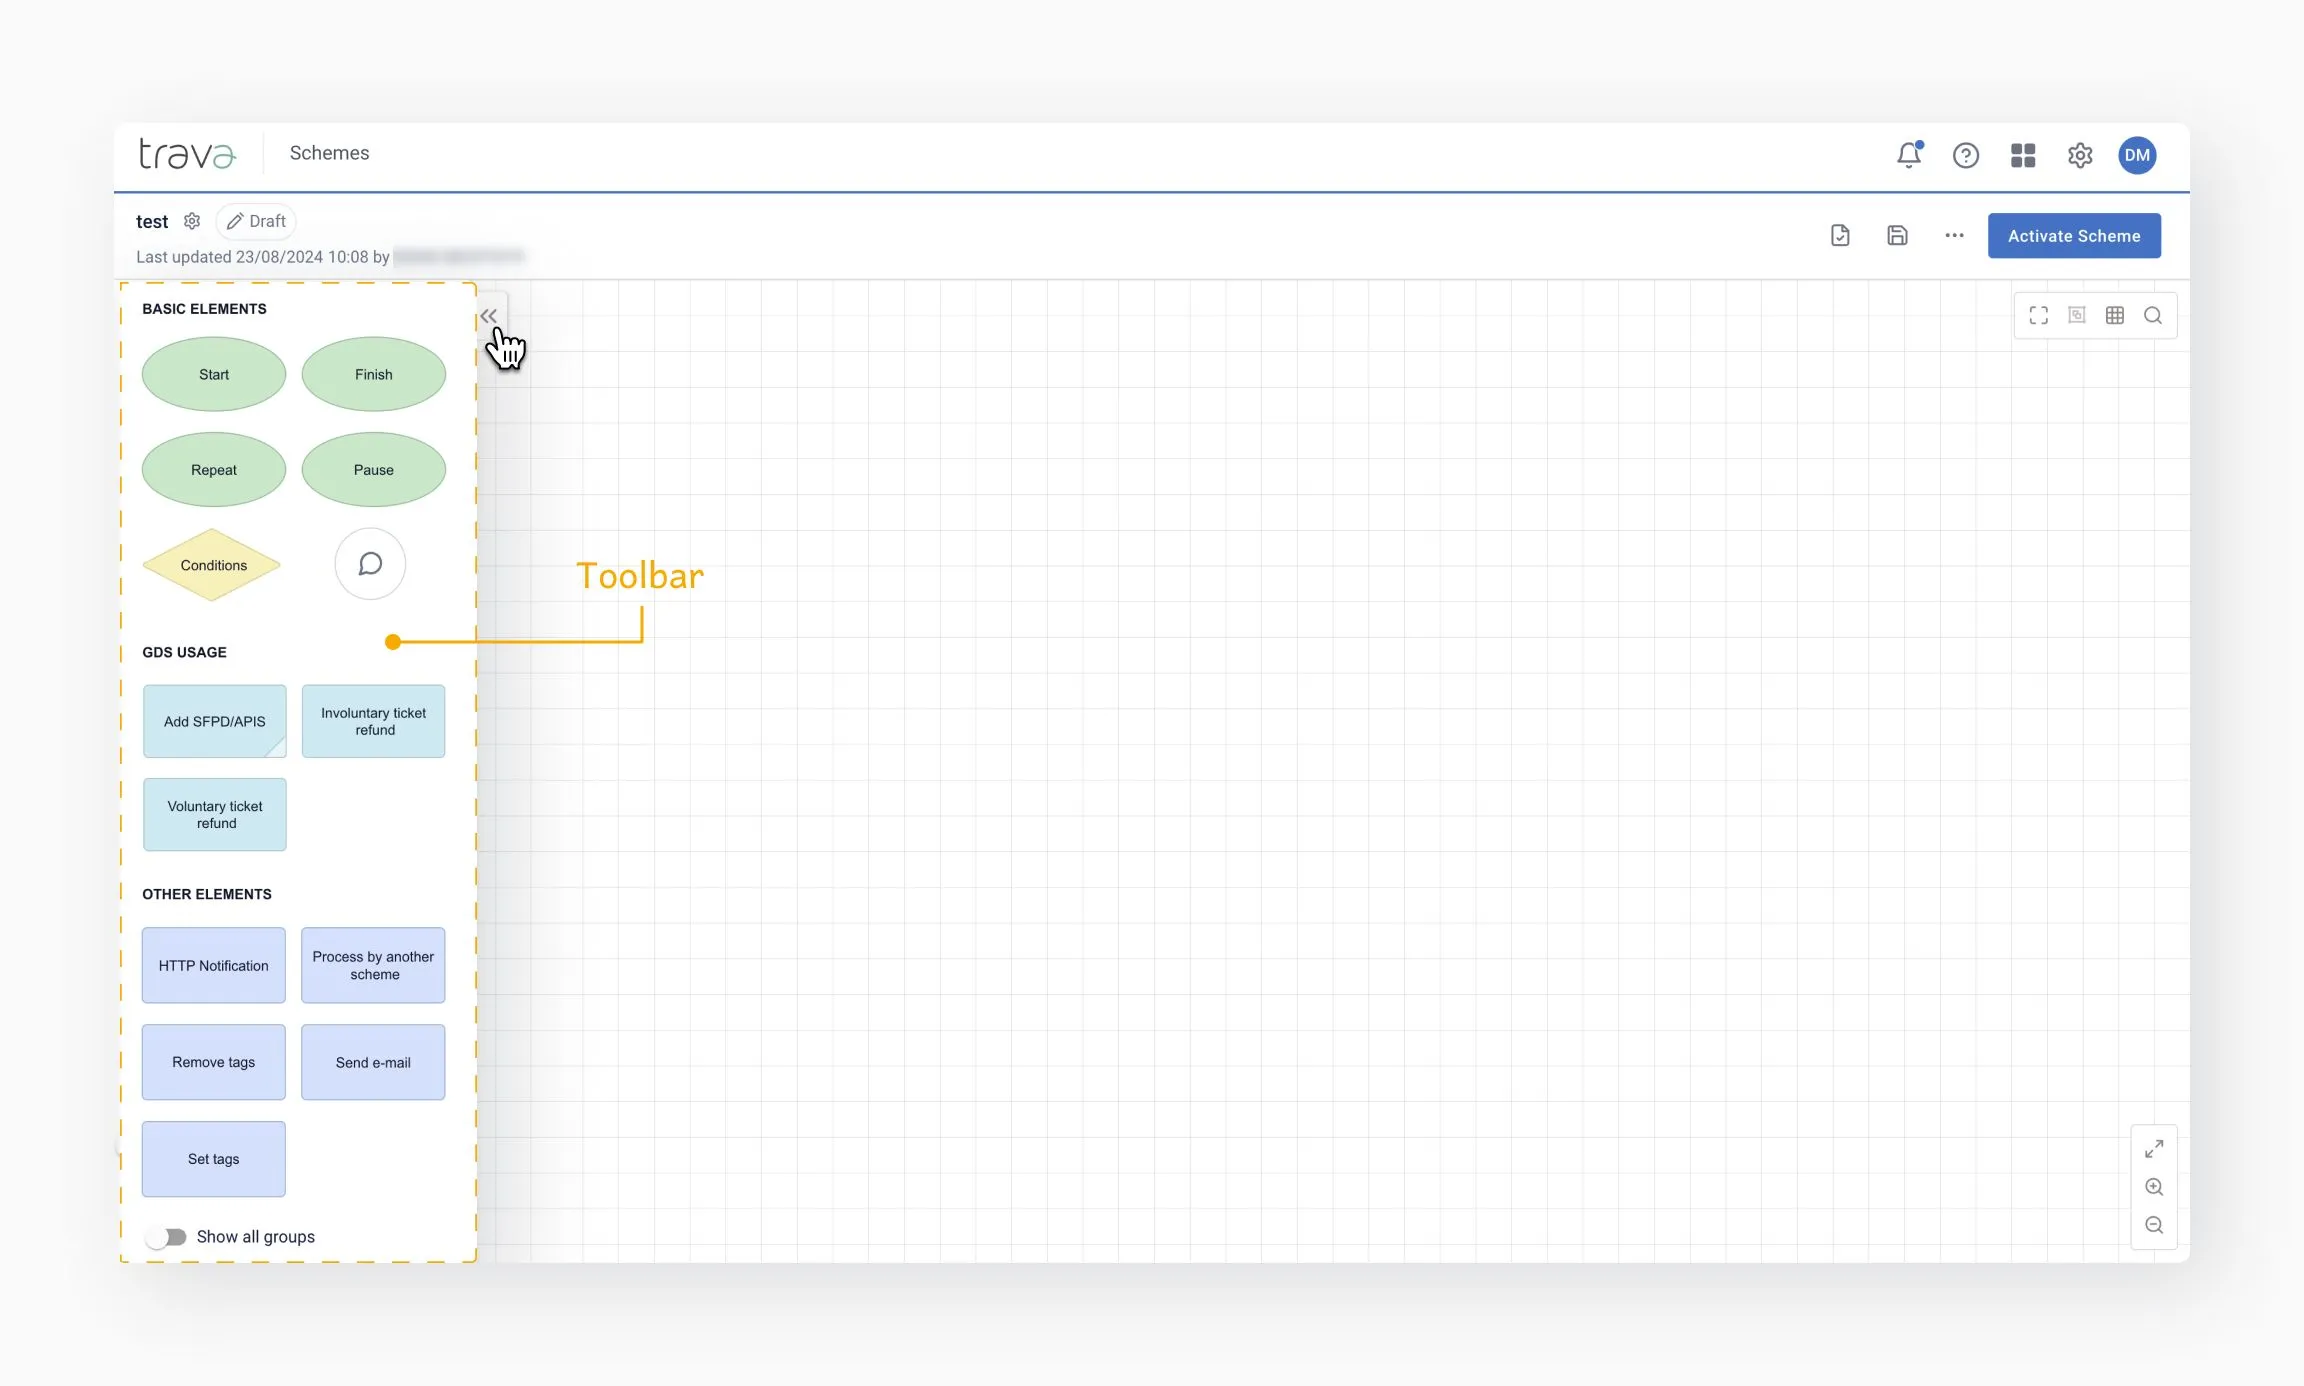
All scheme elements are displayed in the Toolbar menu depending on the selected scheme type.
Each element provides a specific level of functionality, which becomes available after the element is placed on the Canvas.
The menu also includes a Show all groups section. When enabled, it displays:
- All elements available for the selected scheme type
- Including elements not supported by your current GDS
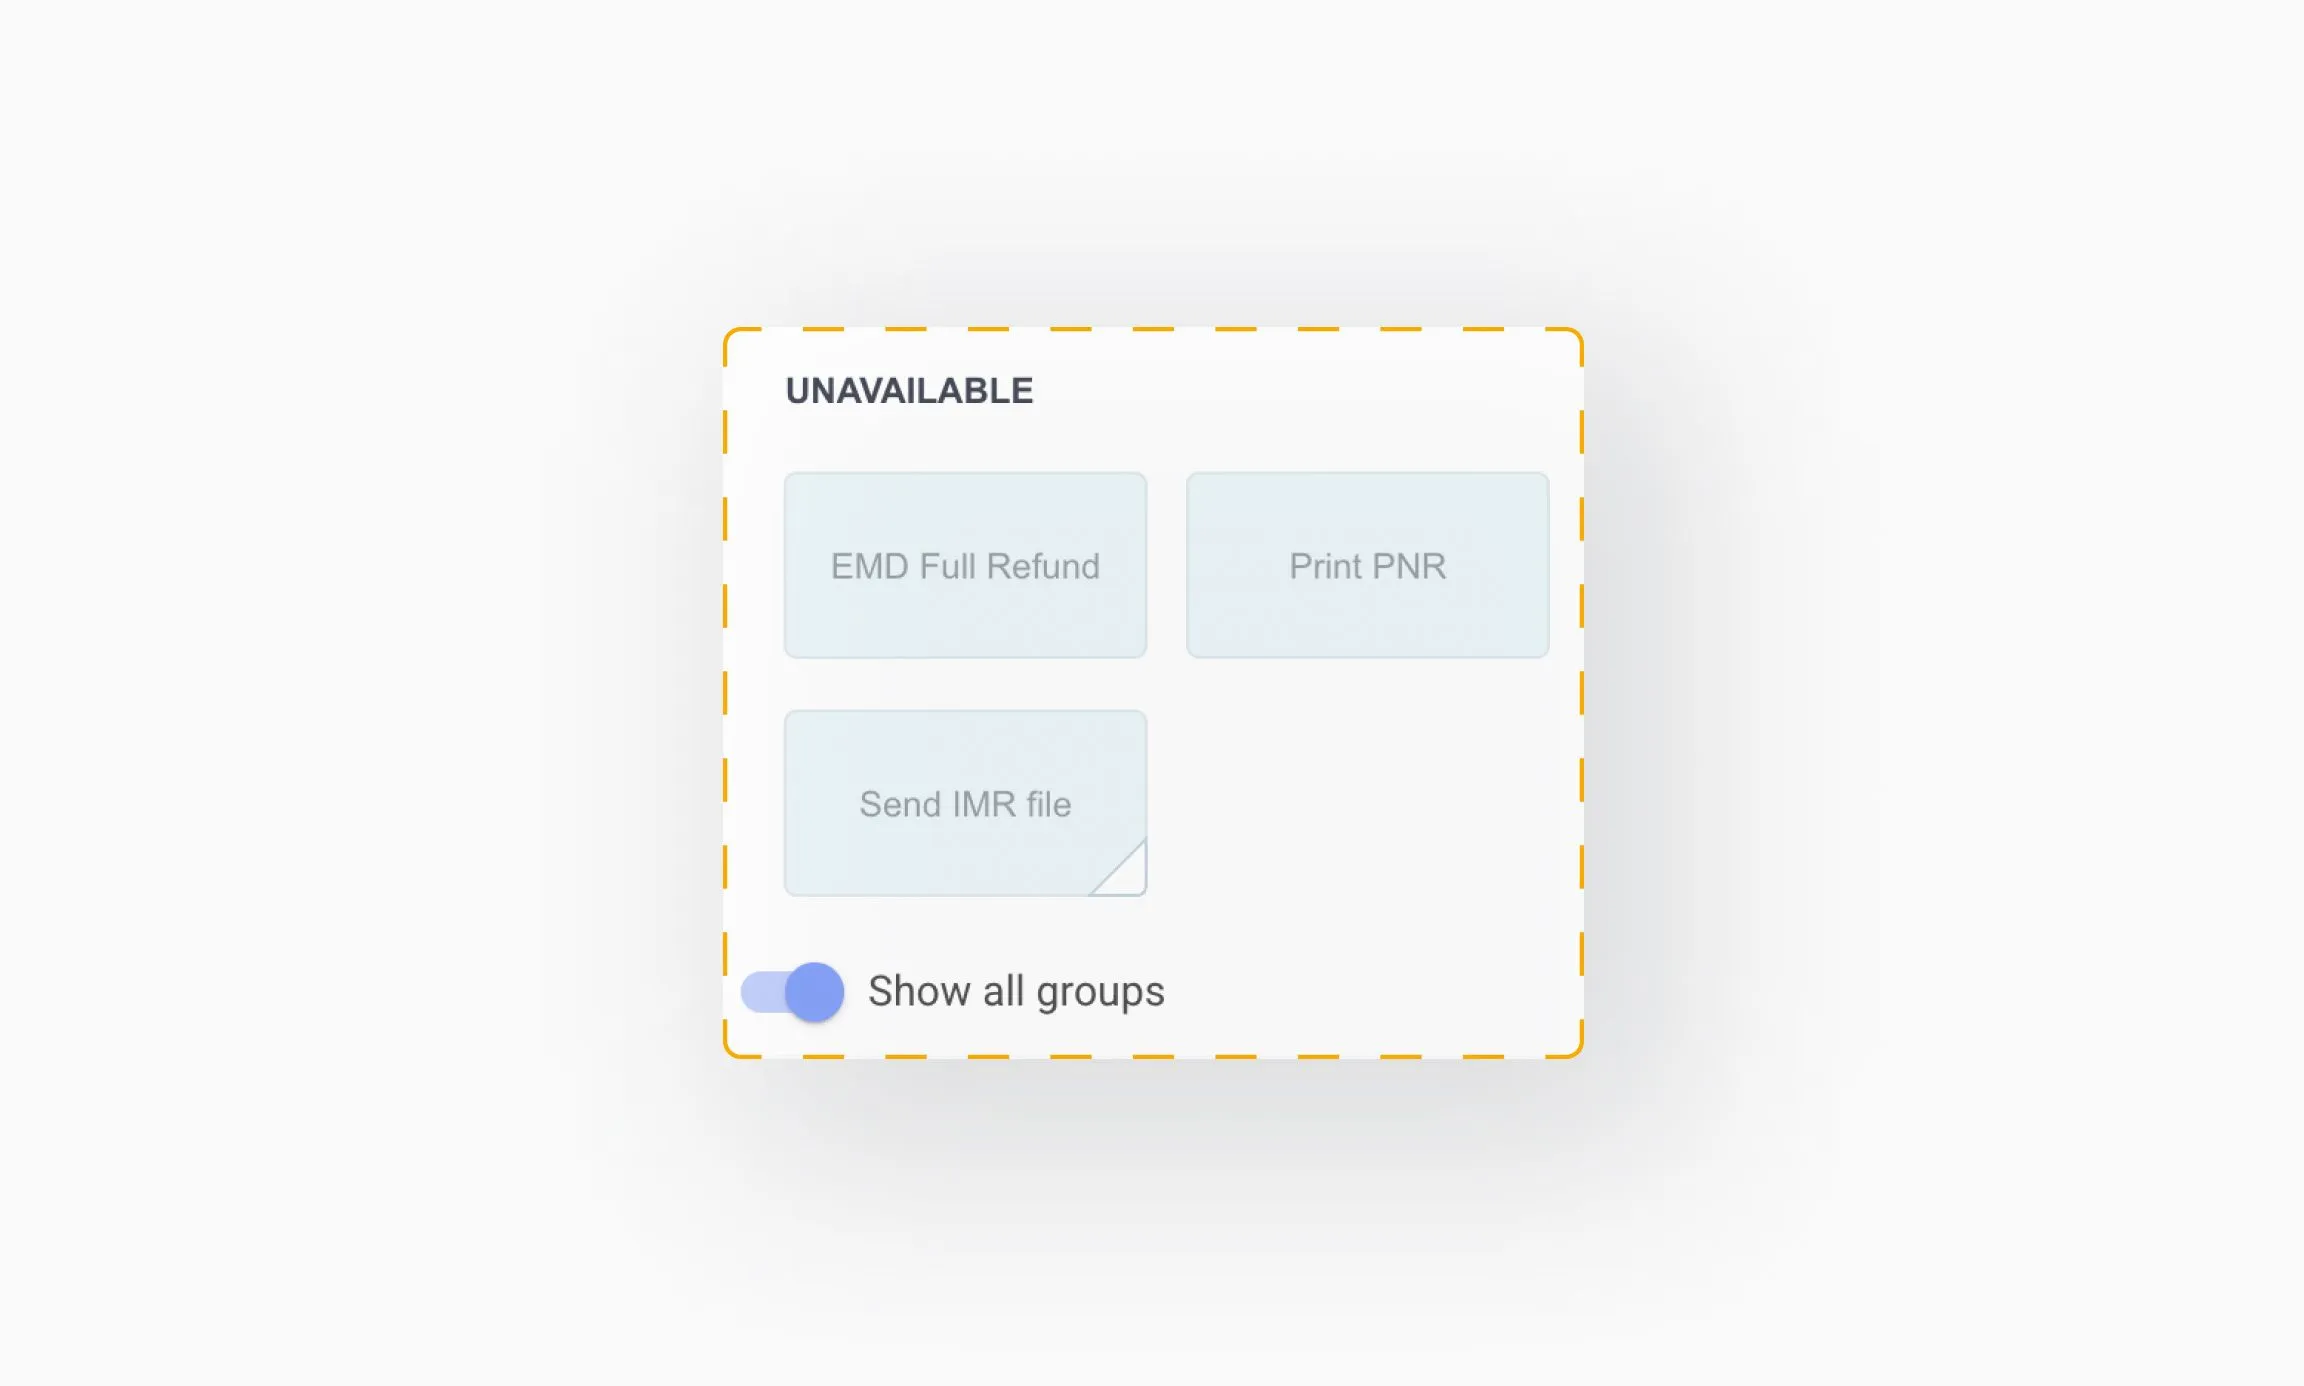
When you hover over an unavailable element, a tooltip is displayed explaining why the element is not available for selection. This helps explore cross-GDS capabilities.
- Click an element in the Toolbar menu
- Click on the Canvas to place it
This menu is available in Draft mode only. Press the Arrows button to expand it.
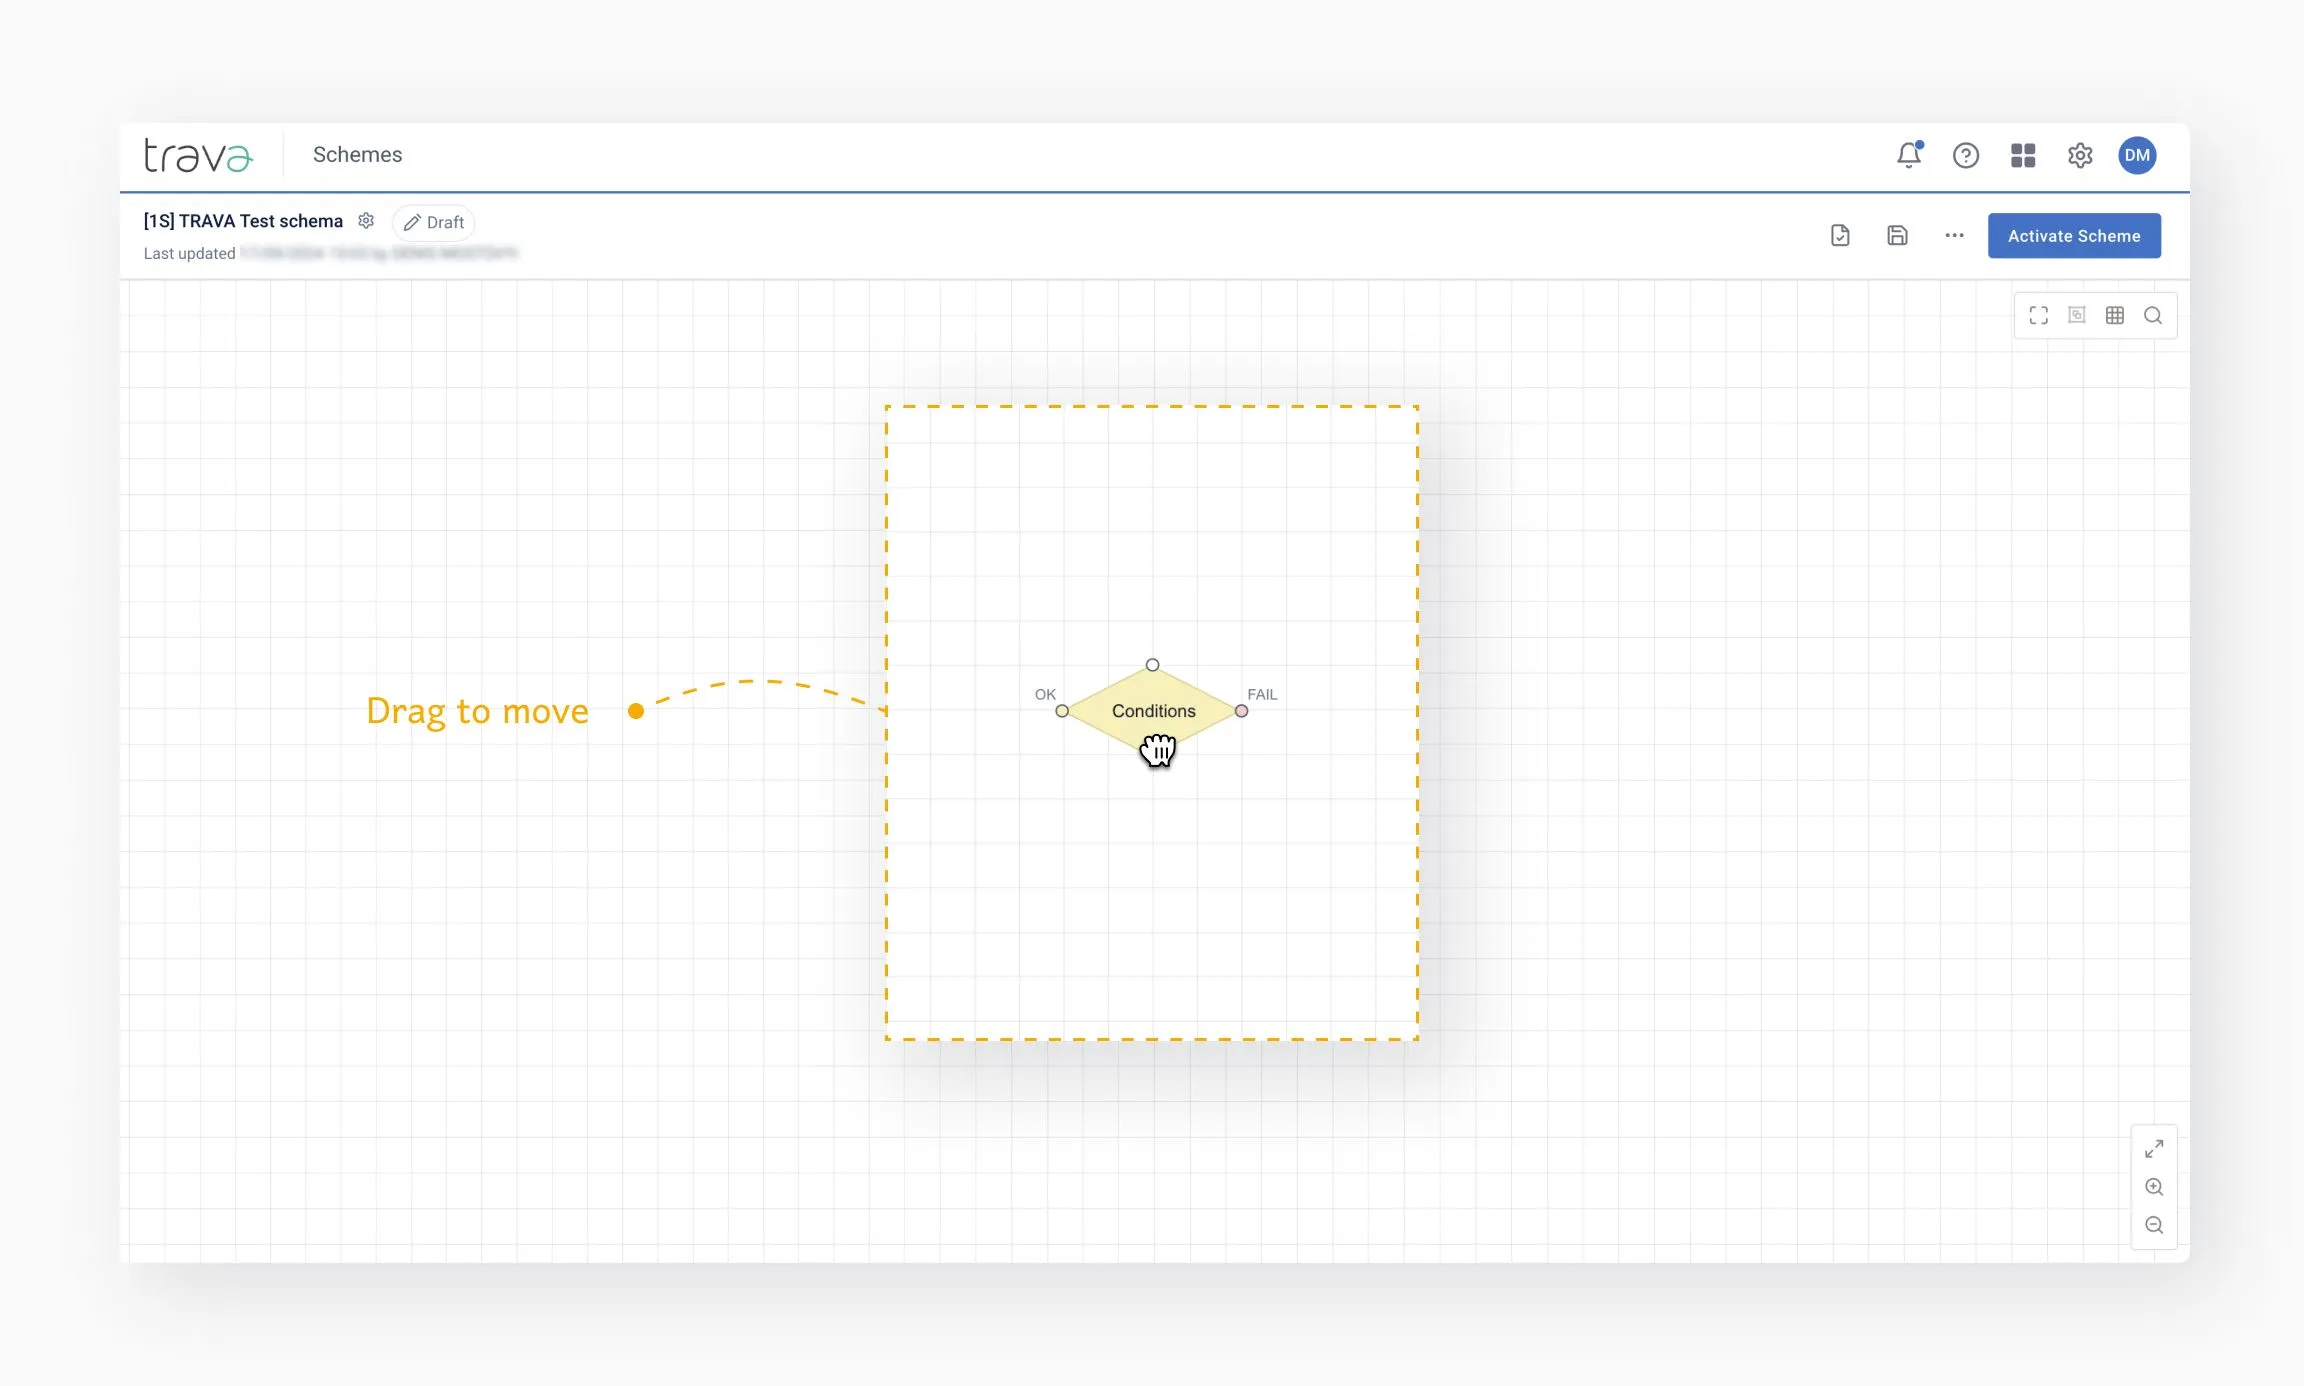
Click and hold an element to reposition it anywhere on the Canvas.
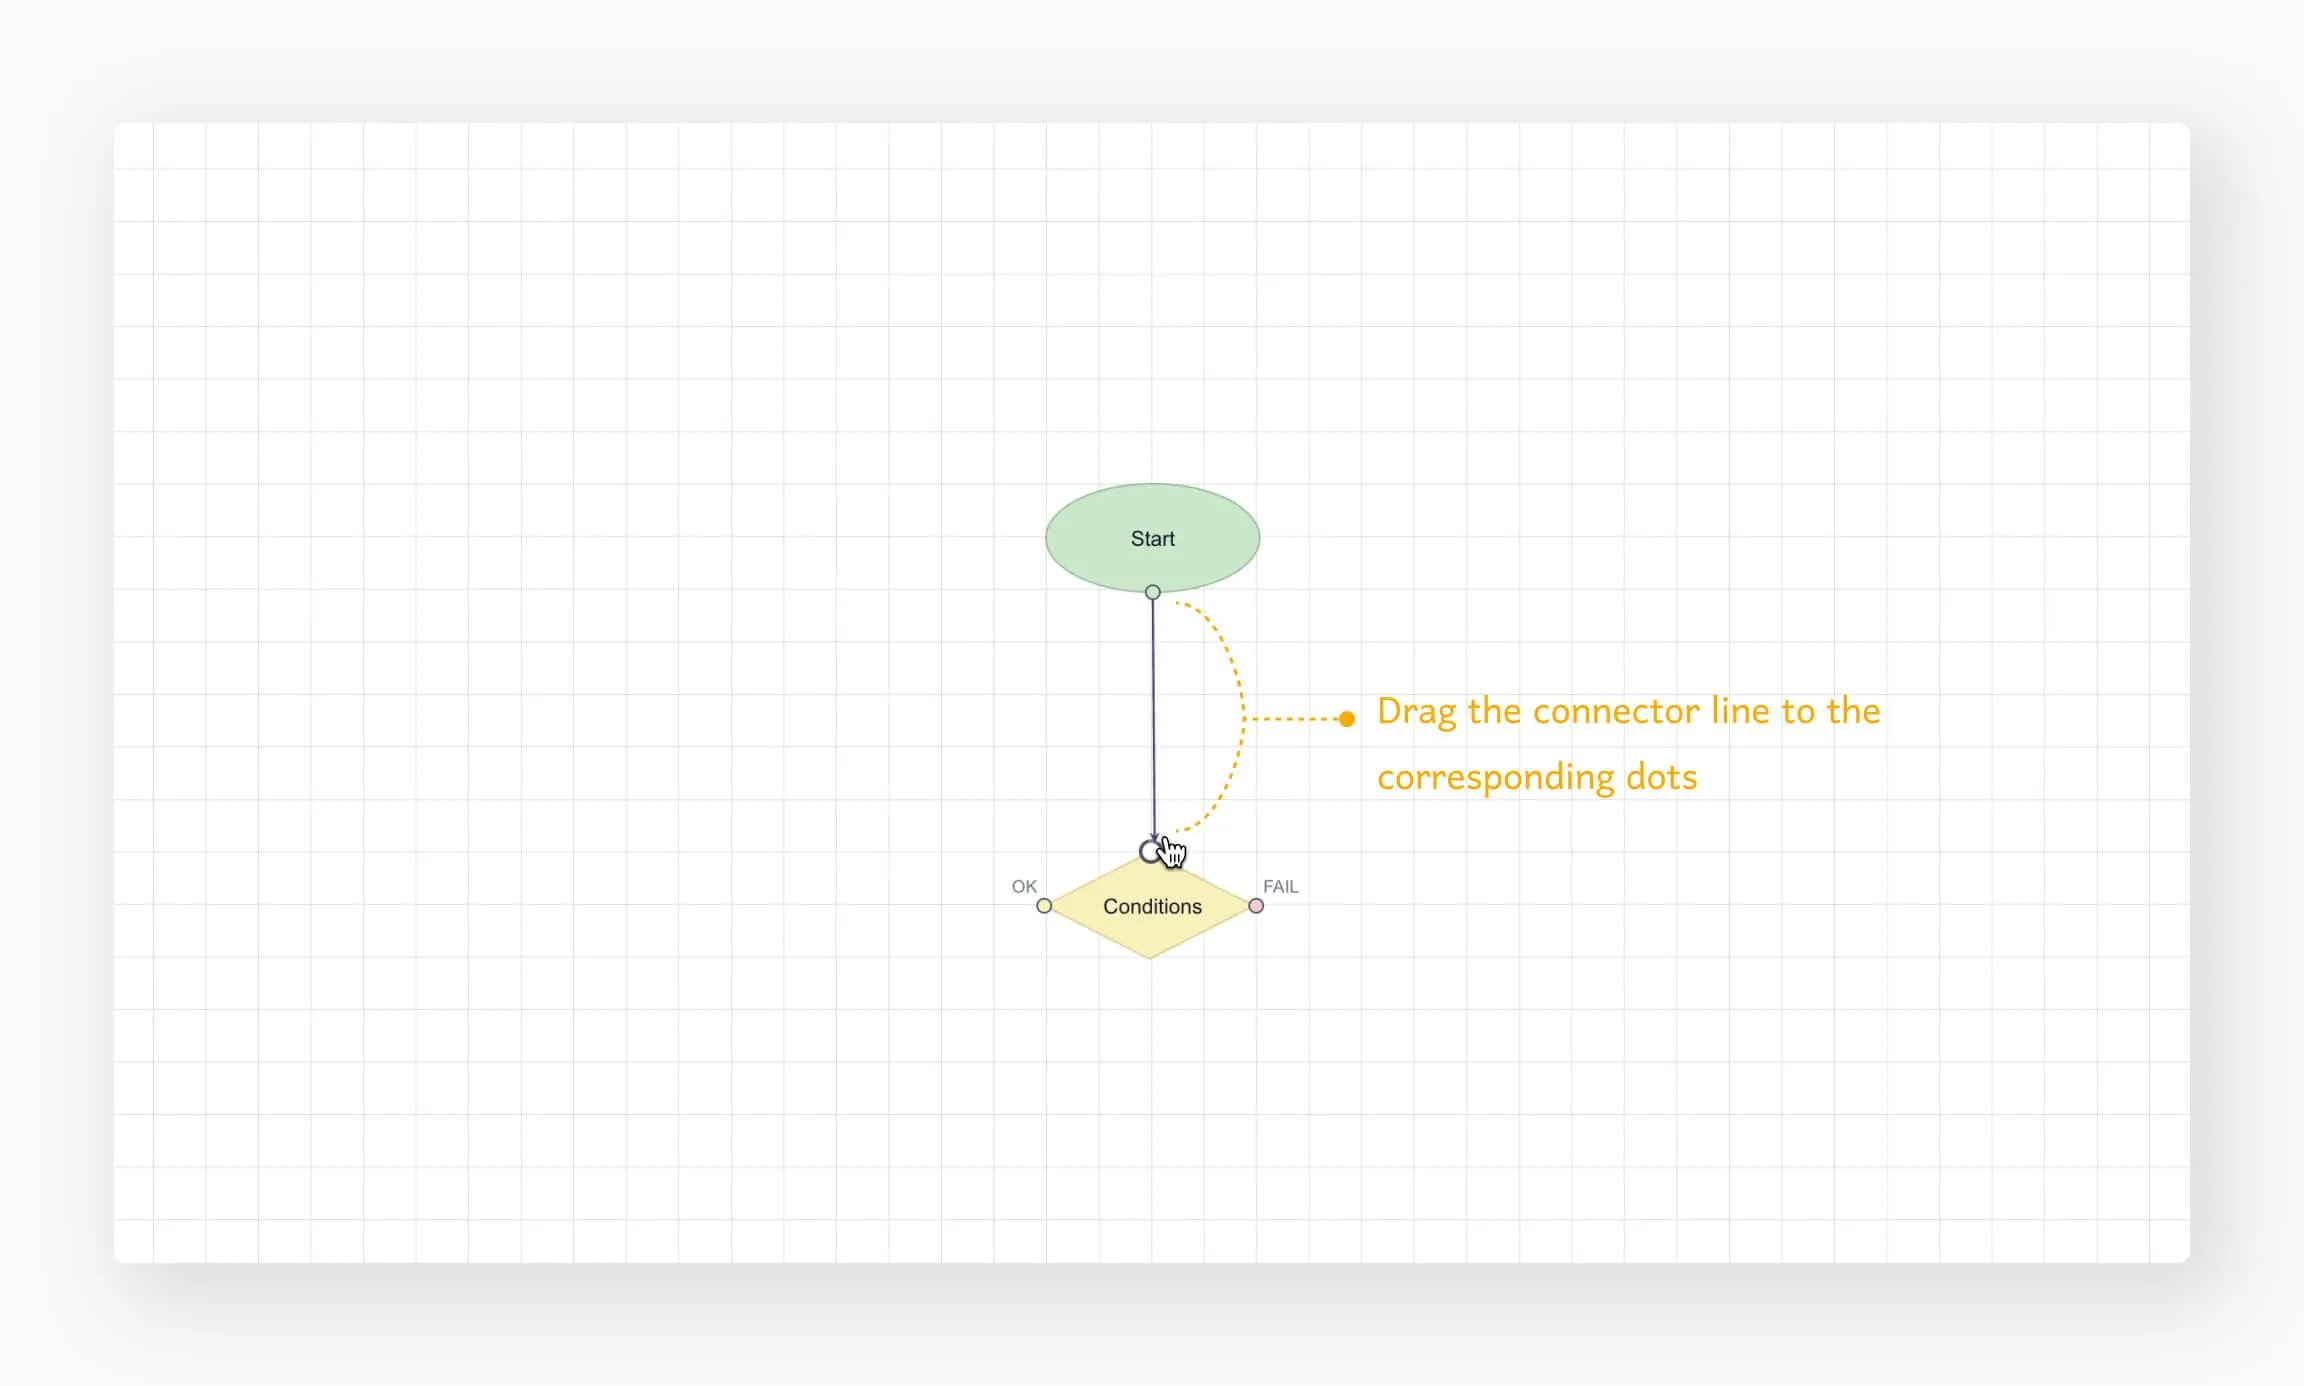
- Drag from an element’s exit point to the entry point of the next element
Each element has predefined connection points:
- Single point – Start and Finish
- Entry + exit – standard actions
- Entry + two exits (OK / FAIL) – conditions and critical actions
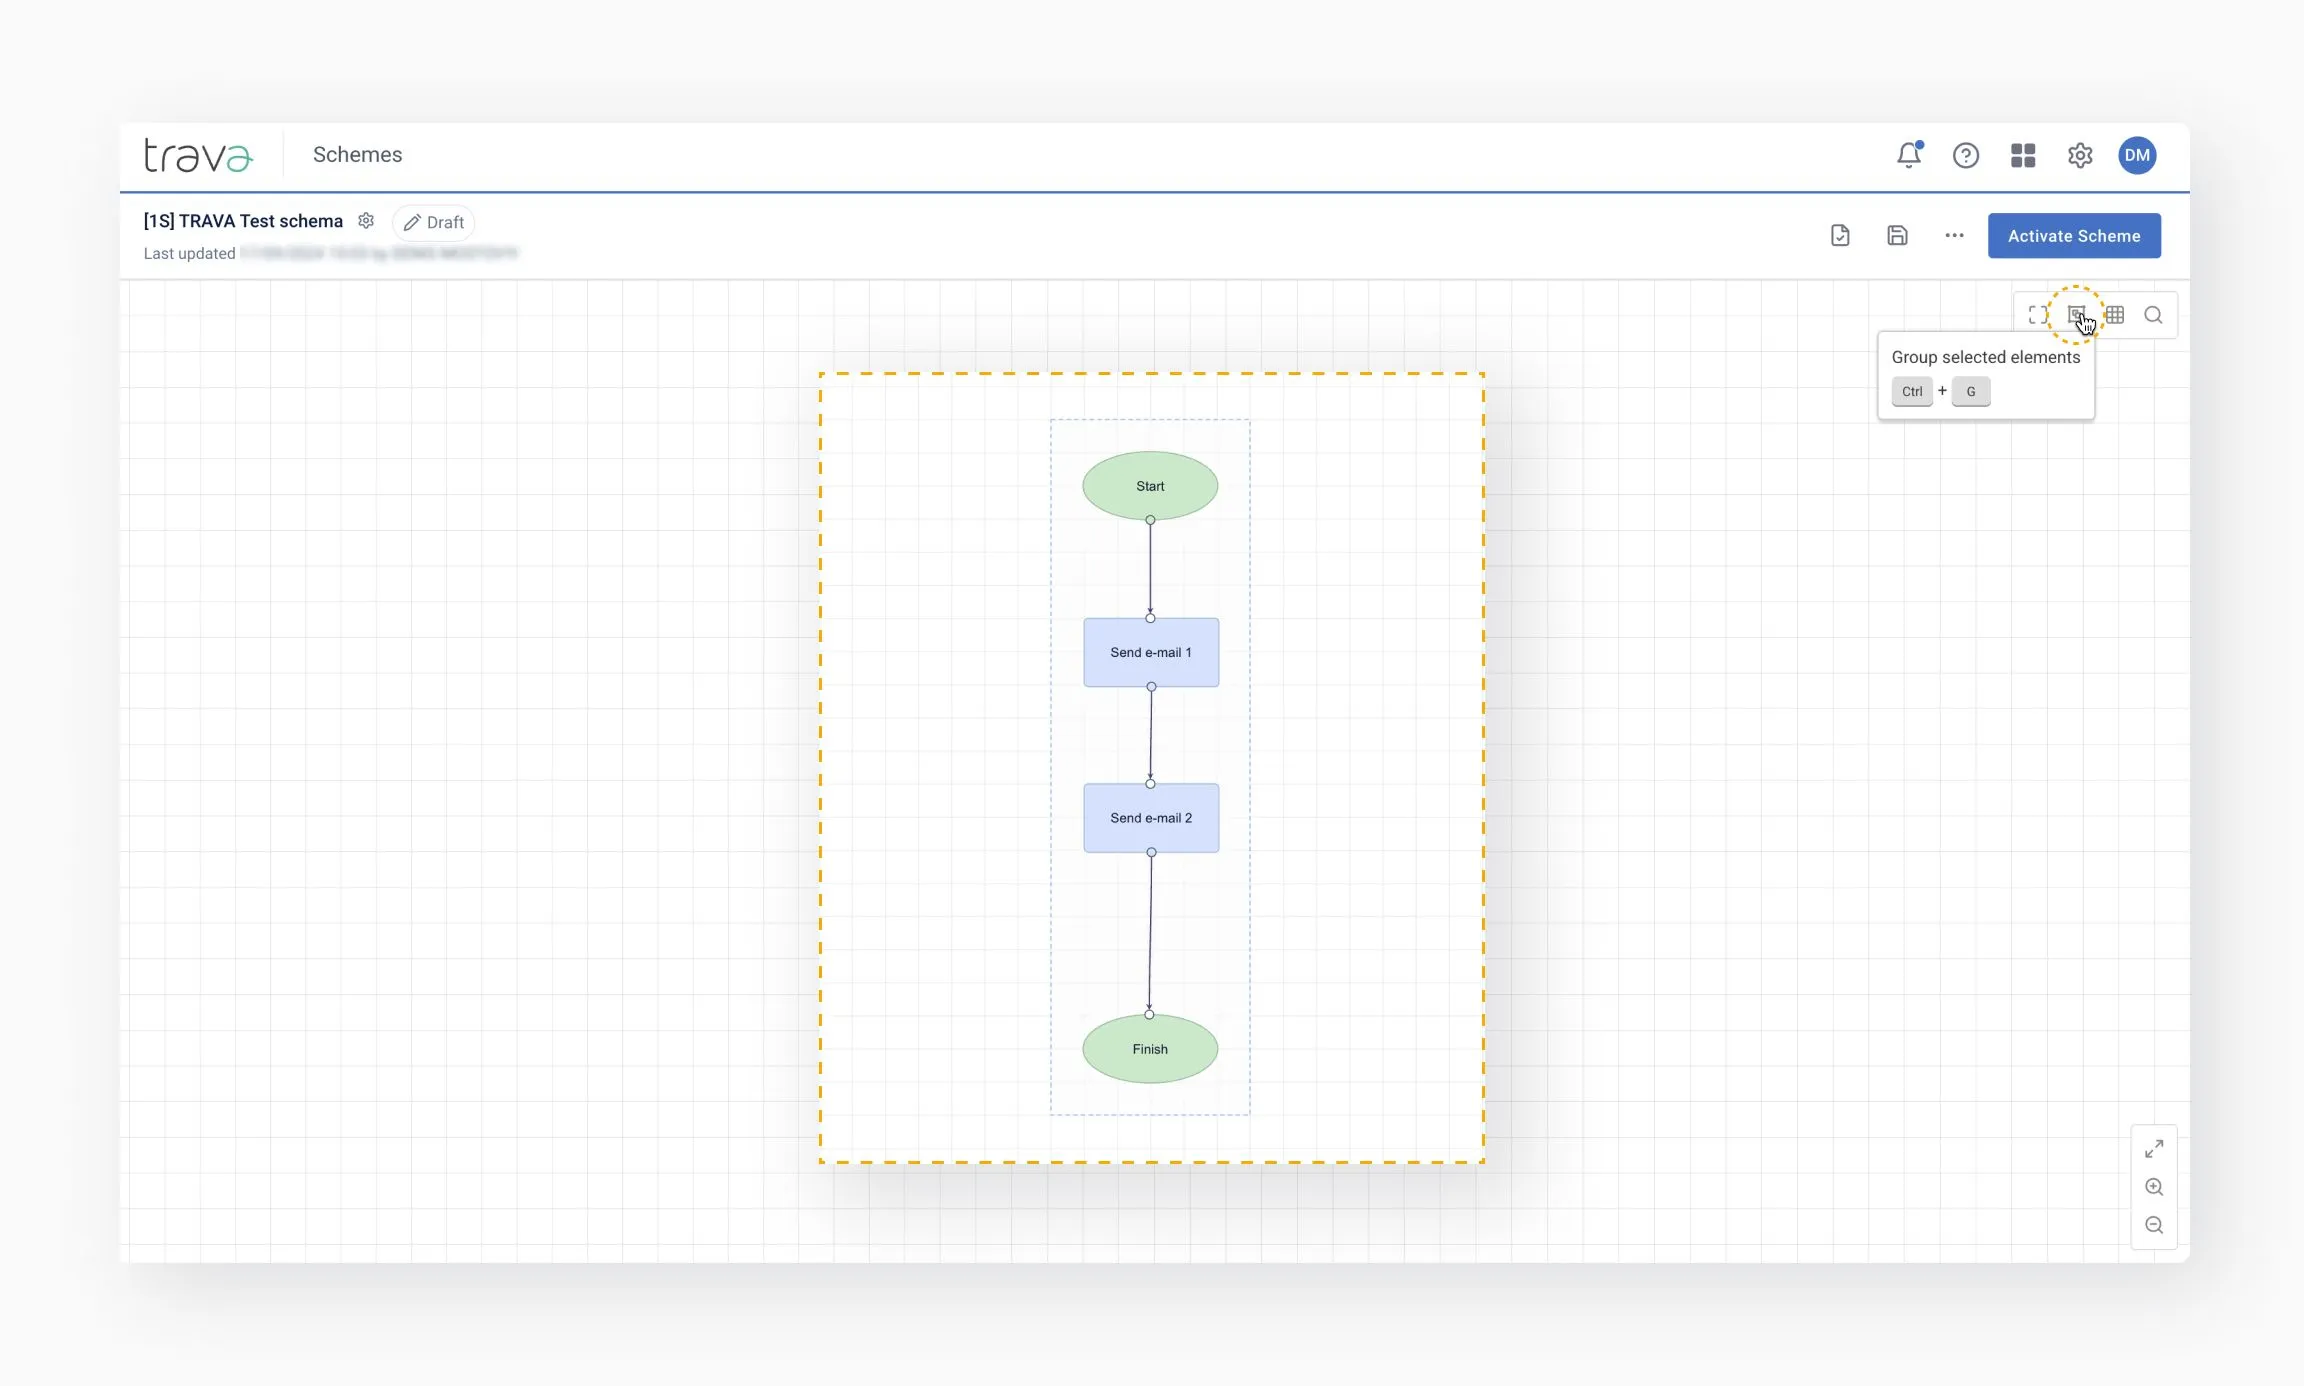
Grouping helps manage large schemes:
- Right-click and select multiple elements
- Choose Group selected elements
- Ungroup – remove grouping
- Rename – add descriptions for clarity and navigation
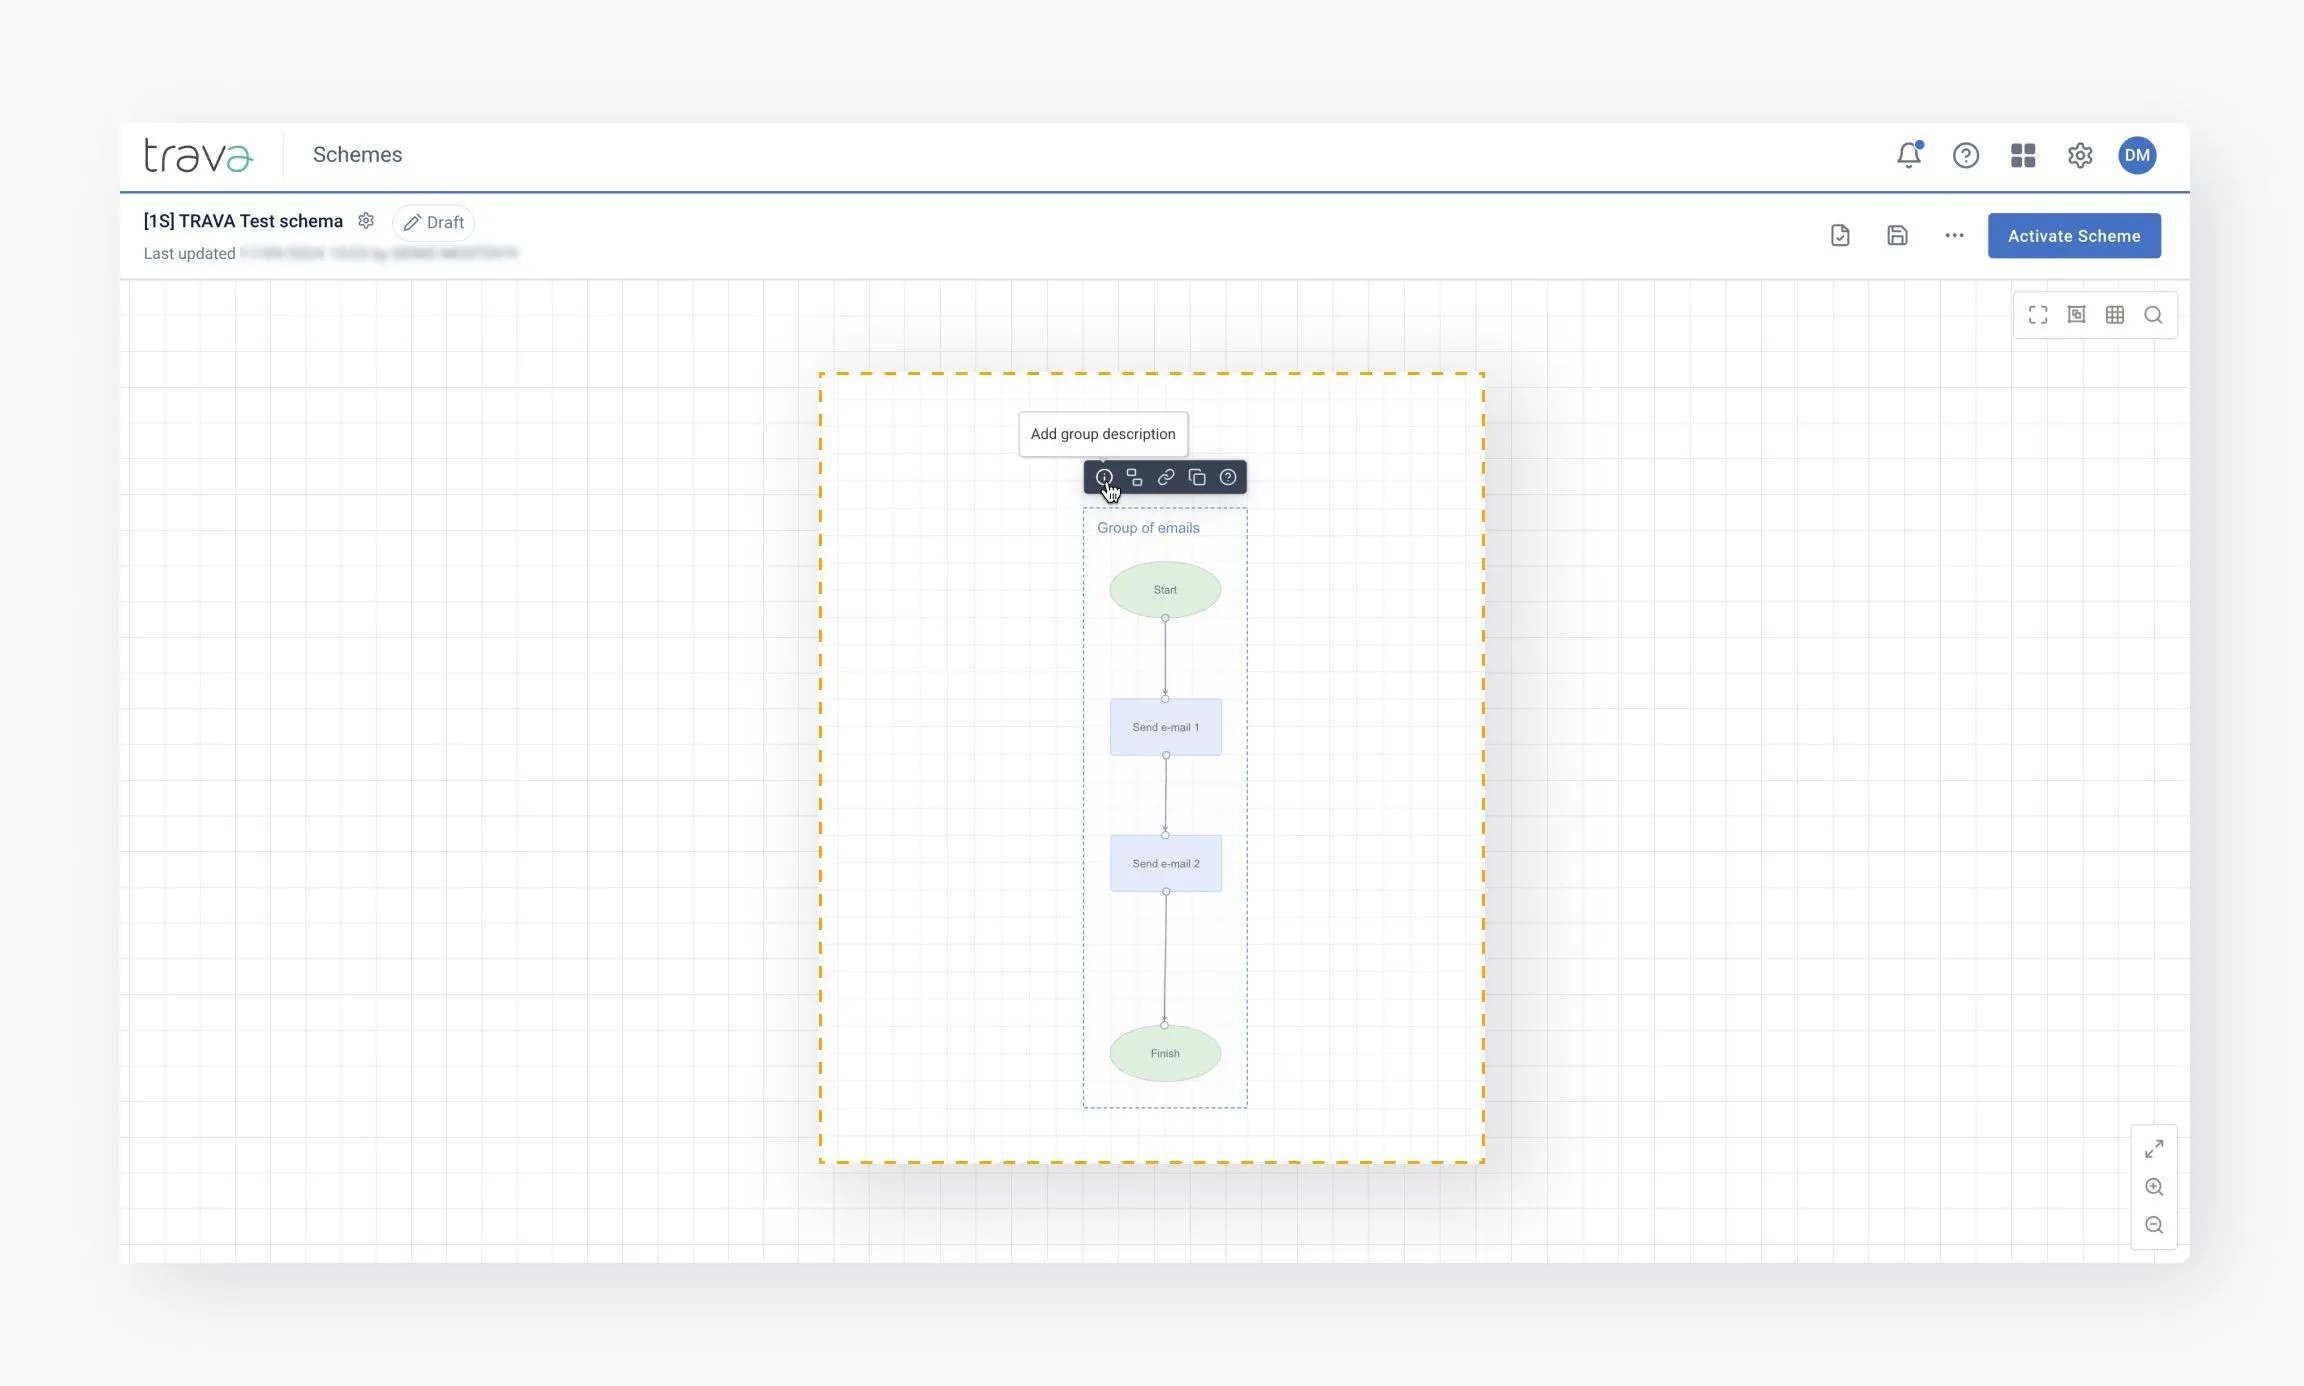
Groups can be moved or duplicated as a single unit.
The Canvas supports quick keyboard actions:
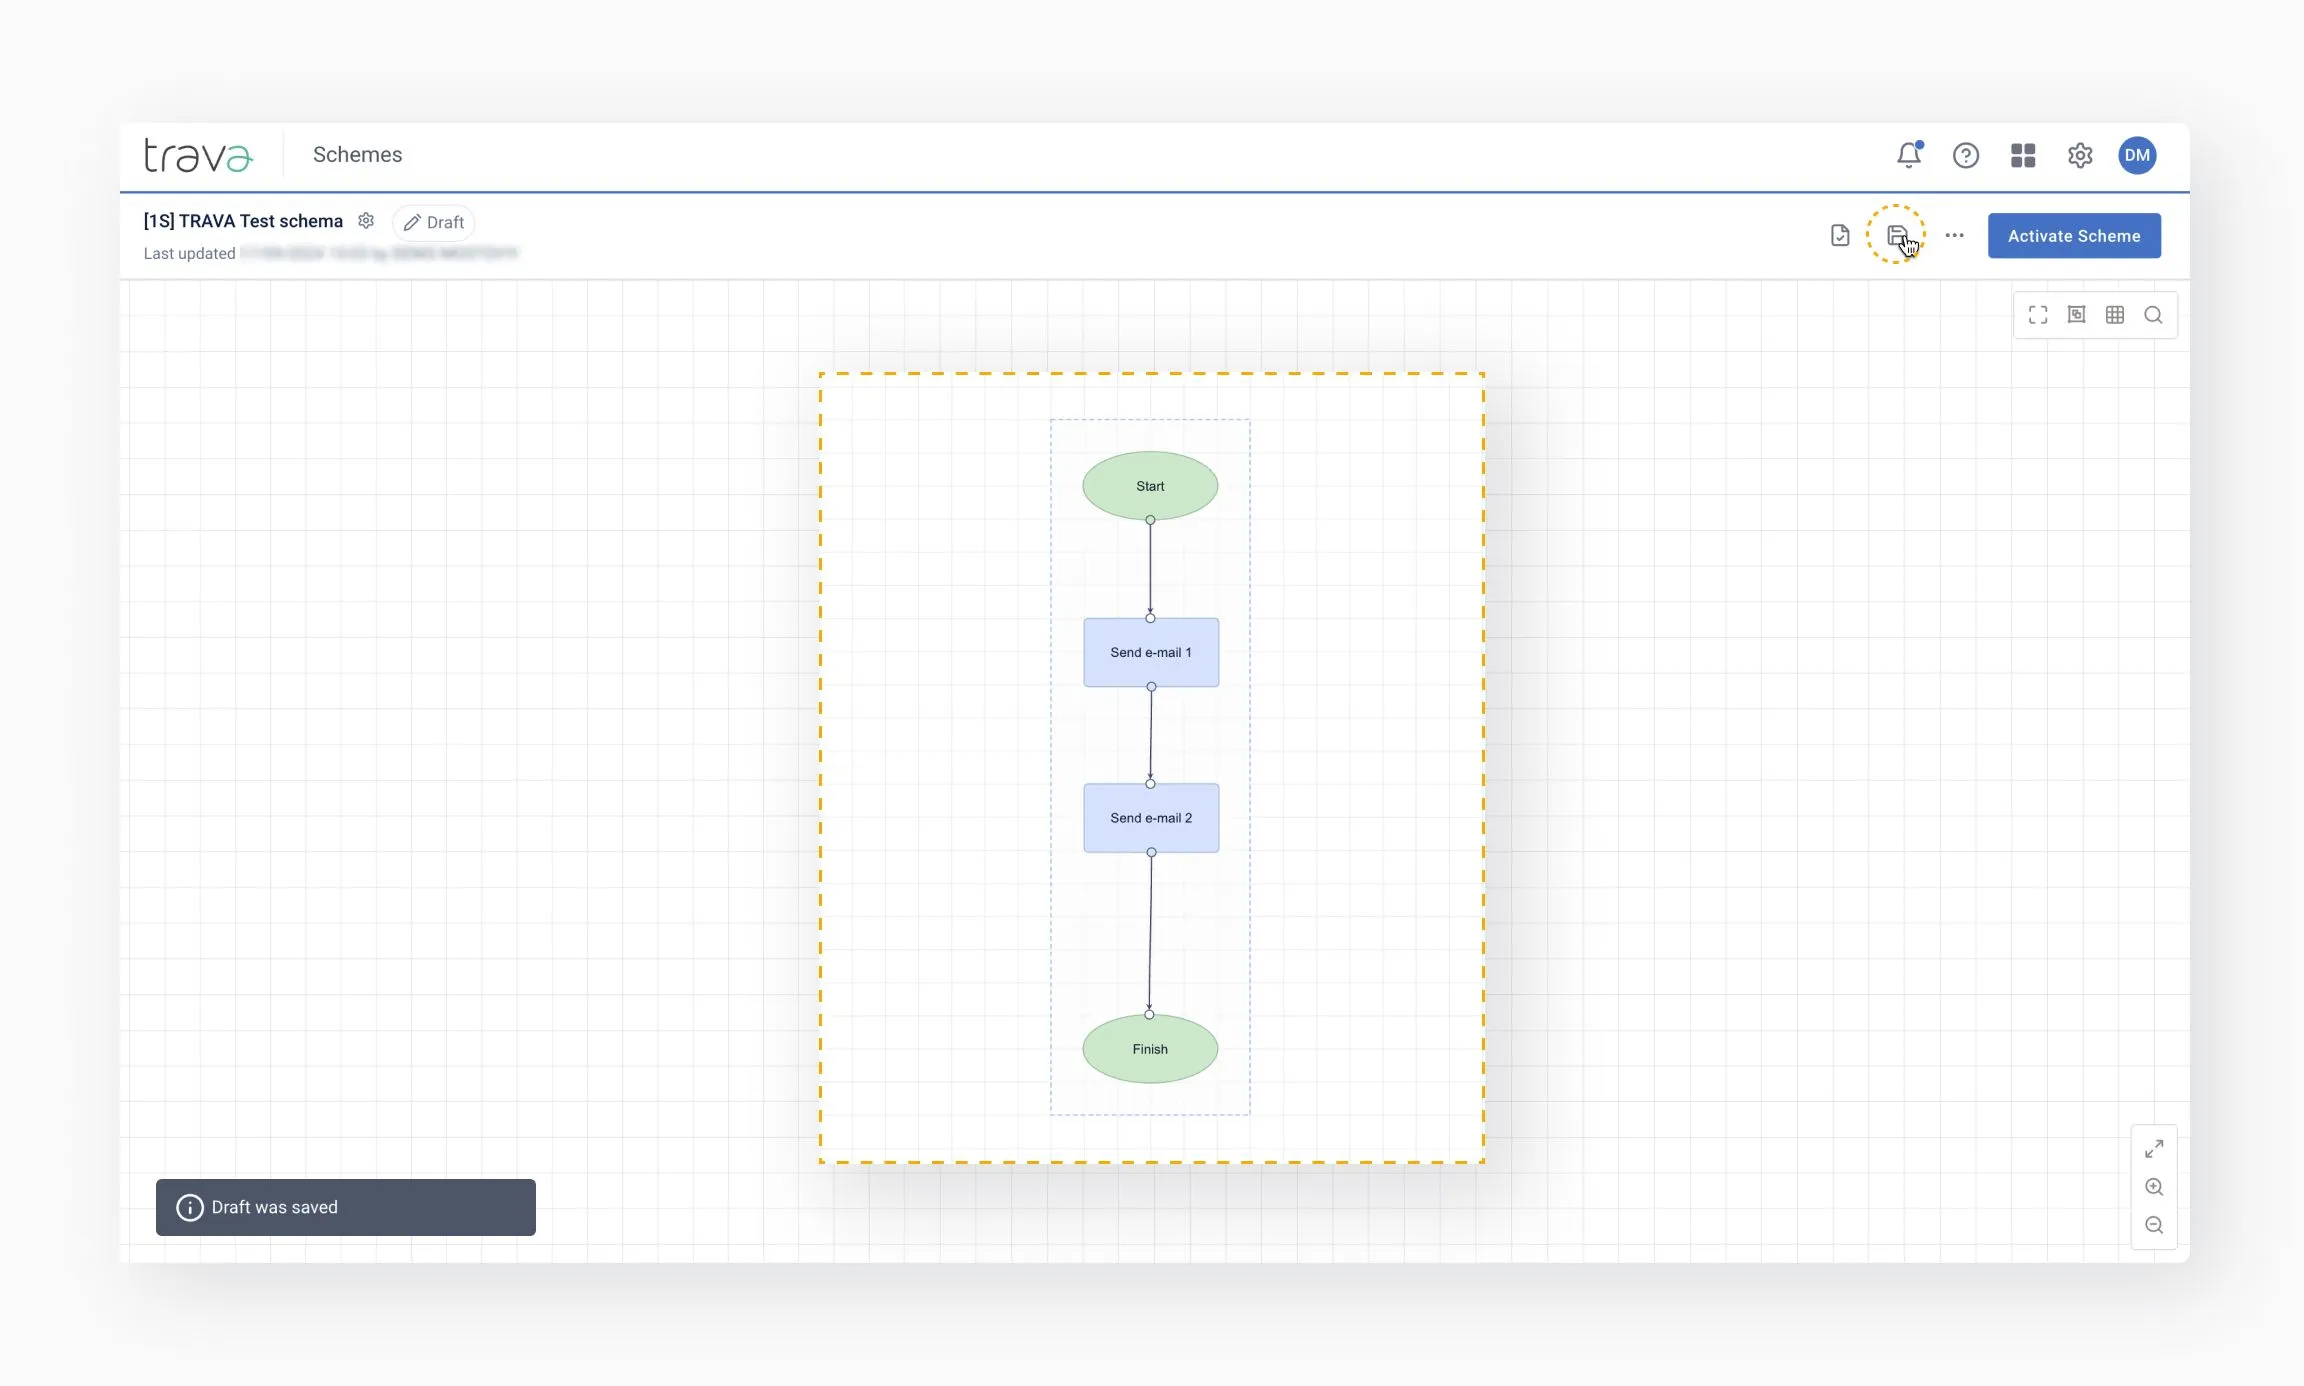
- Check (Ctrl + K) – validates the scheme and highlights configuration errors. This does not save changes.
- Save (Ctrl + S) – saves the current draft
- Undo changes (Ctrl + R) – reverts to the last saved state
Frequent validation helps catch errors early in complex workflows.
Opening settings
Double-click an element to open its configuration panel
Common configuration fields
- Text fields
- Checkboxes
- Drop-down lists (highlighted in blue)
- Variables for dynamic values
Click Apply to save element settings.
For detailed information about configuring Conditions and Actions, see their respective pages.
Elements can also be renamed using the Title field for better searchability.
[ADD IMAGE]
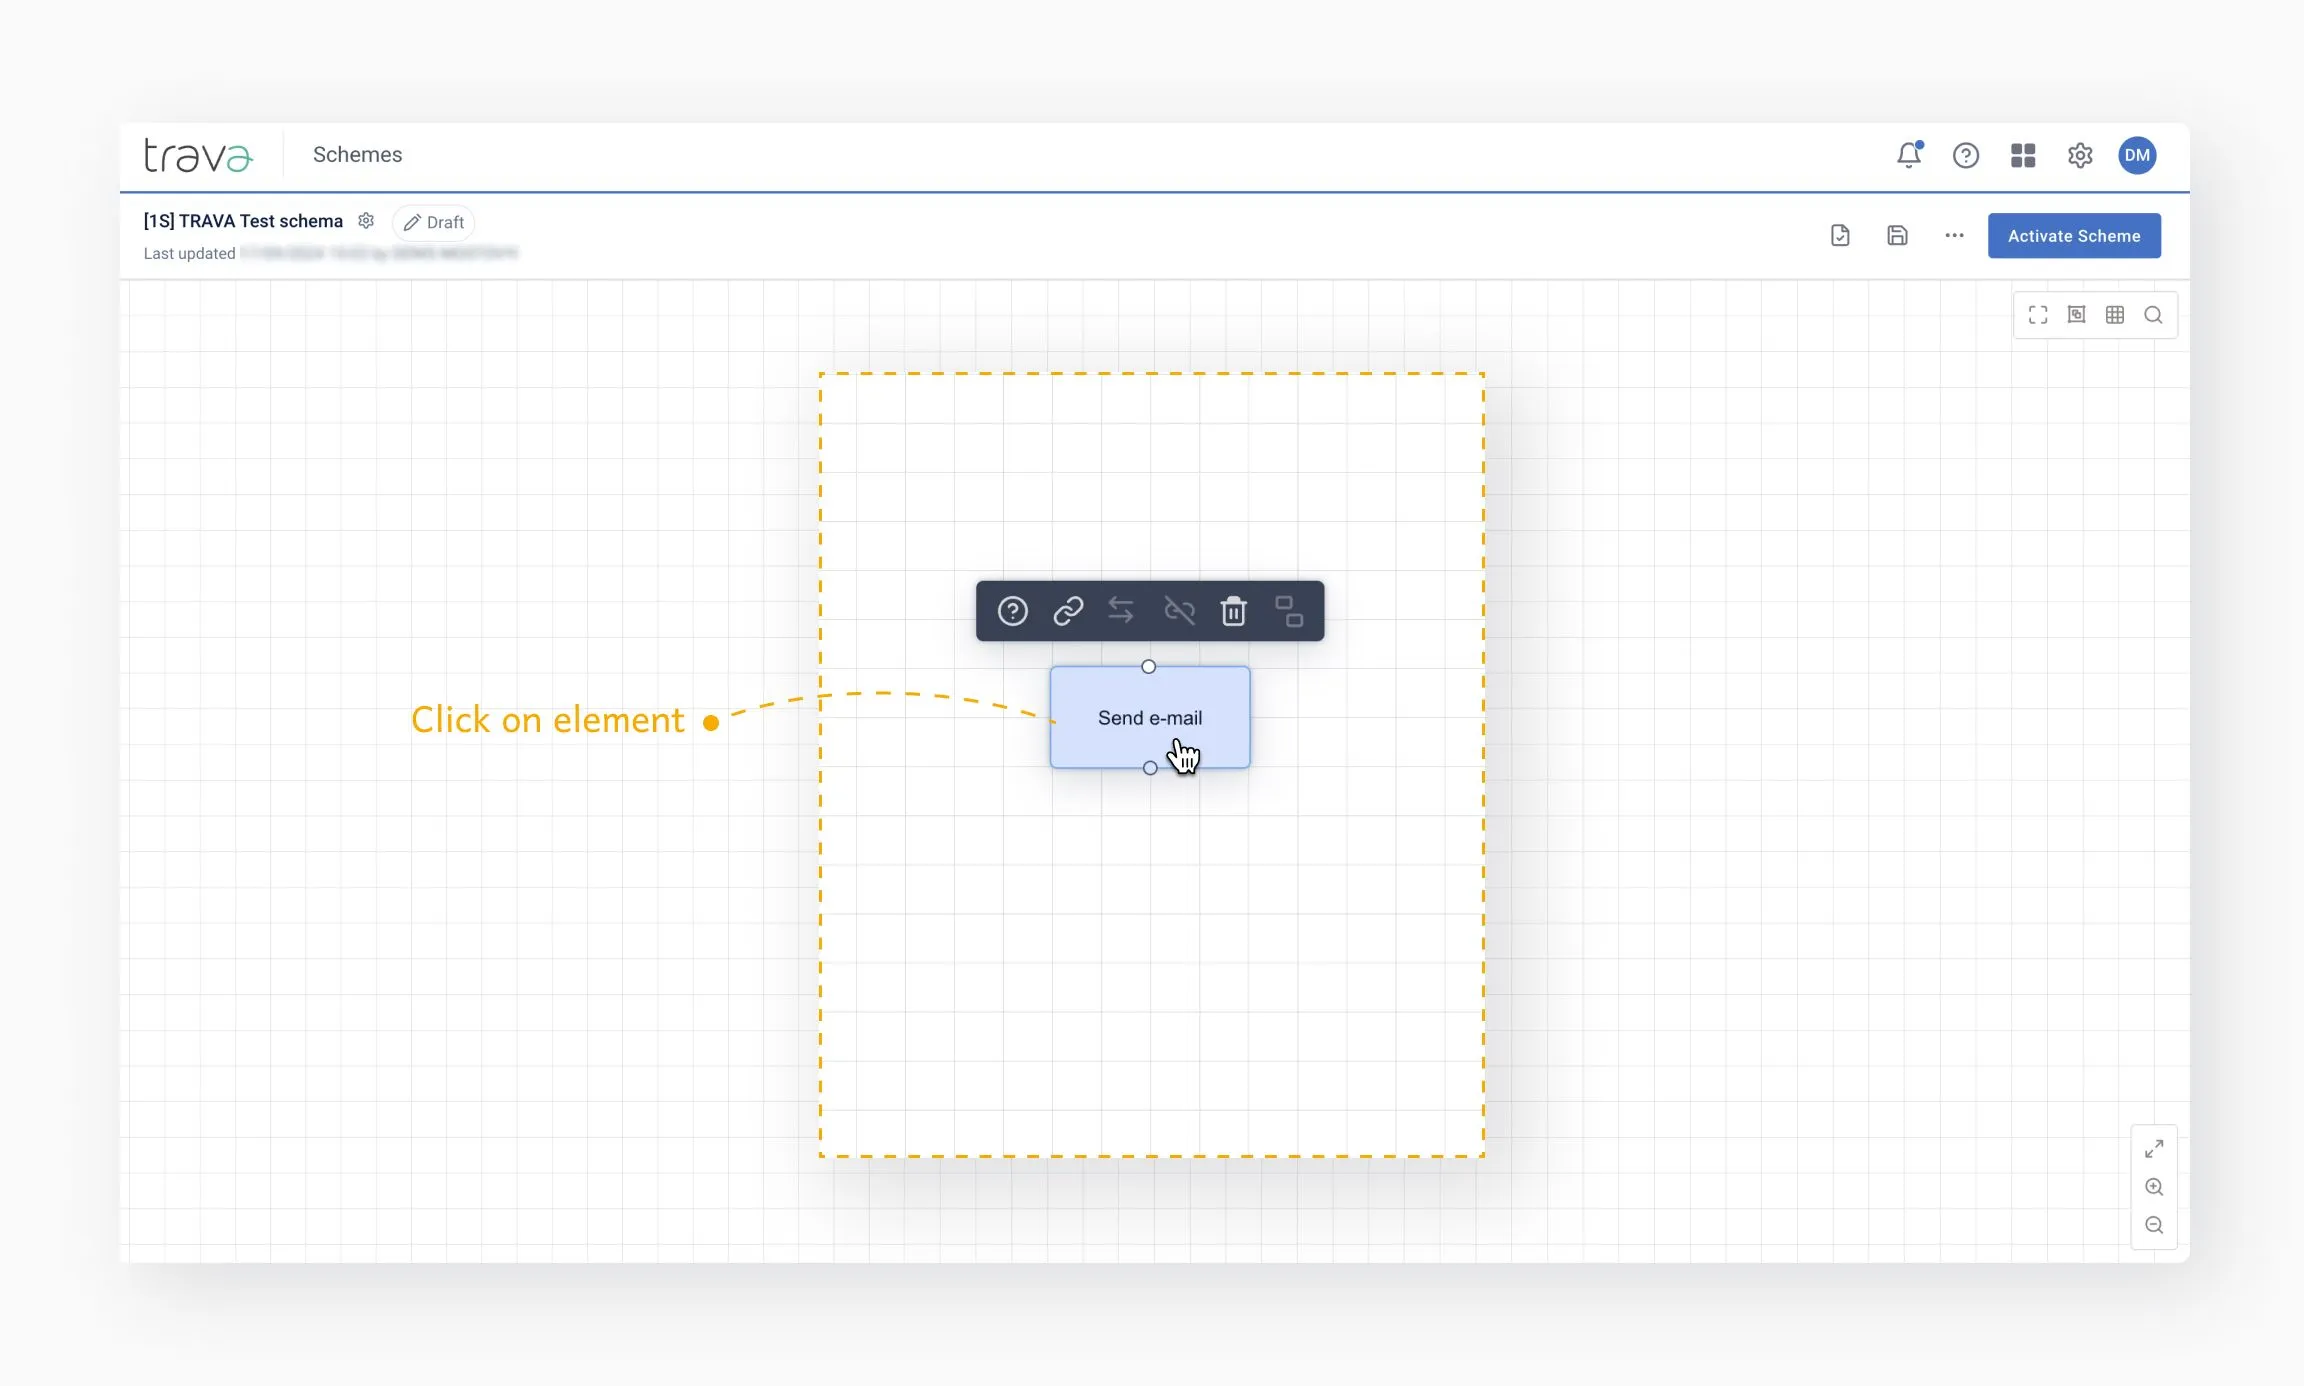
Left-clicking an element opens additional tools:
- Help – create a support ticket
- Copy link – generate a direct link to the element
- Swap OK / FAIL – adjust visual layout without changing logic
- Remove all connections – clear all links
- Delete – remove element from the Canvas
- Remove from group – detach element from a group
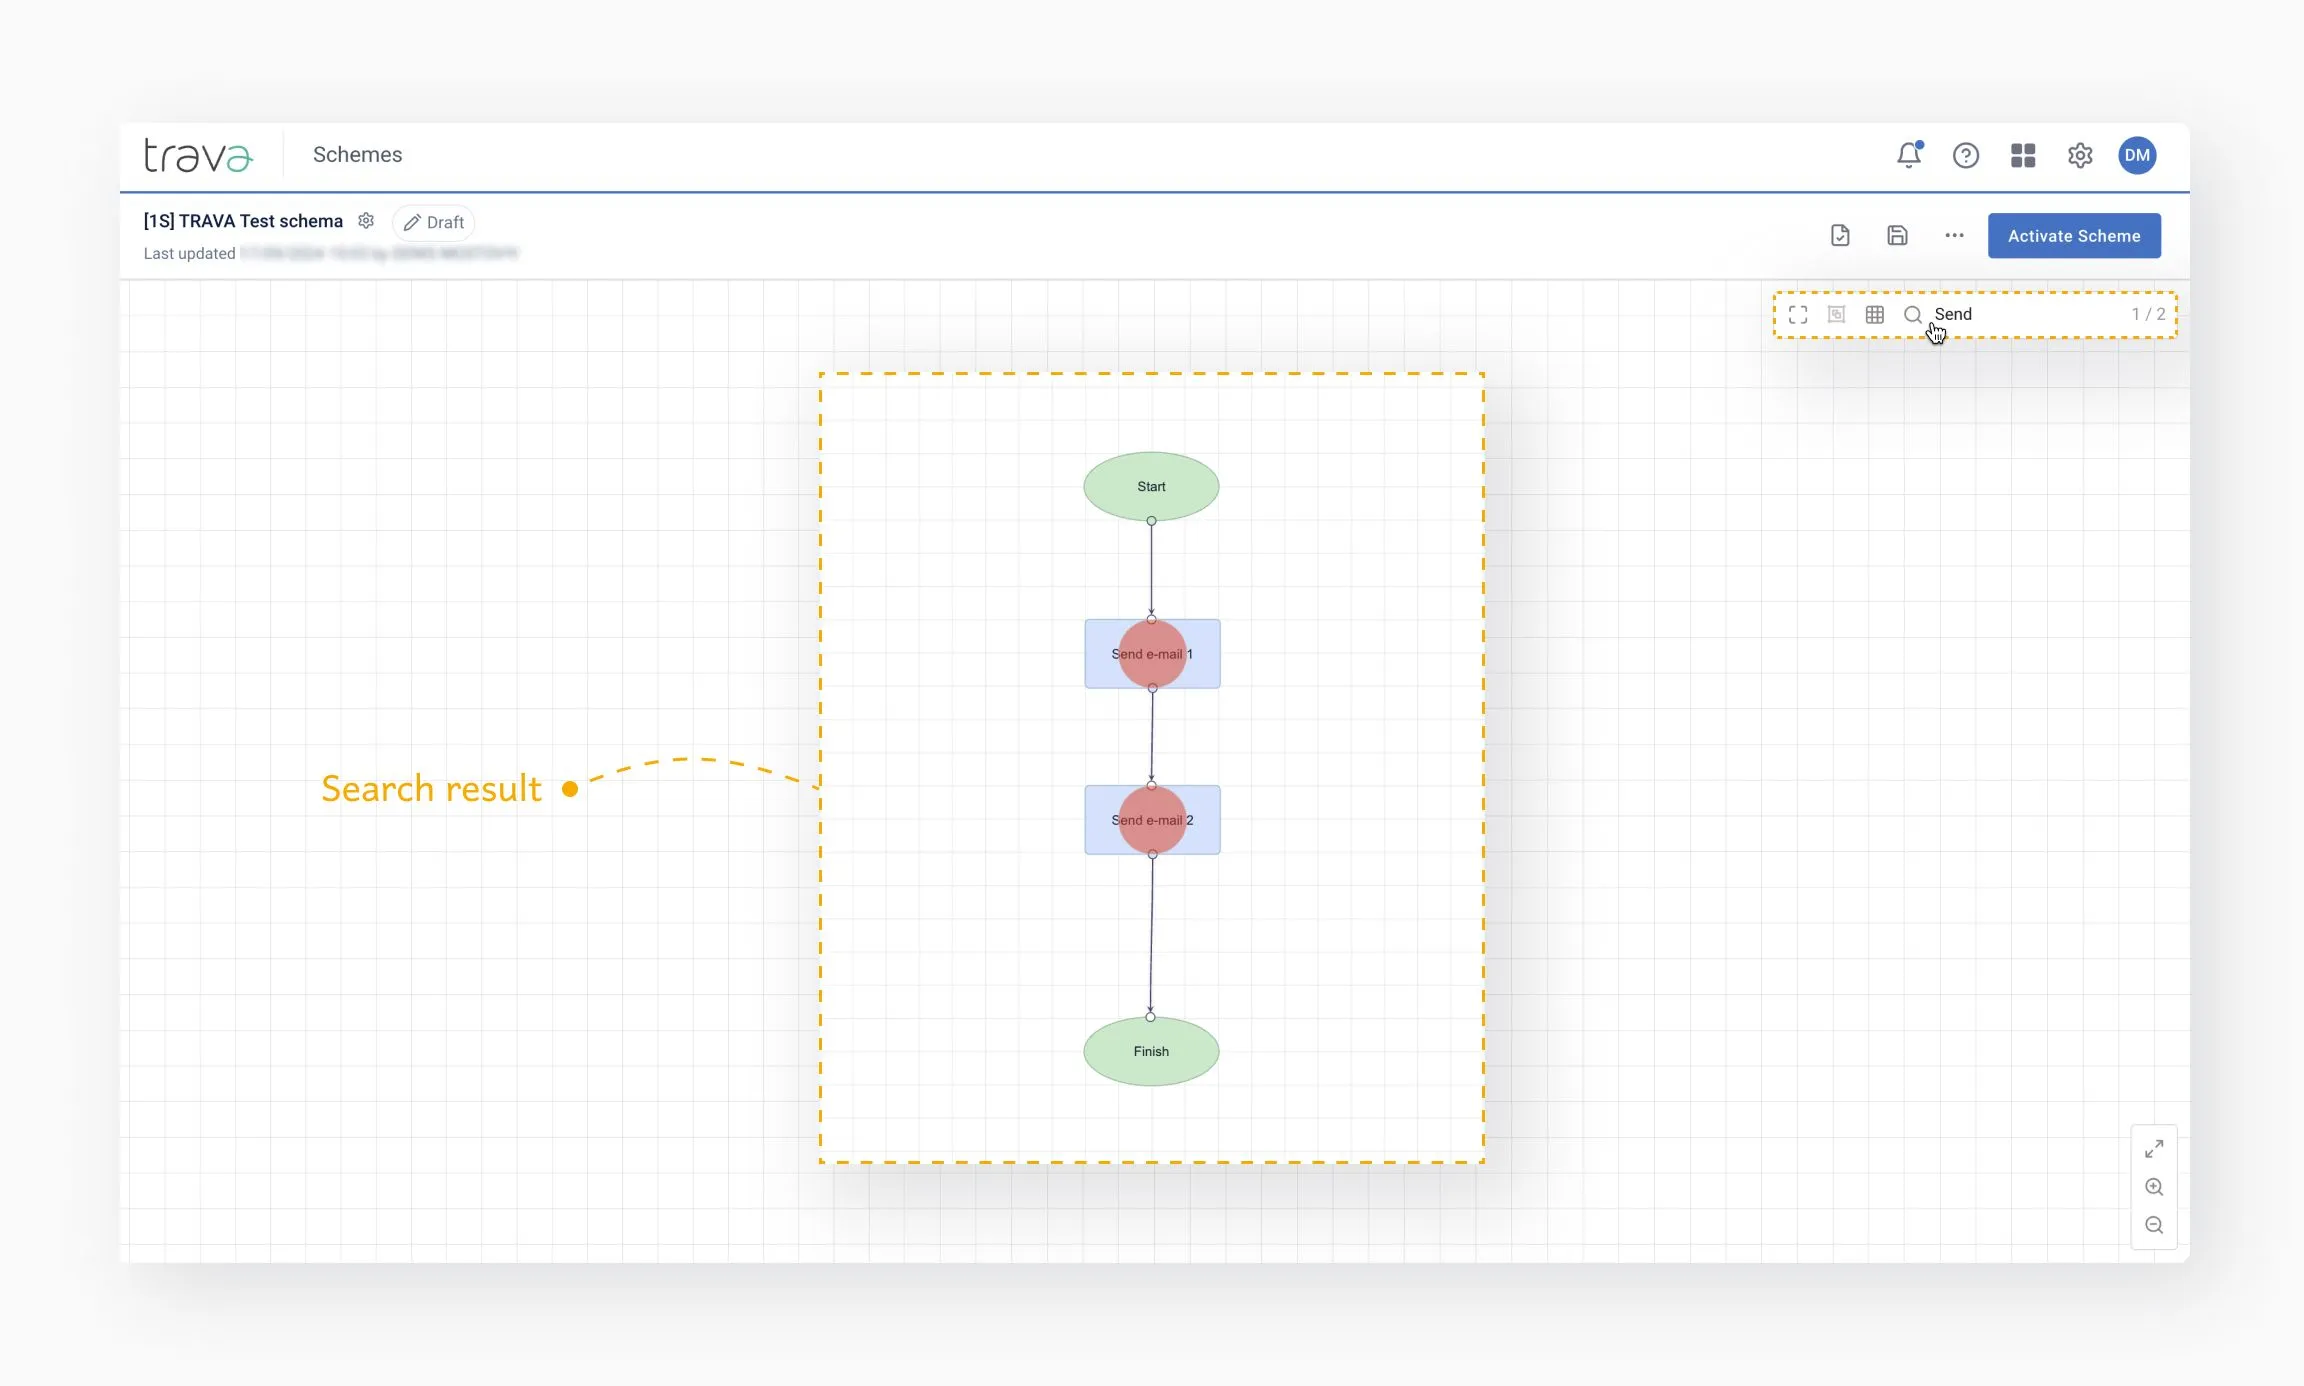
The search tool allows you to find elements by:
- Default element name
- Custom title
- Notes added to the scheme
Matching elements are highlighted directly on the Canvas.
- Validate often during editing
- Use groups for complex logic
- Rename key elements for clarity
- Use search to navigate large schemes
- Make sure to save your work at key stages