Learn how to test your scheme using a PNR – either in parts or as a full workflow. In this article, we’ll walk you through the process using a simple, pre-built scheme as an example. You can choose to replicate the provided workflow or create your own version.
In the Start element, select External start as the source. This setting allows you to manually trigger the processing of reservations one at a time, giving you full control over the workflow.
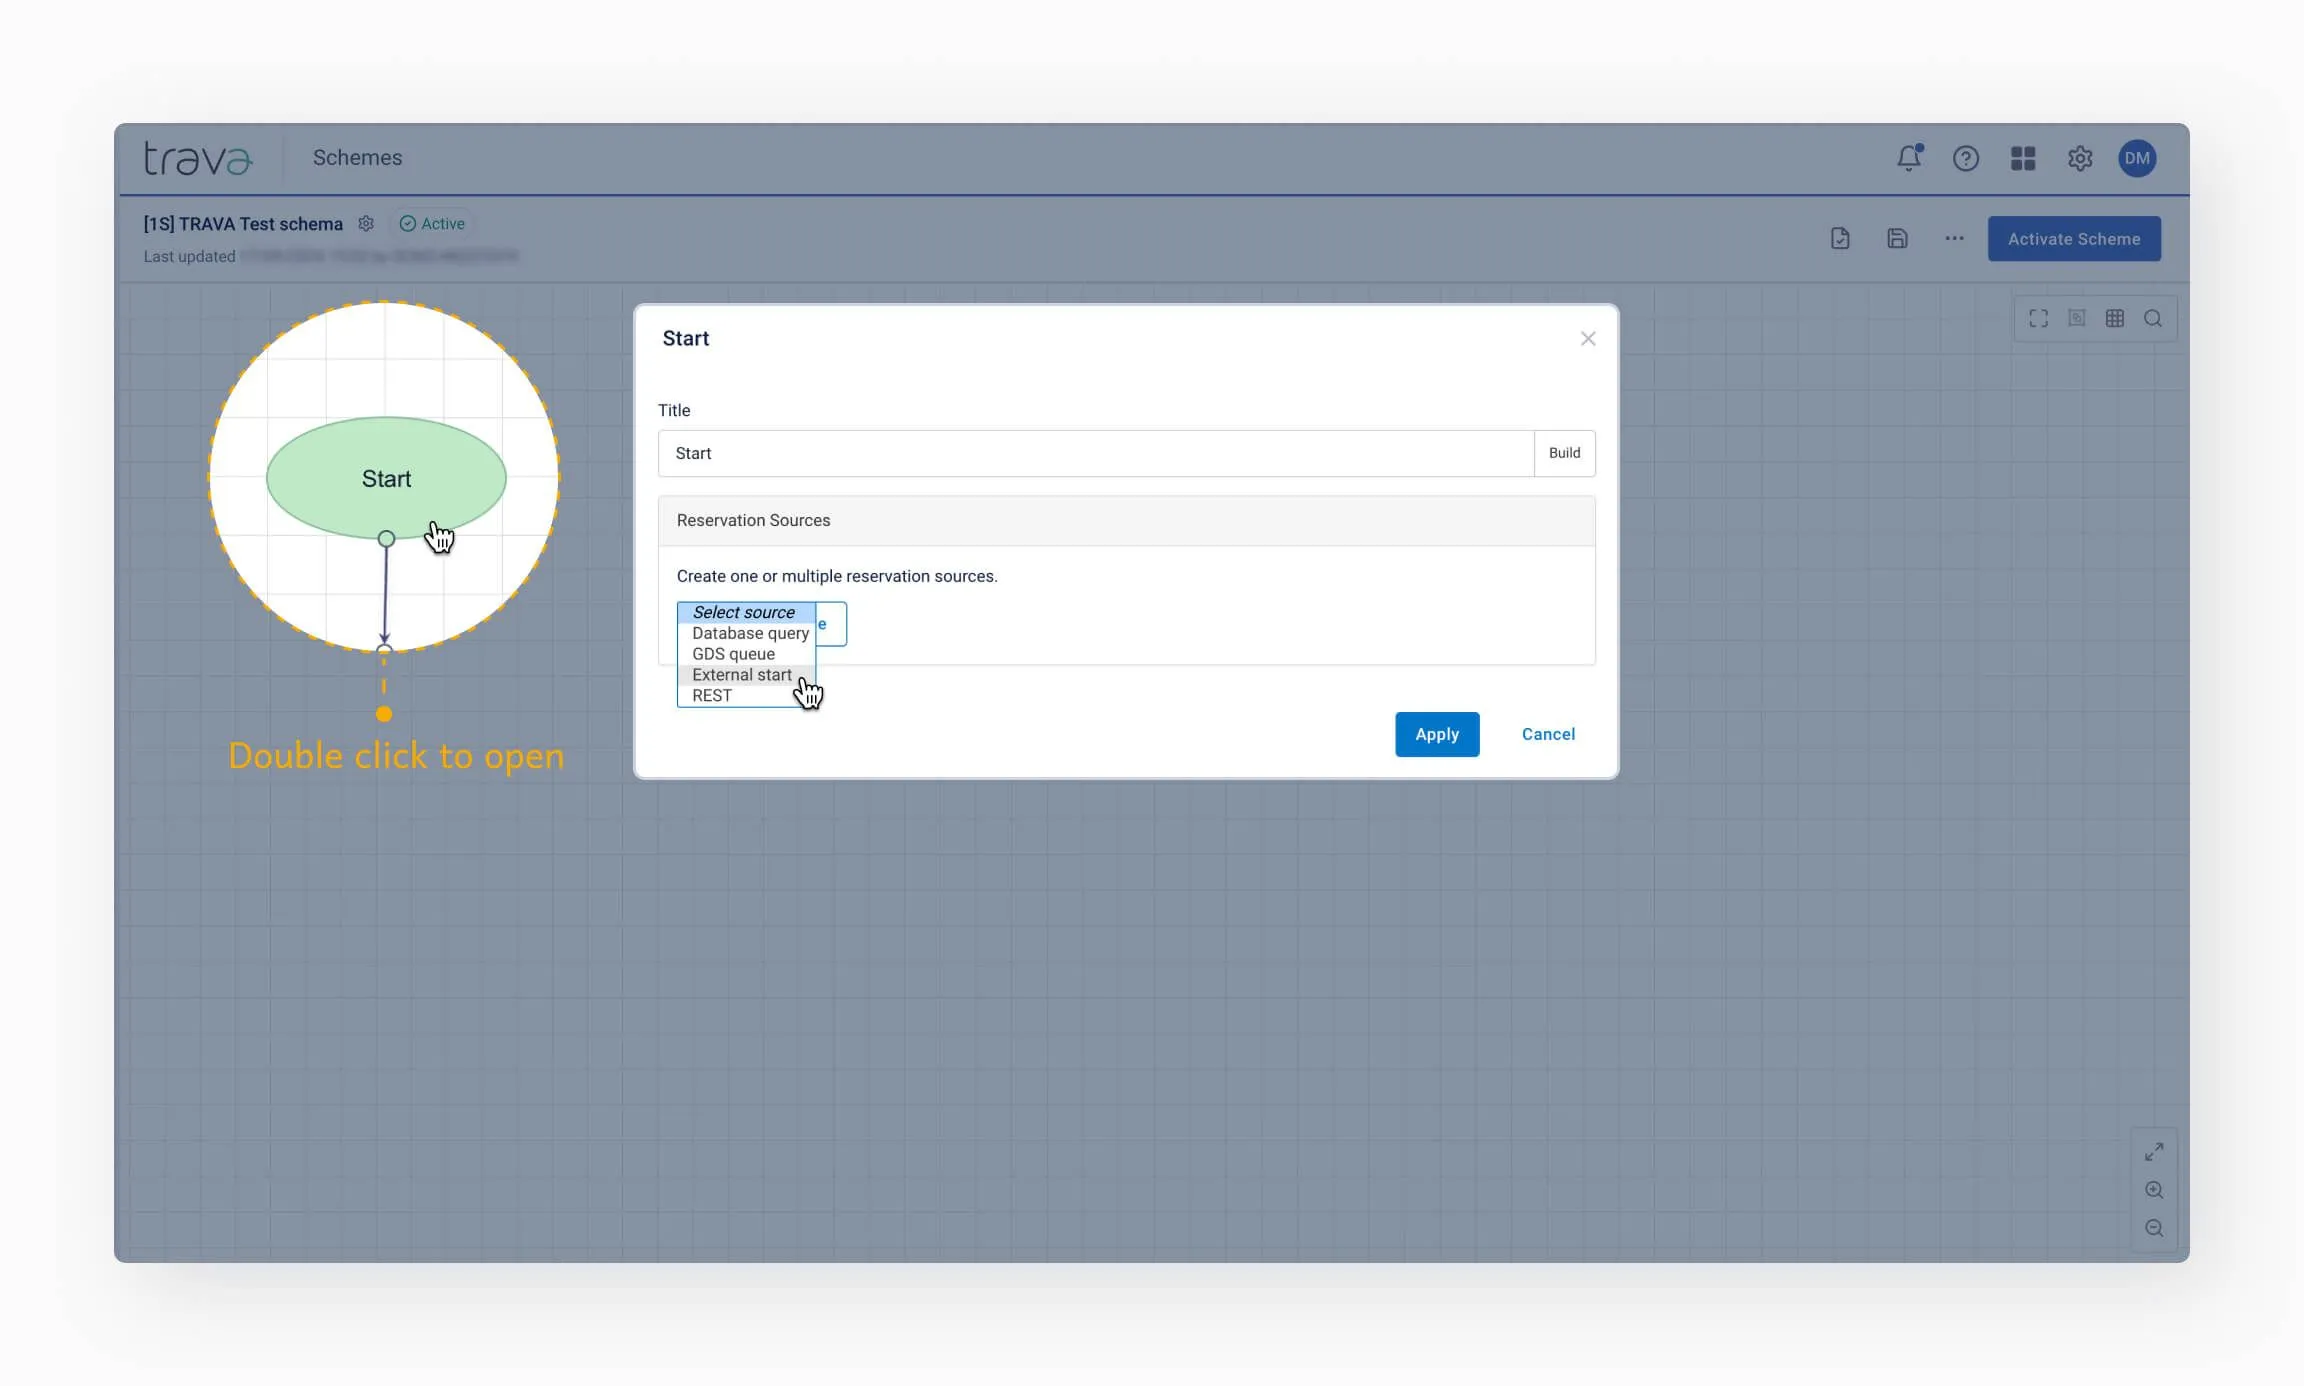
As an example, we recommend using a newly created reservation to avoid modifying real PNRs. You can also test with an existing reservation. In that case, make sure to enable Test Mode to prevent any changes from being applied to the PNR via the GDS (see Build your first workflow).
Later, if you need to update a working scheme that is already linked to a specific source, we recommend creating a separate test scheme for experimenting with complex conditions. Once you're confident the logic works, you can transfer those components into the main scheme.
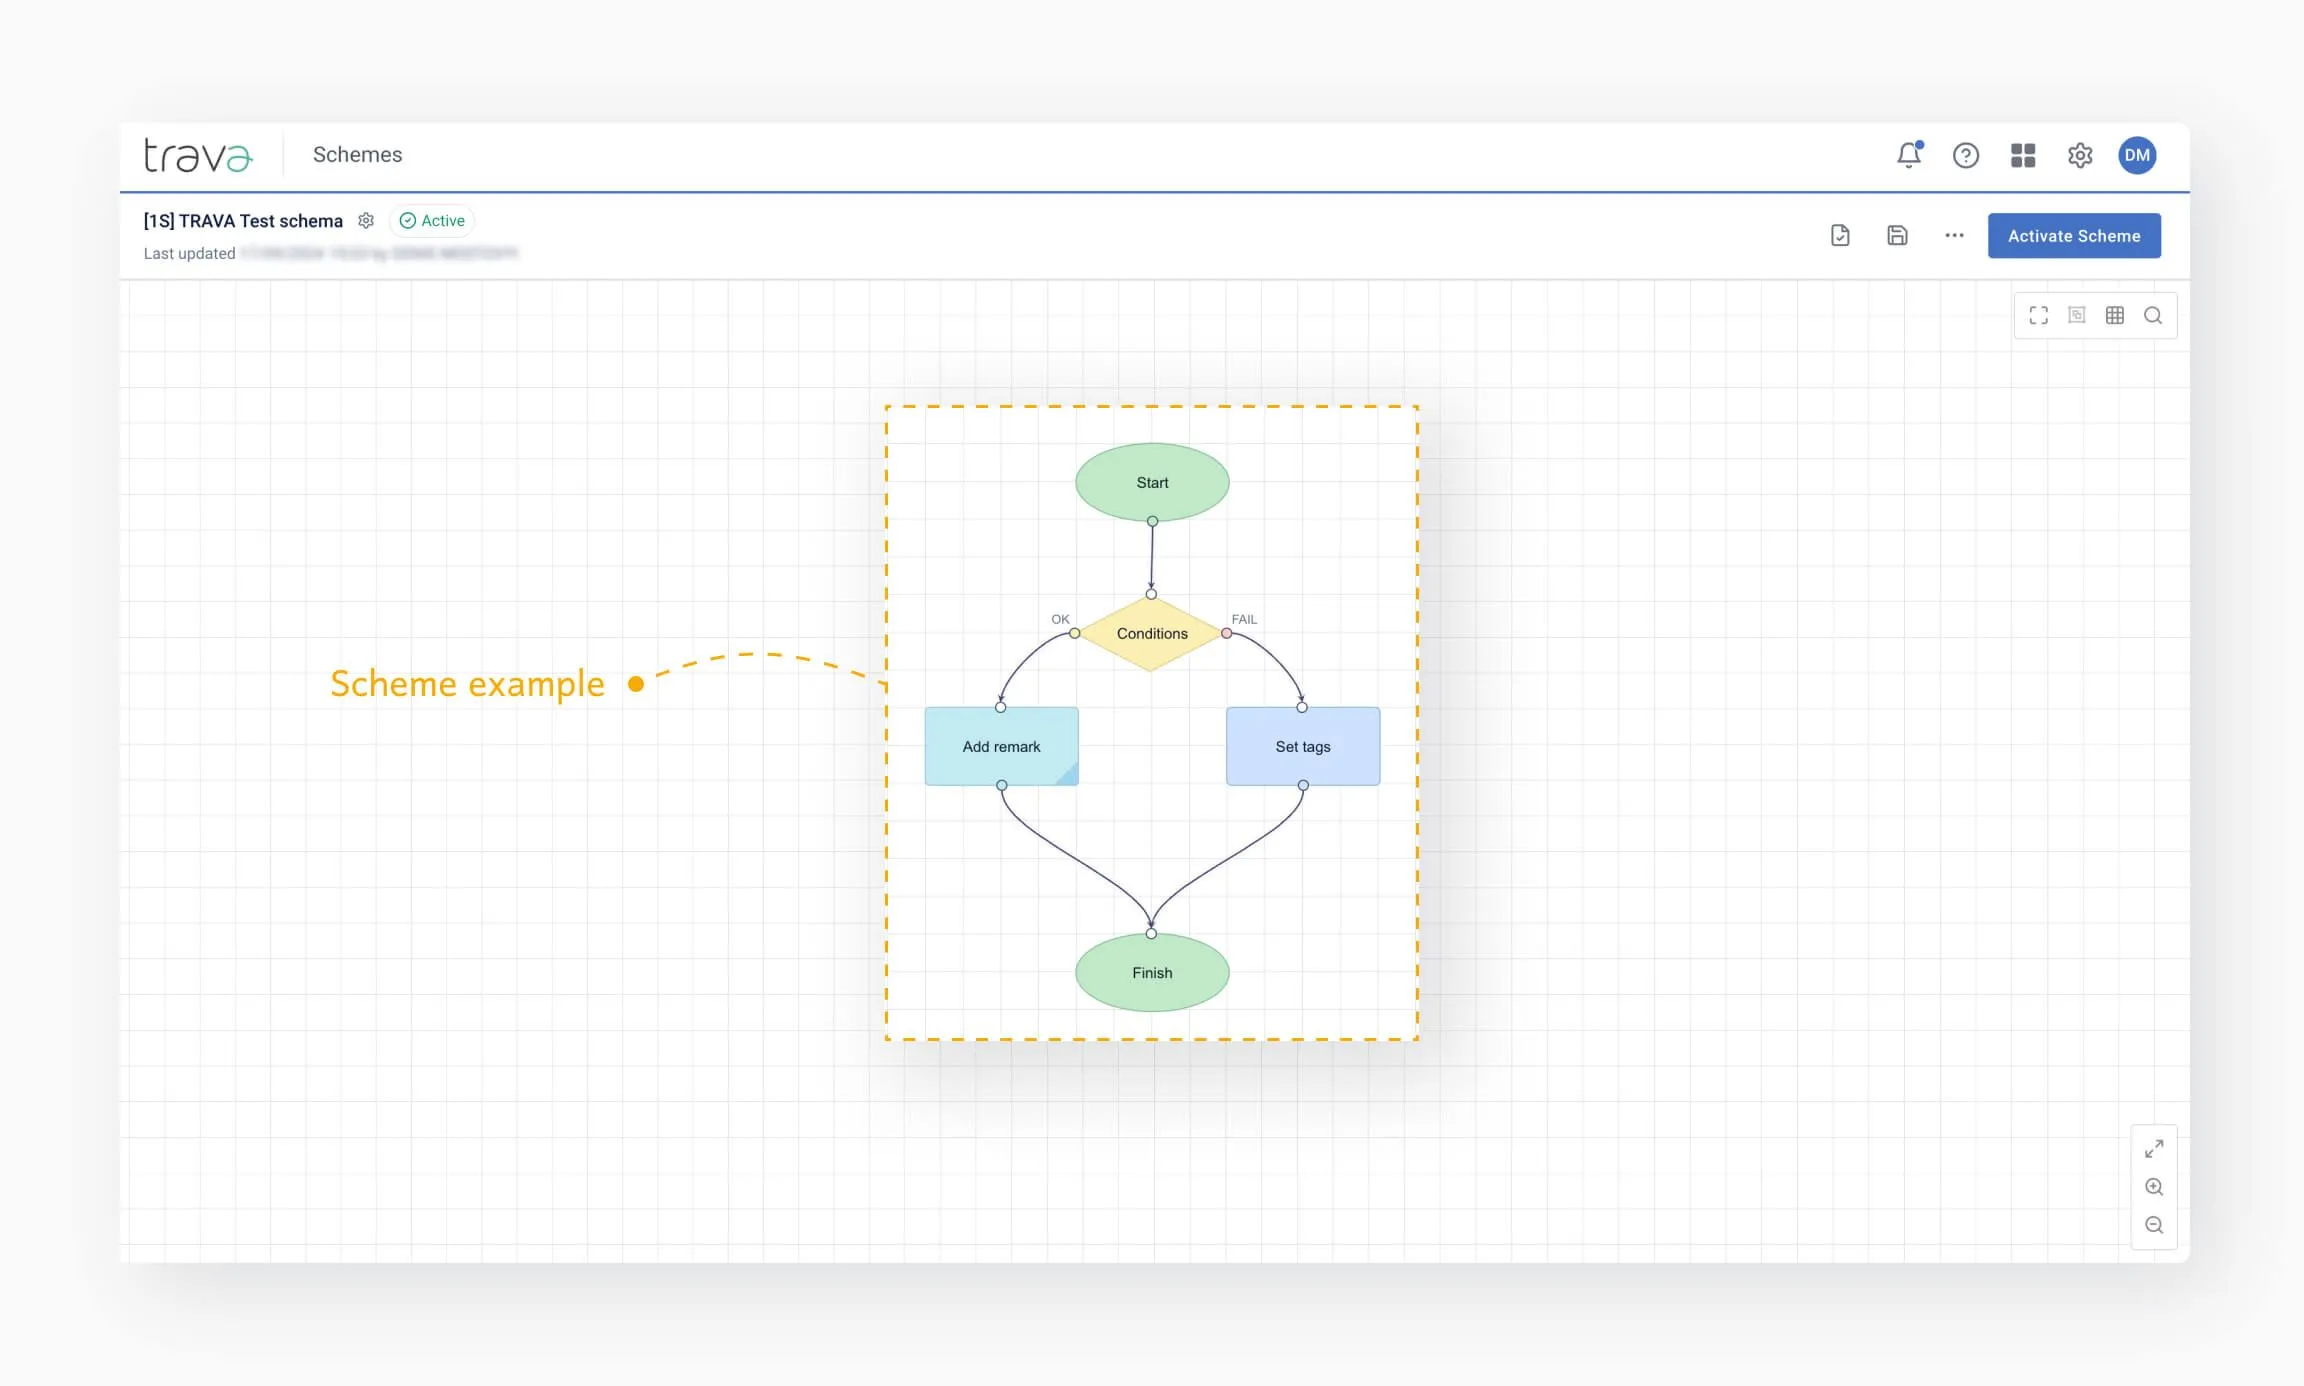
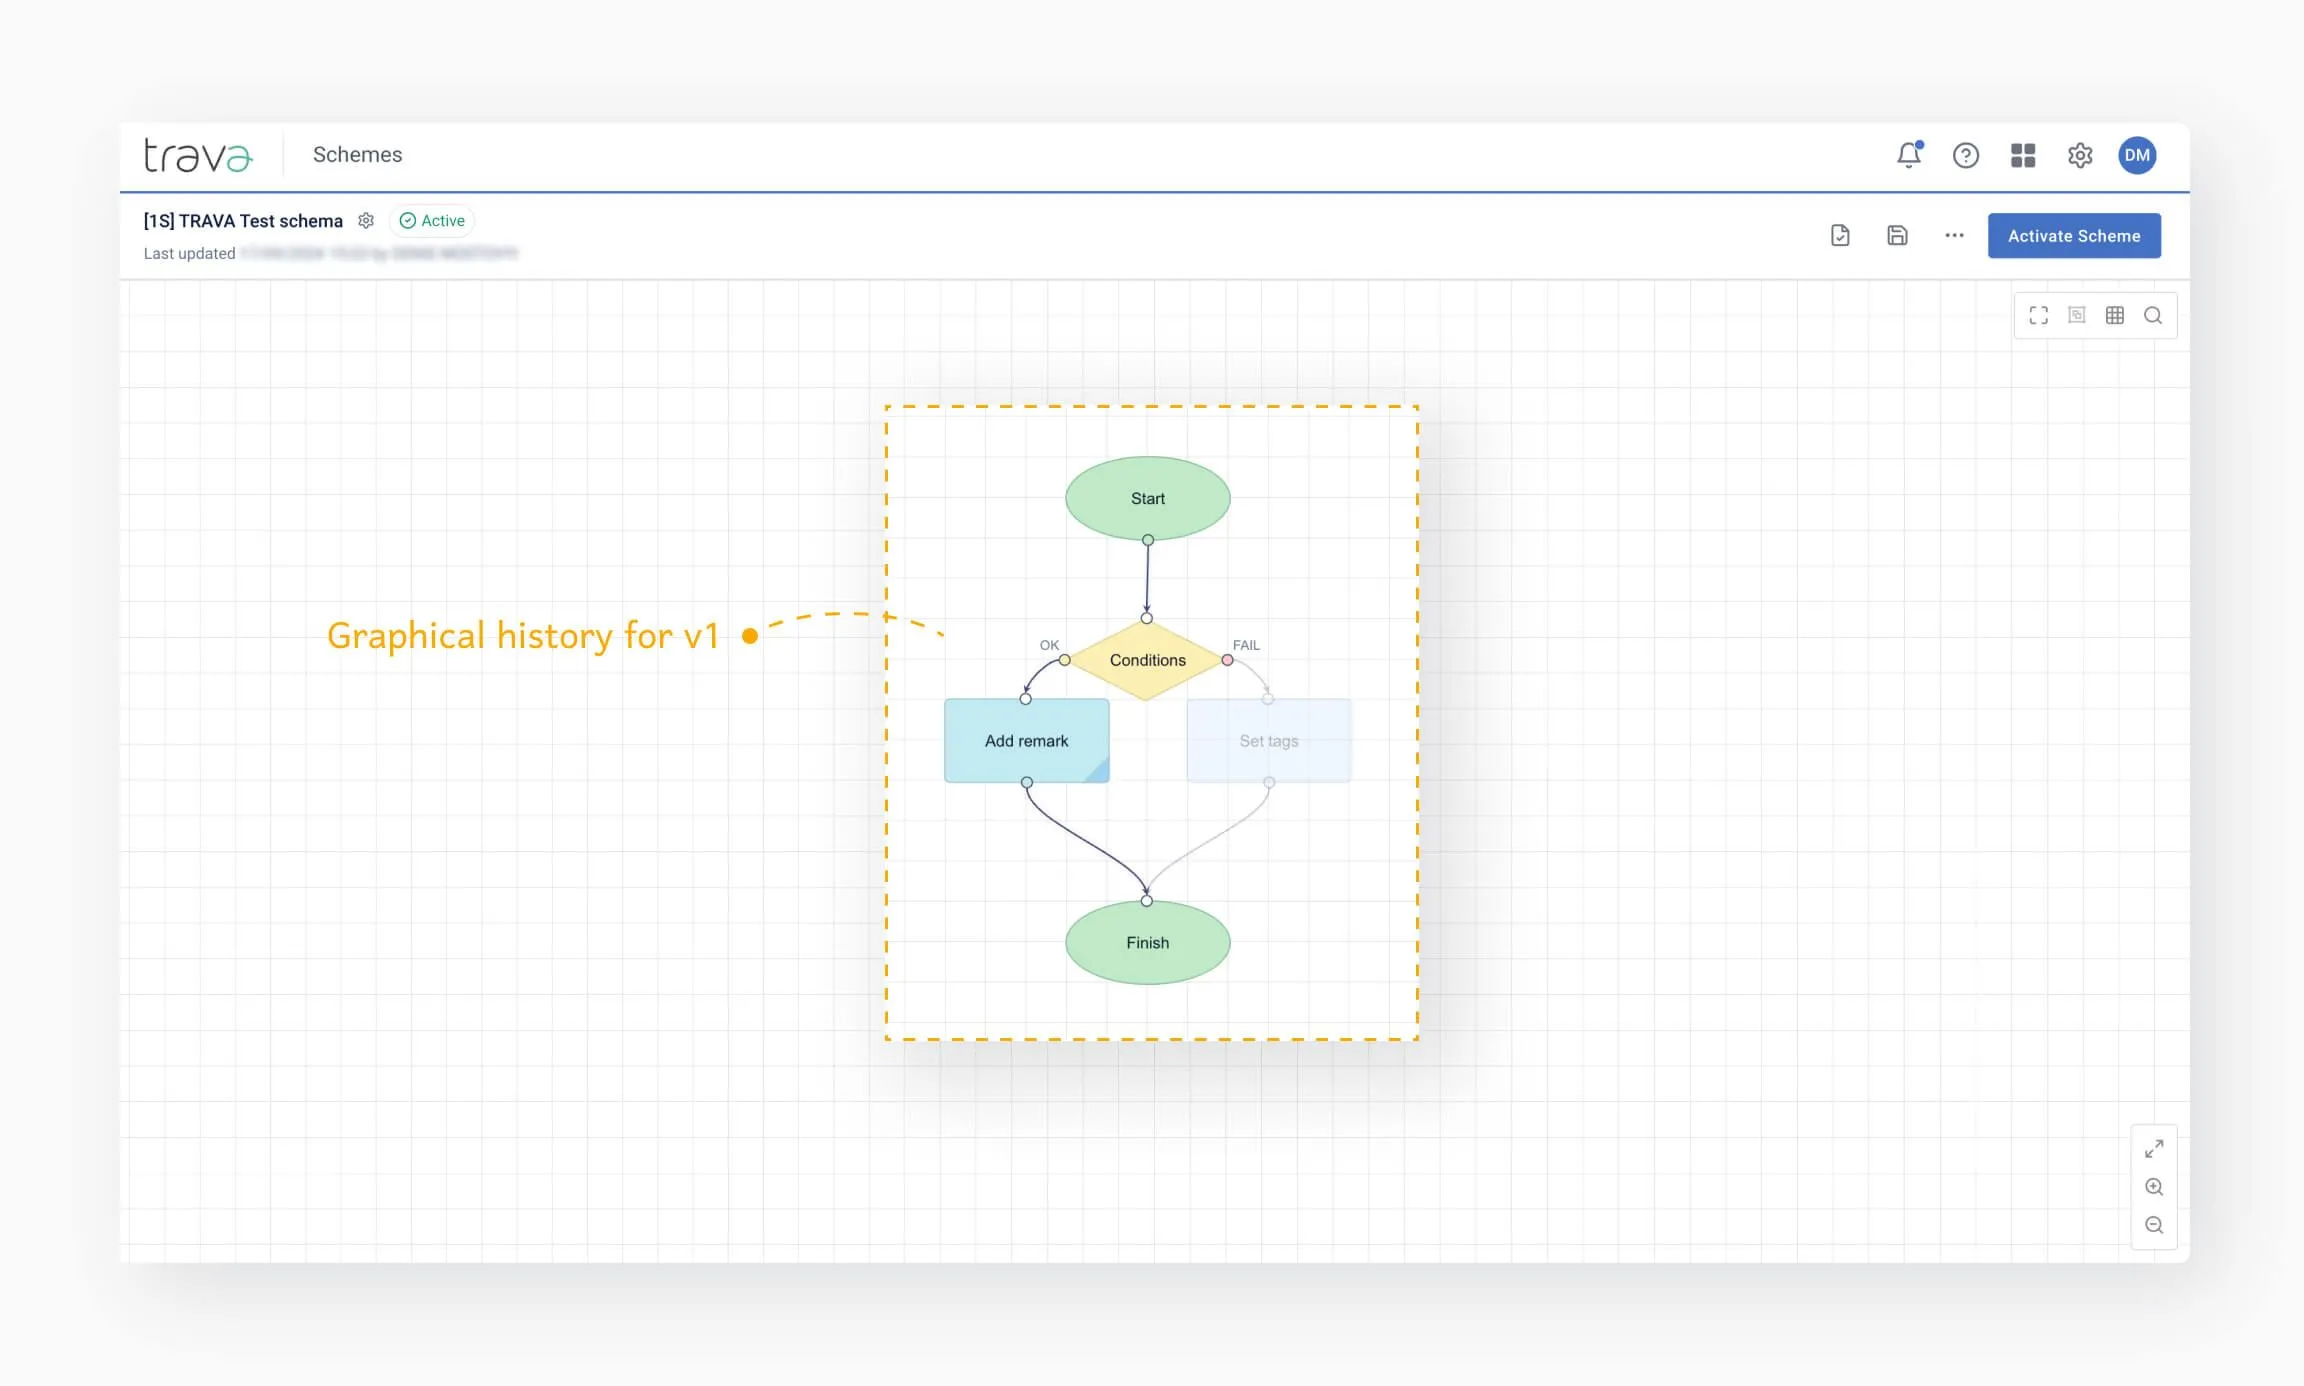
In the example scheme provided, the goal is to verify that all segments in the PNR have the status HK.
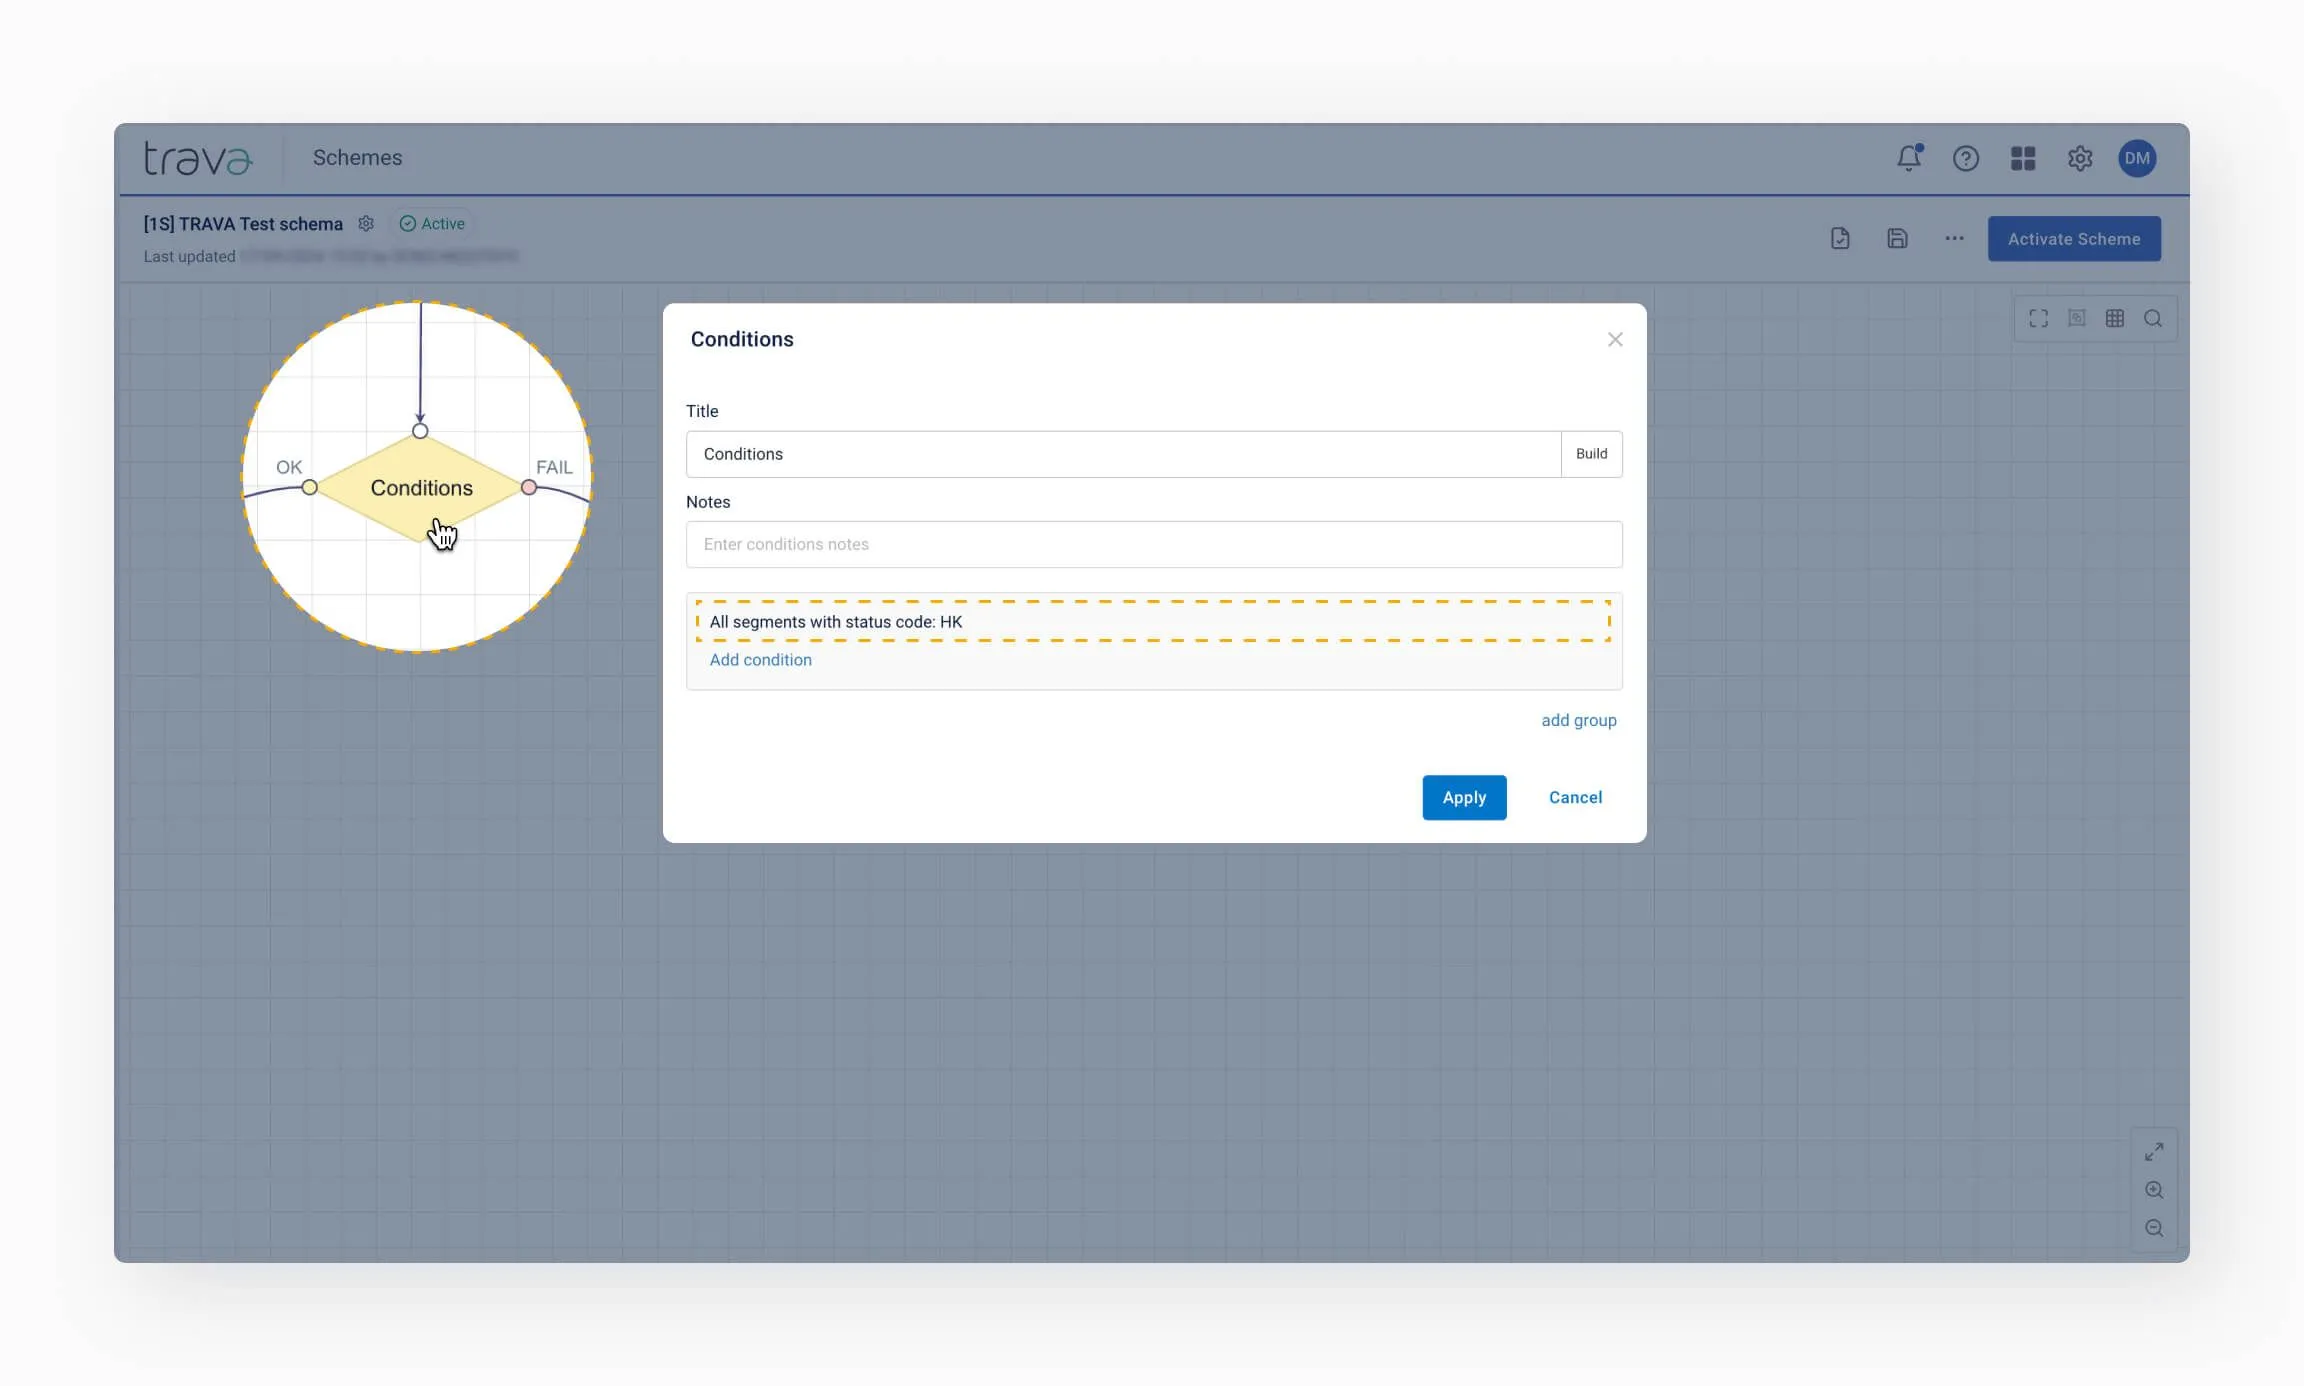
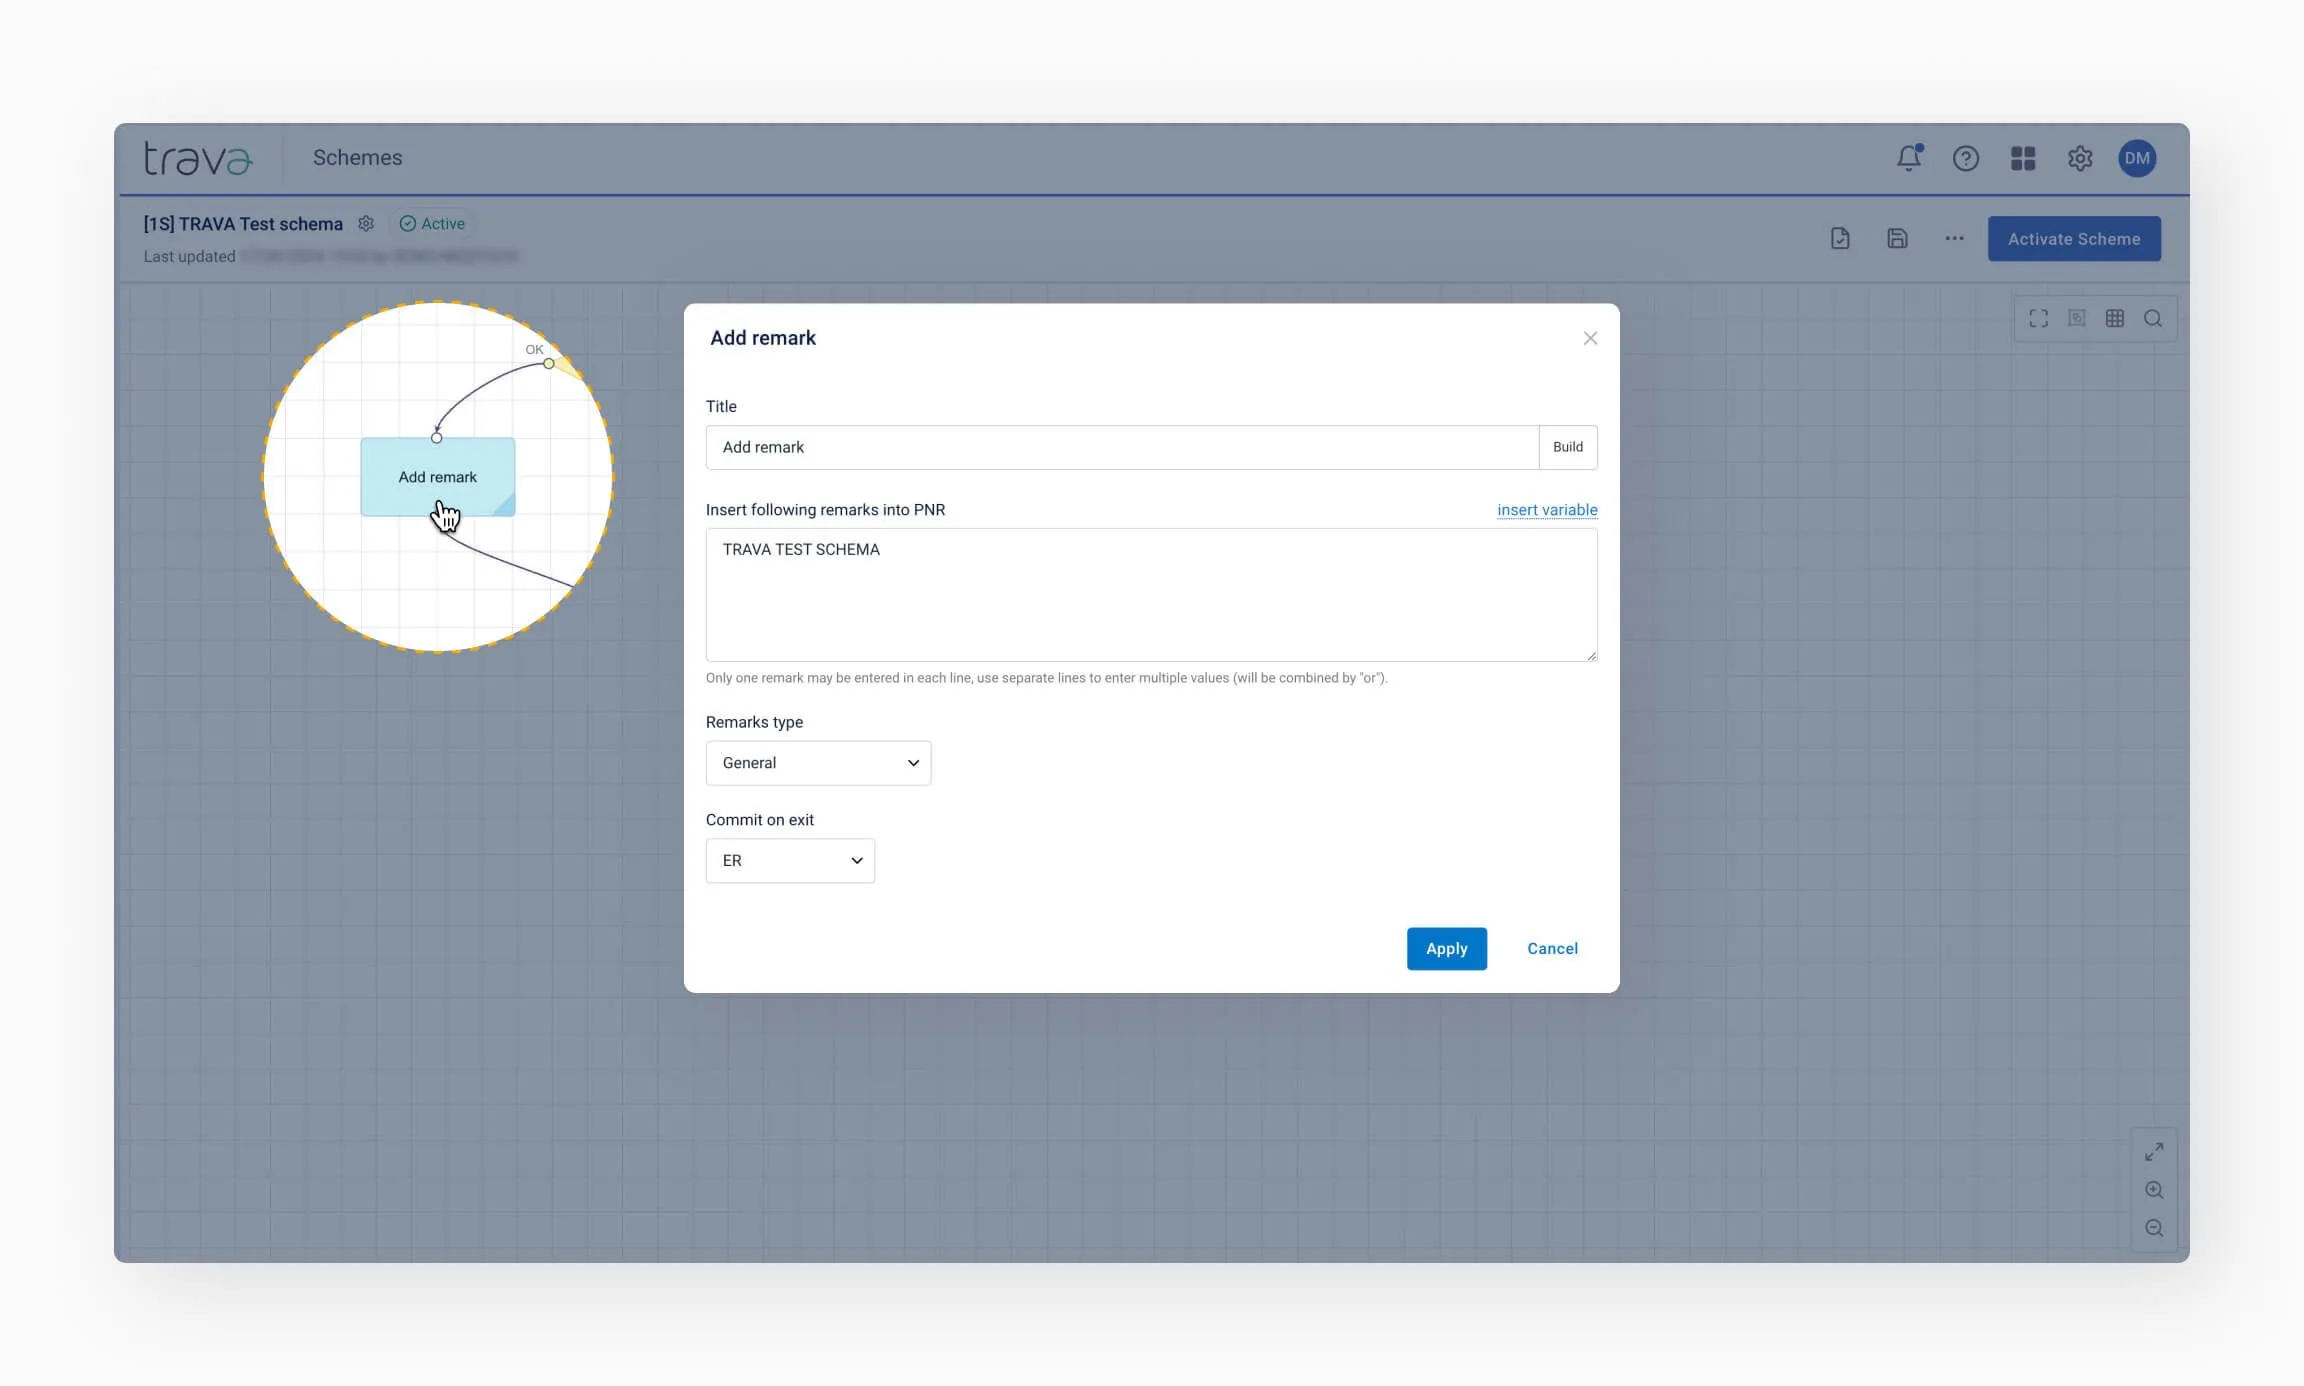
If all segments meet this condition, the scheme routes the PNR along the OK path. A remark will be added according to the settings of the Add remark element.
If any segment in the PNR does not have the status HK, the system routes the PNR down the Fail path and assigns a tag to the booking.
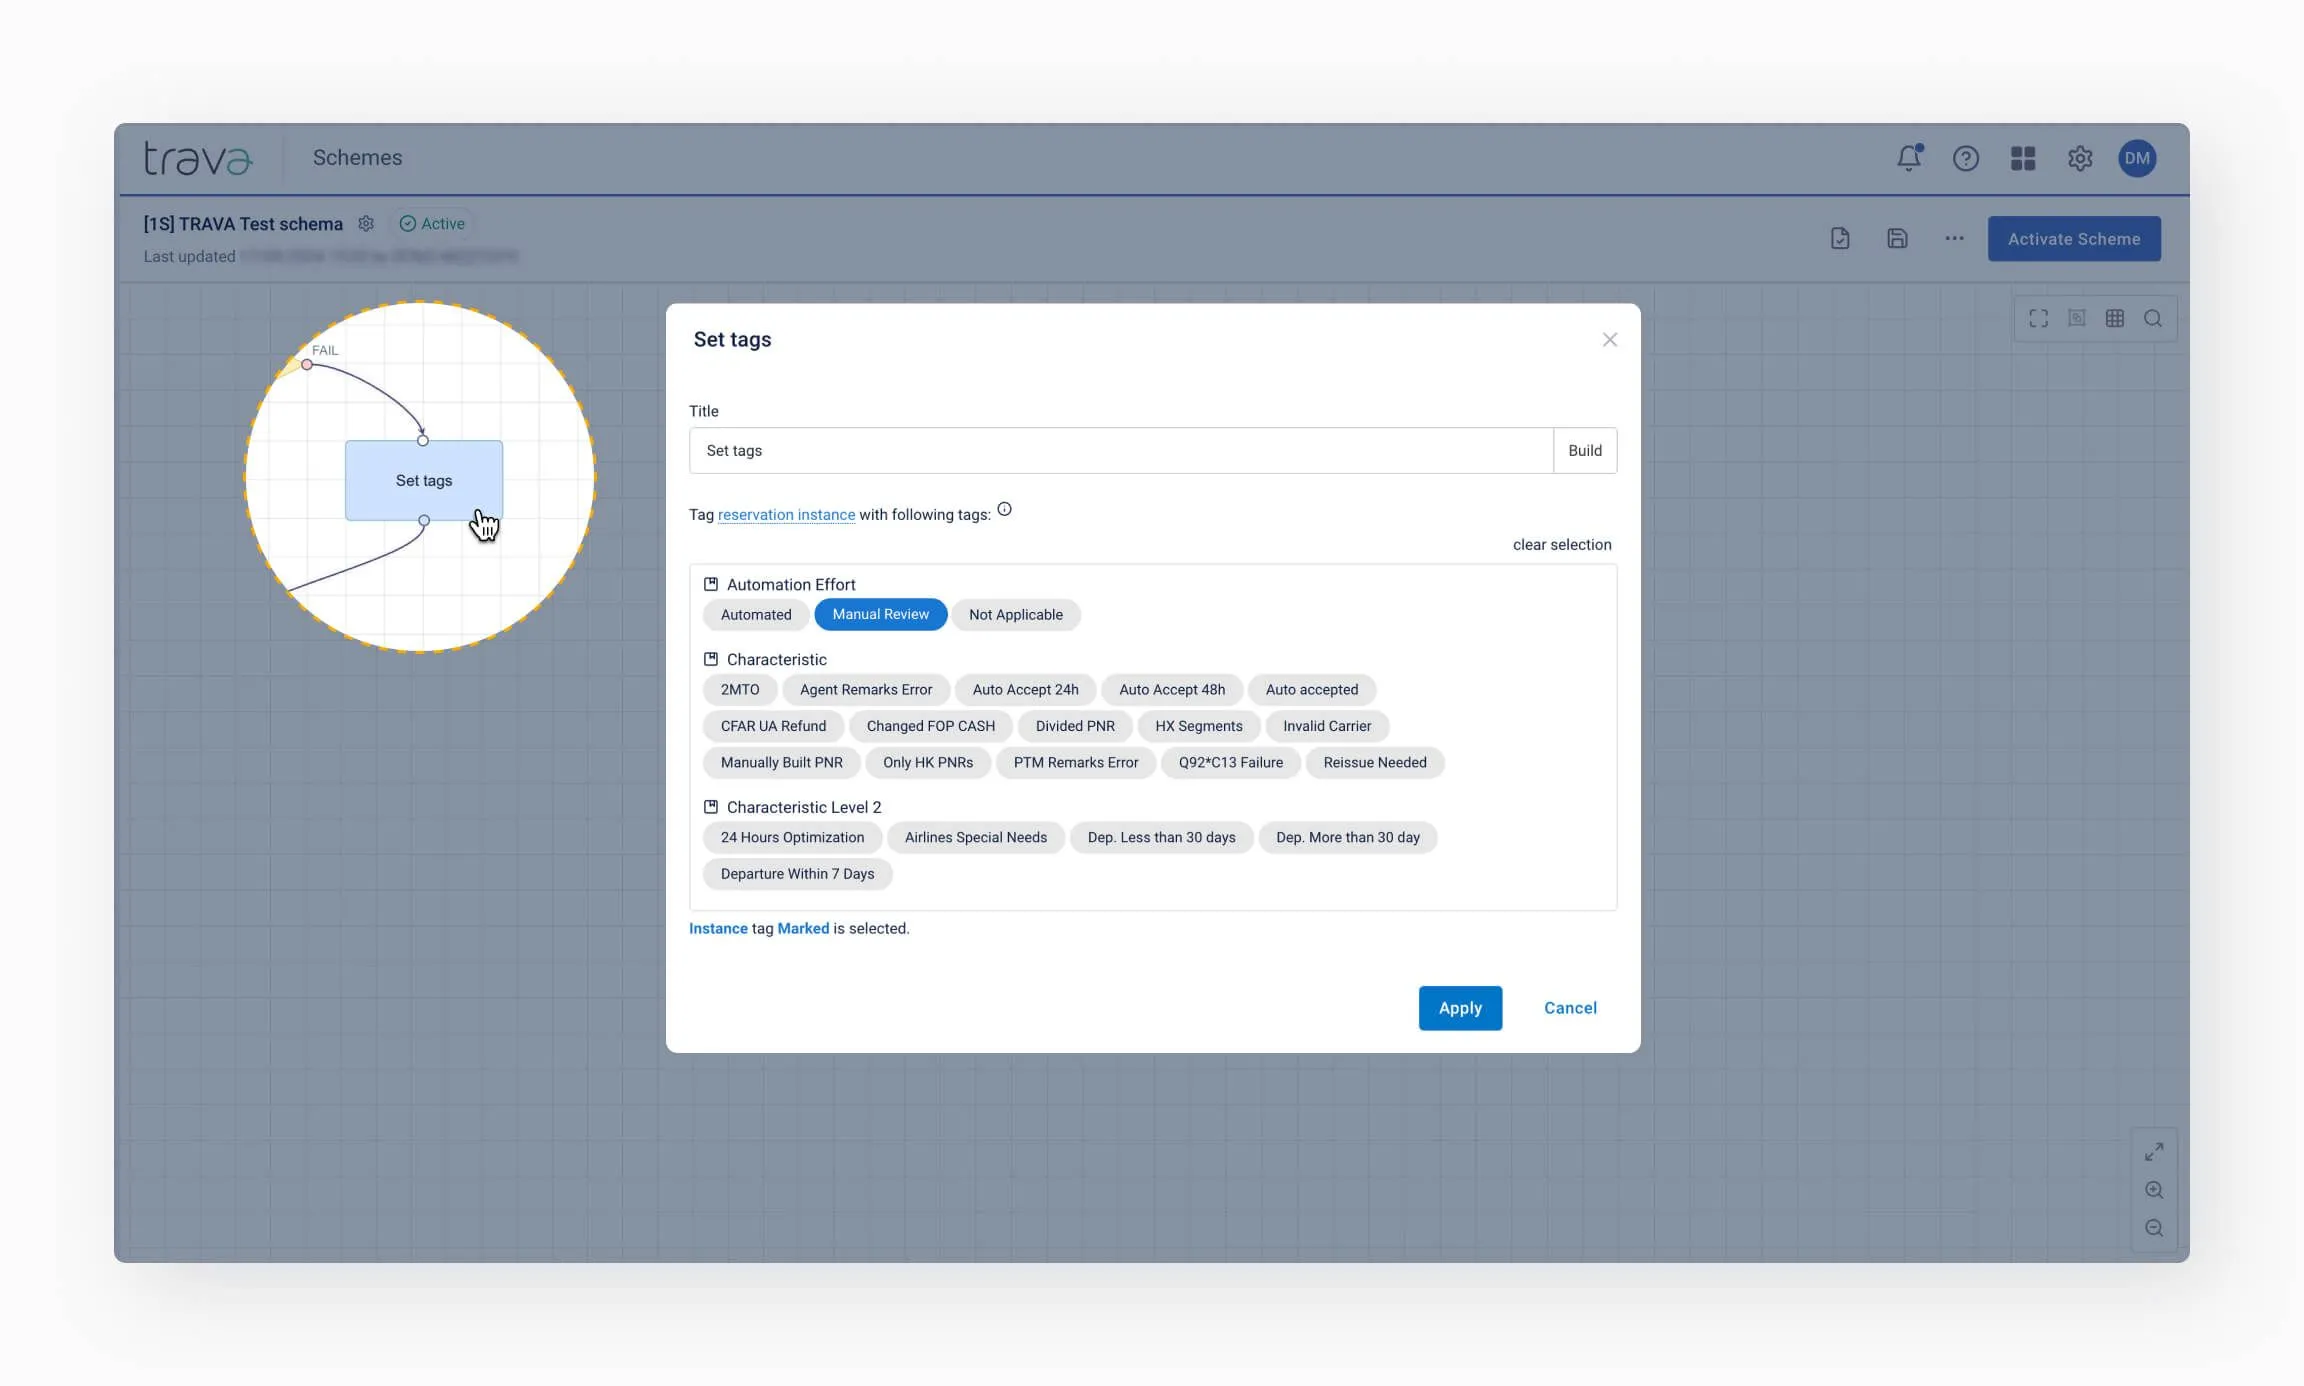
After building and checking the scheme, activate it and remember its name – you'll need to reference it later during testing.
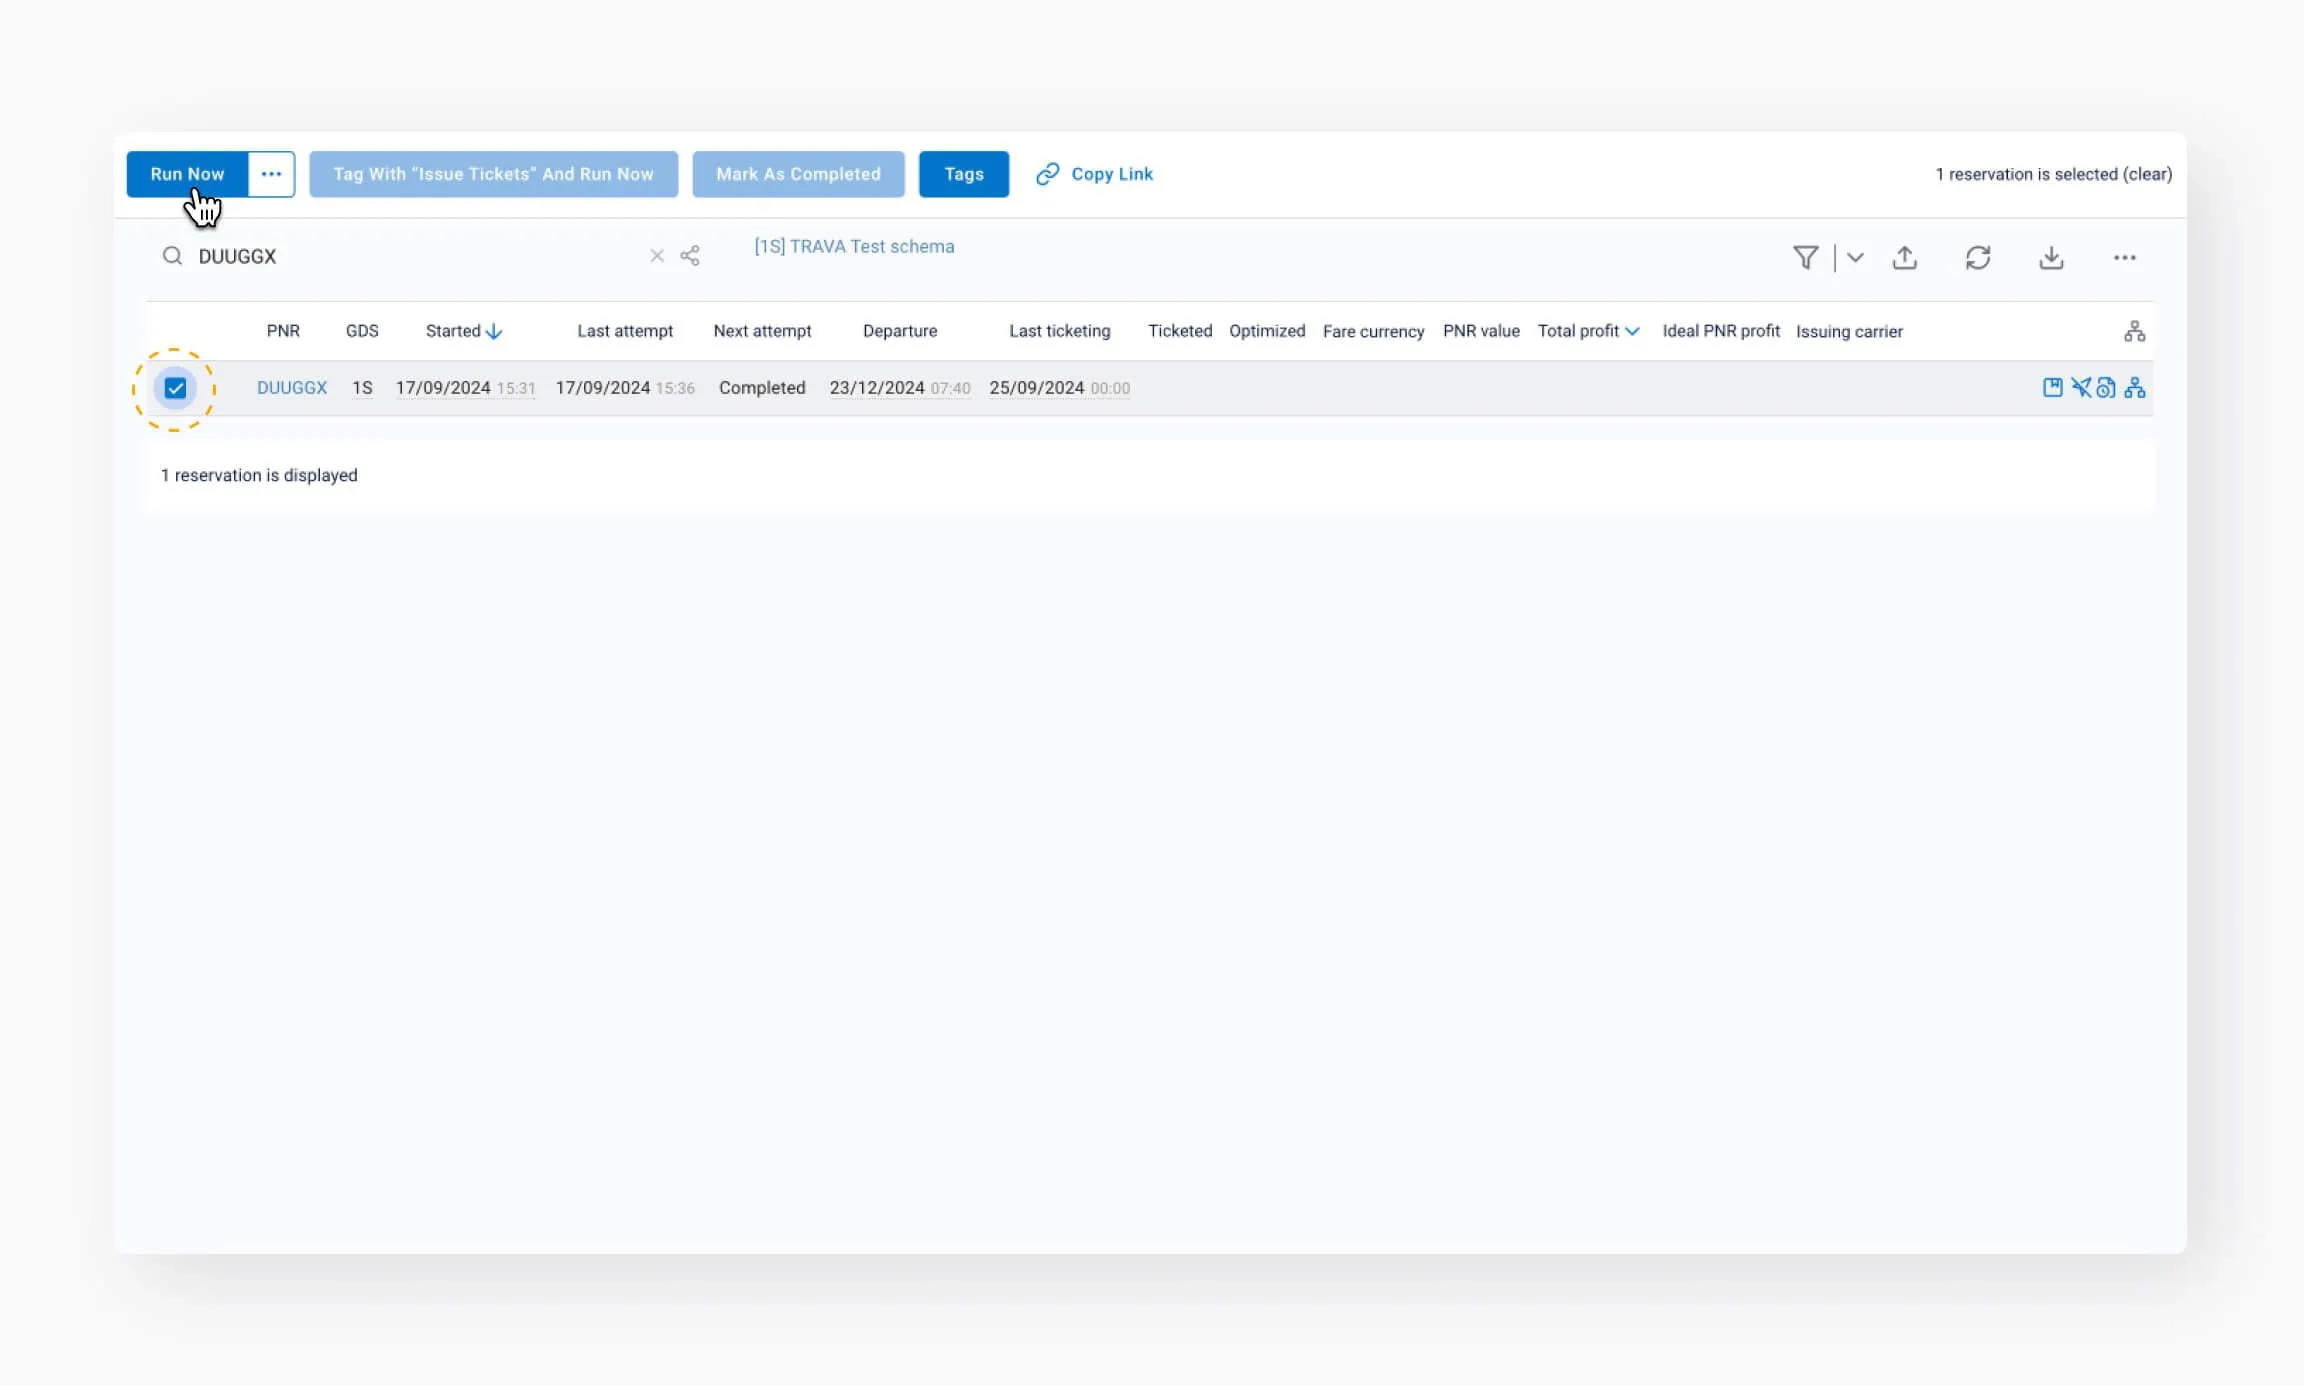
Go to the Reservation Processing page and click Ingest PNRs. In the window that opens, enter the name of the scheme and the PNR you want to process.
Make sure to enter the correct scheme name. Selecting the wrong scheme could result in unintended changes to the PNR.
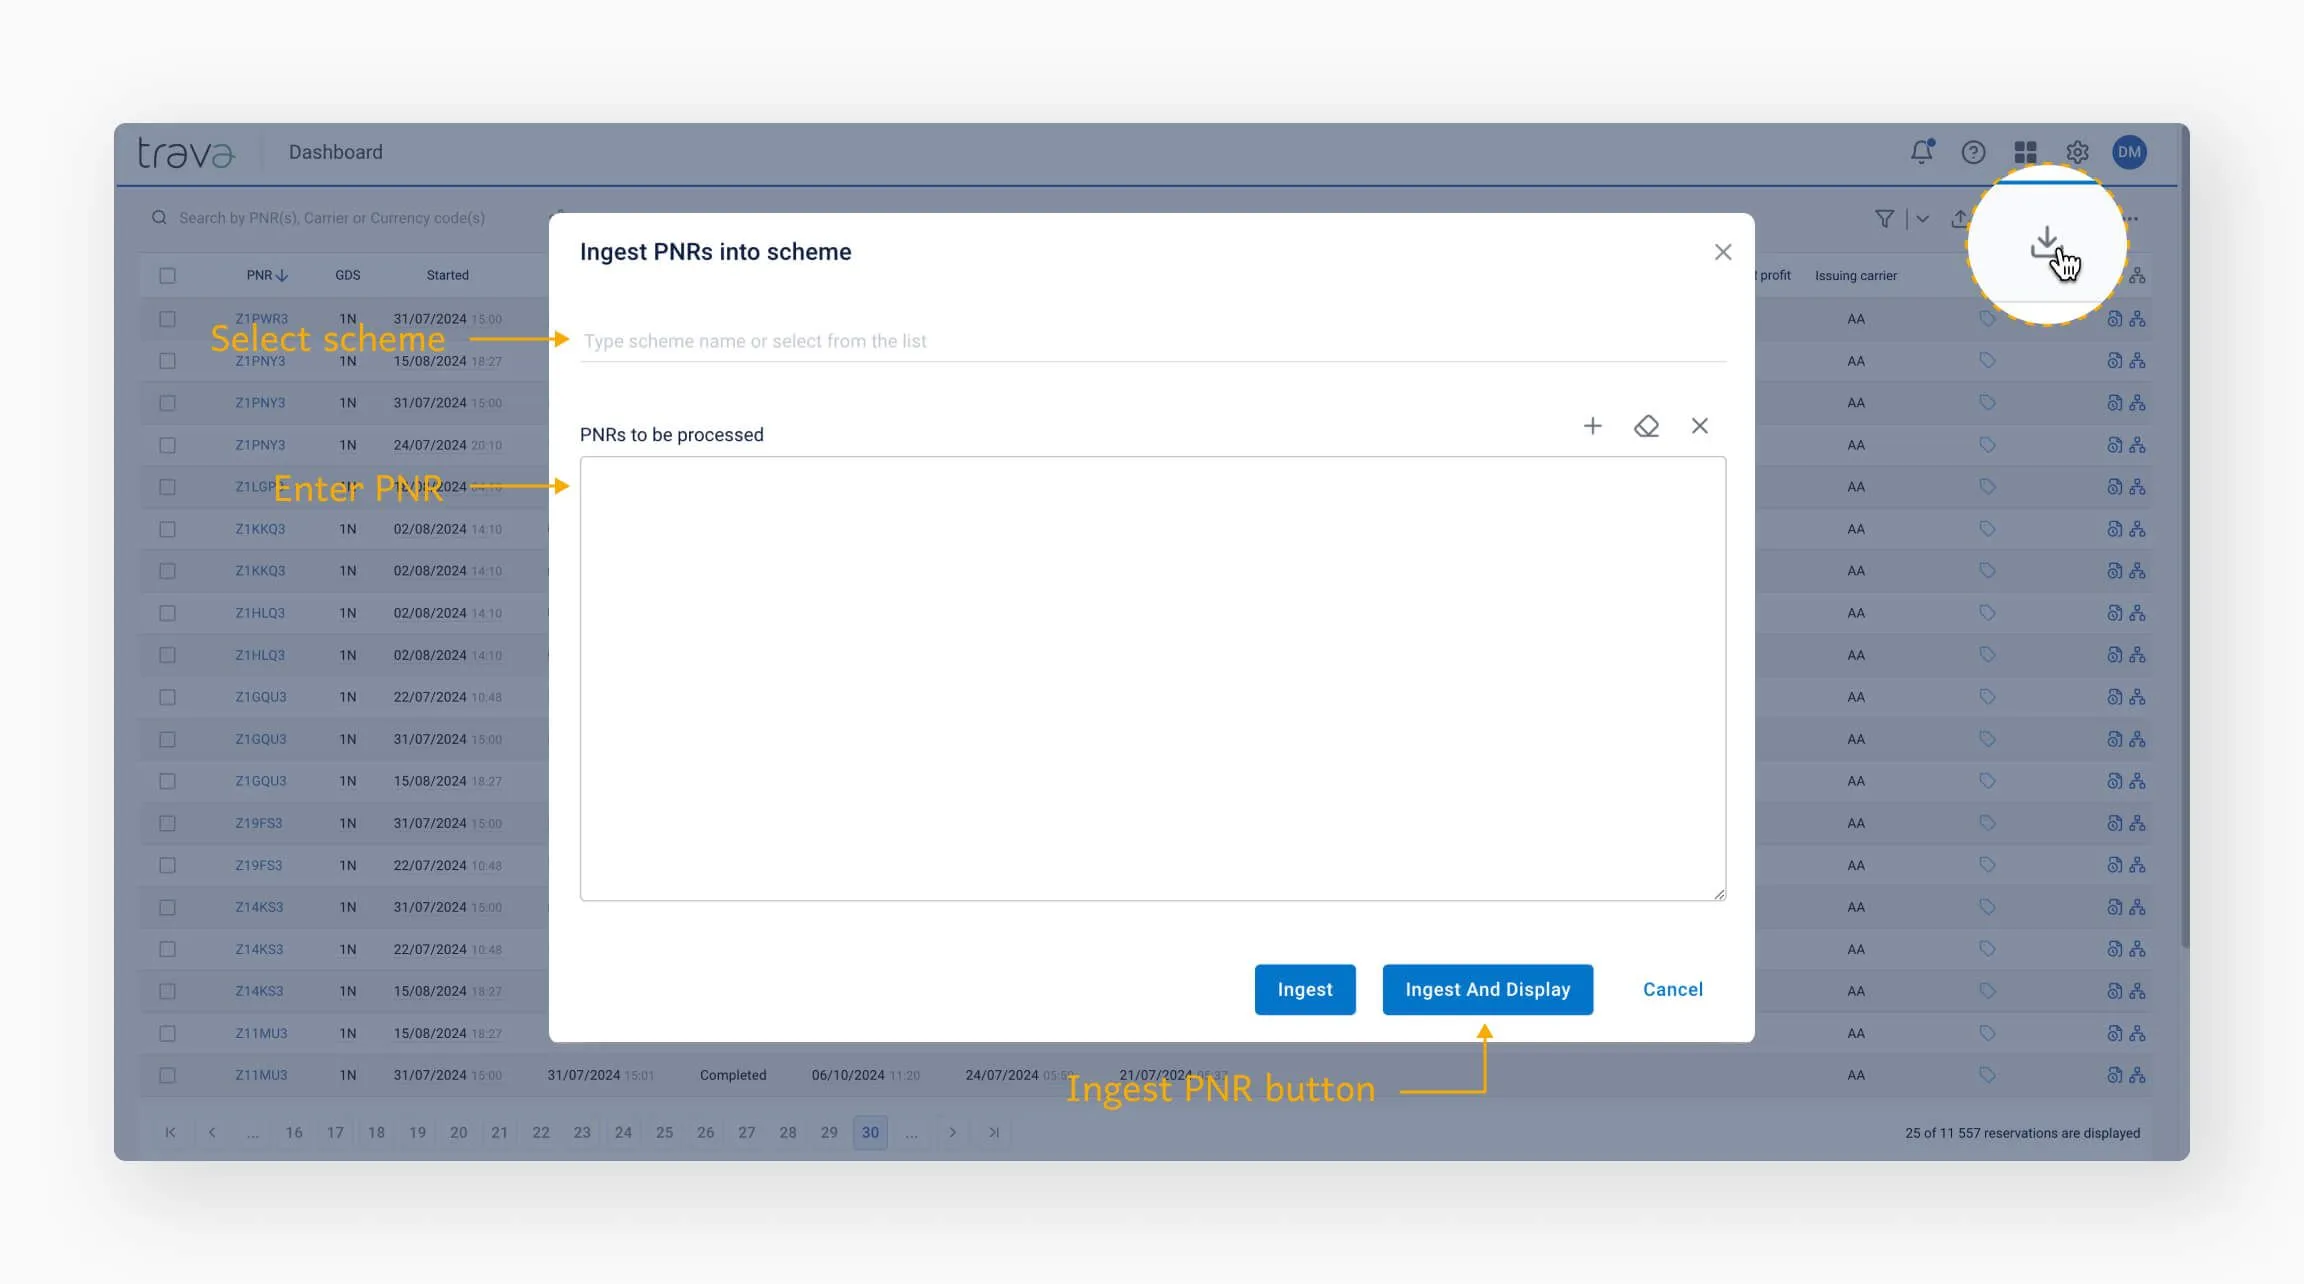
To begin processing, click Ingest and Display. A pop-up message will confirm that processing has started.
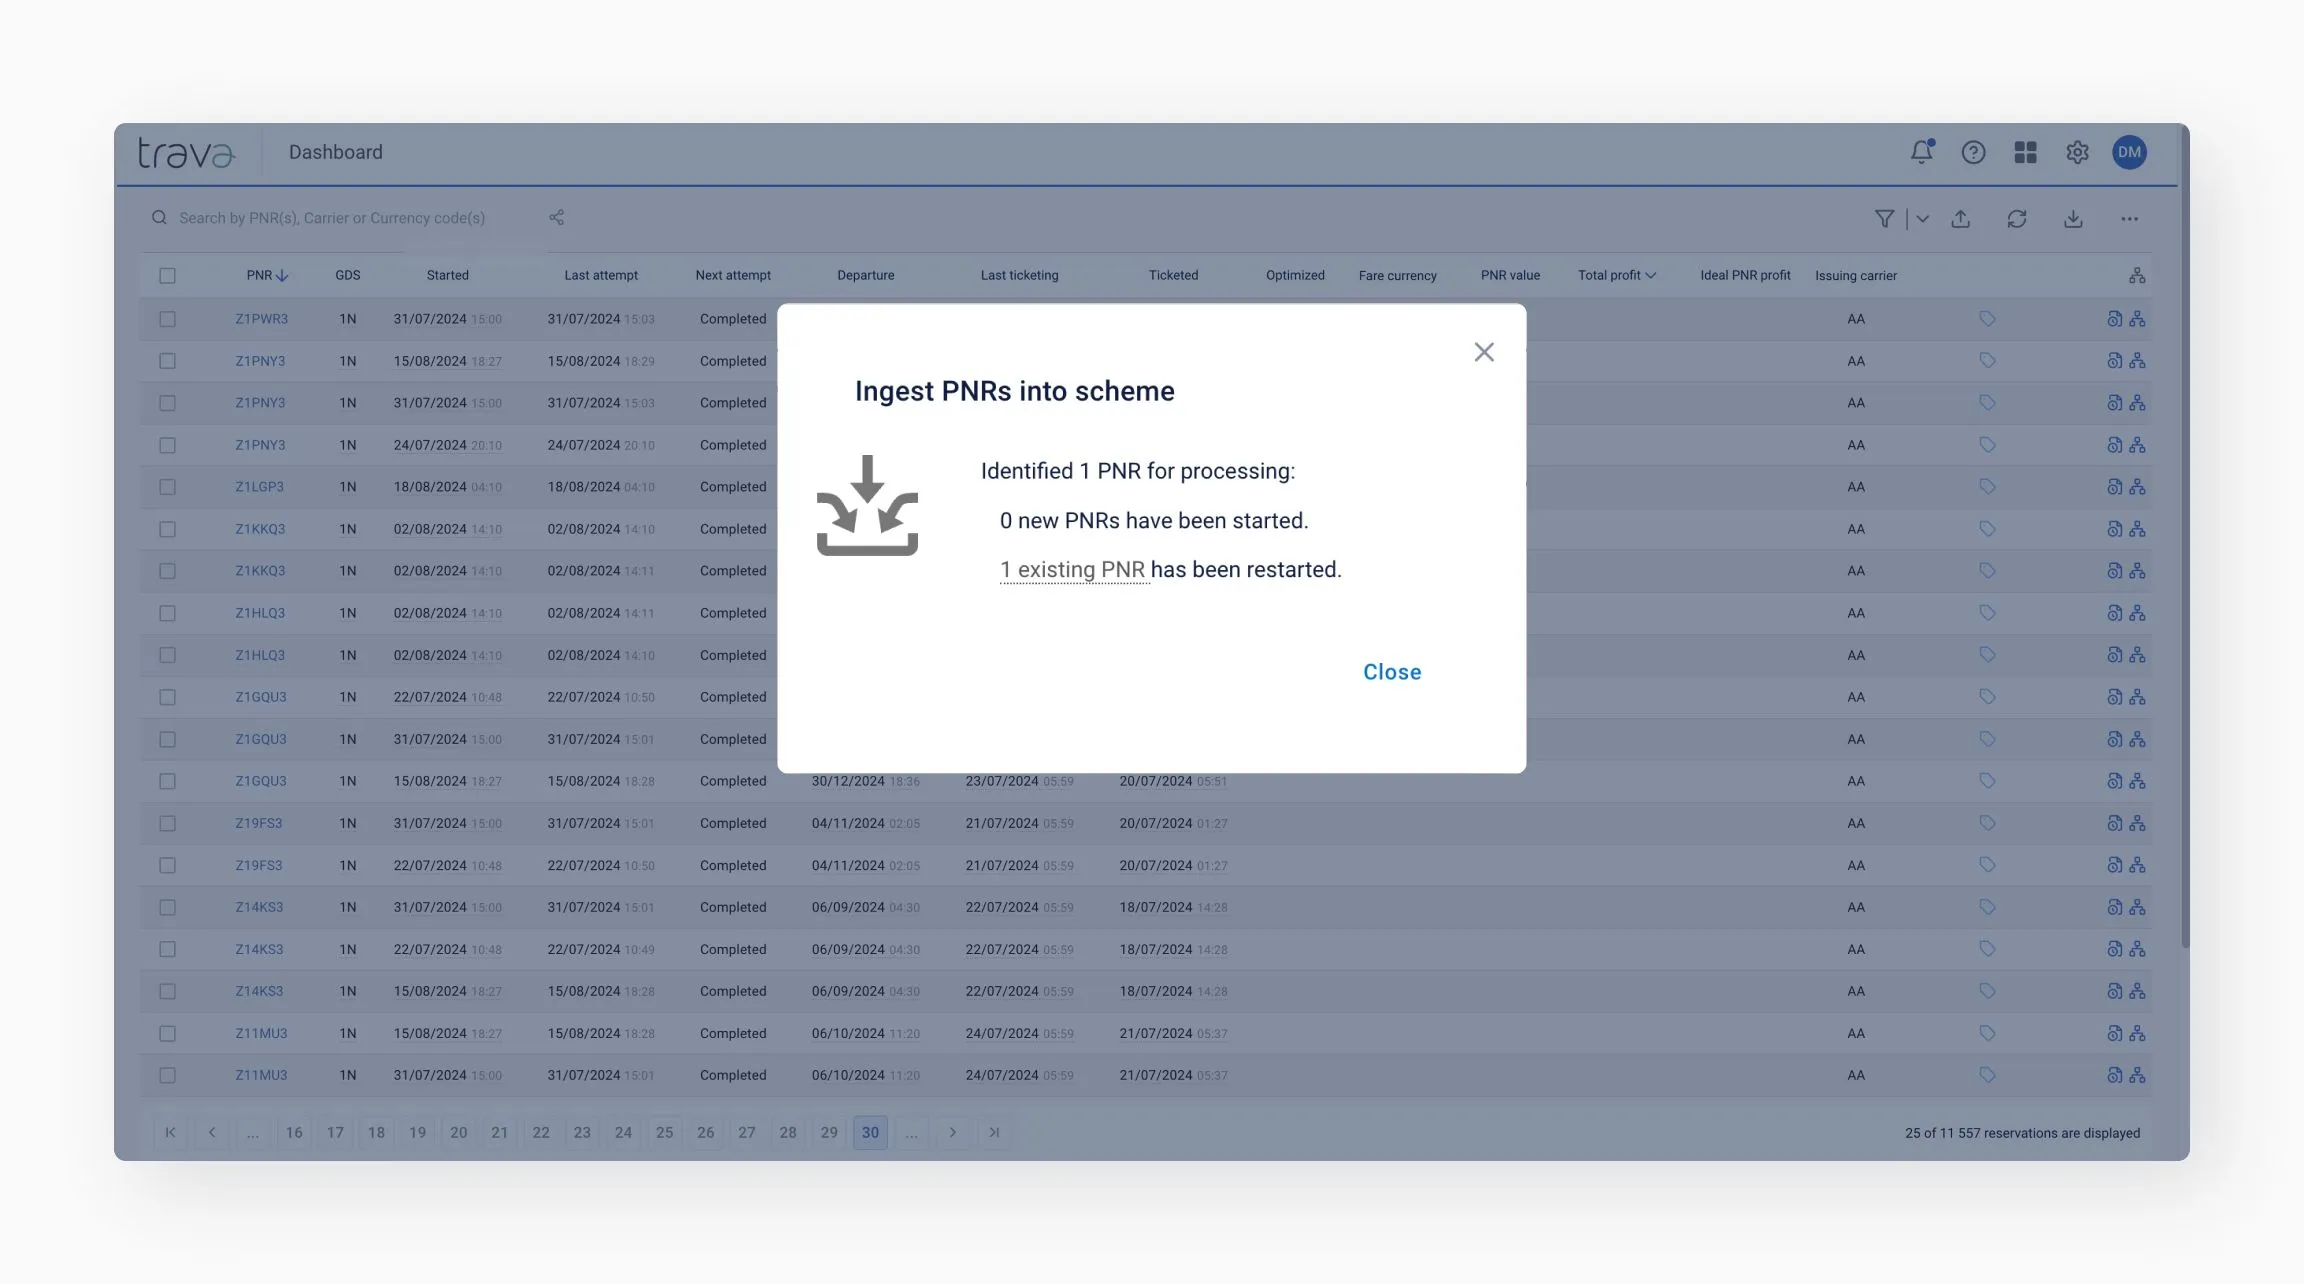
Wait a few seconds, then refresh the page. Once processing is complete, the instance will appear on the Reservation Processing page.
To view processing history, click History in the top-right corner.
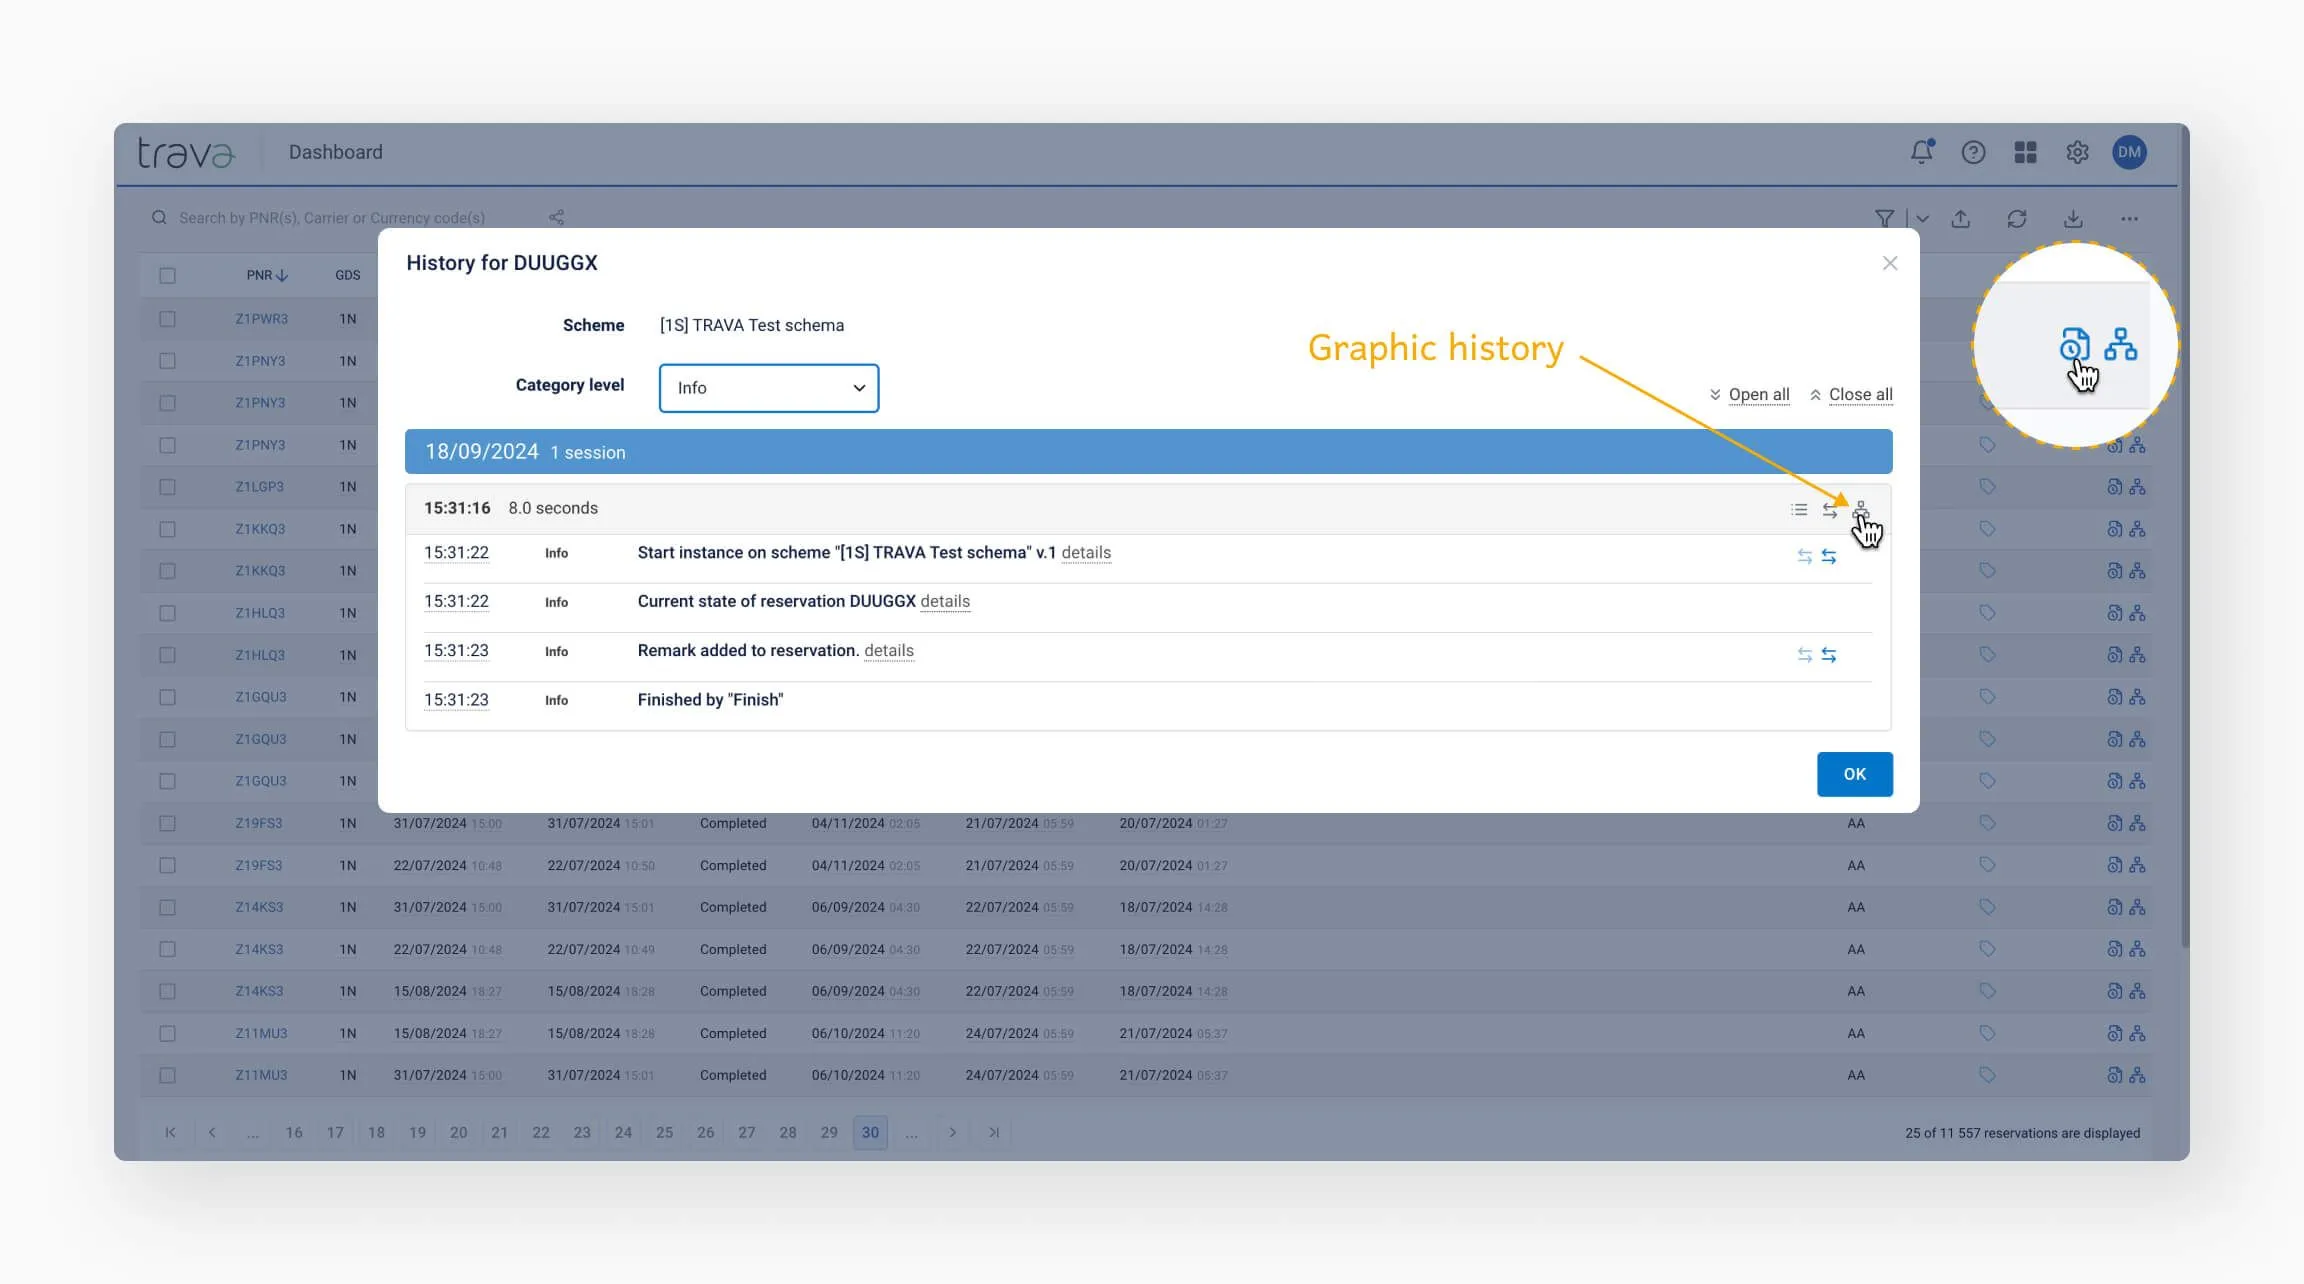
There are two types of history available:
- Textual: A detailed log of each step
- Graphical: A visual representation of the workflow (see images)
Click the Scheme icon at the end of a row to view the exact path the PNR followed.
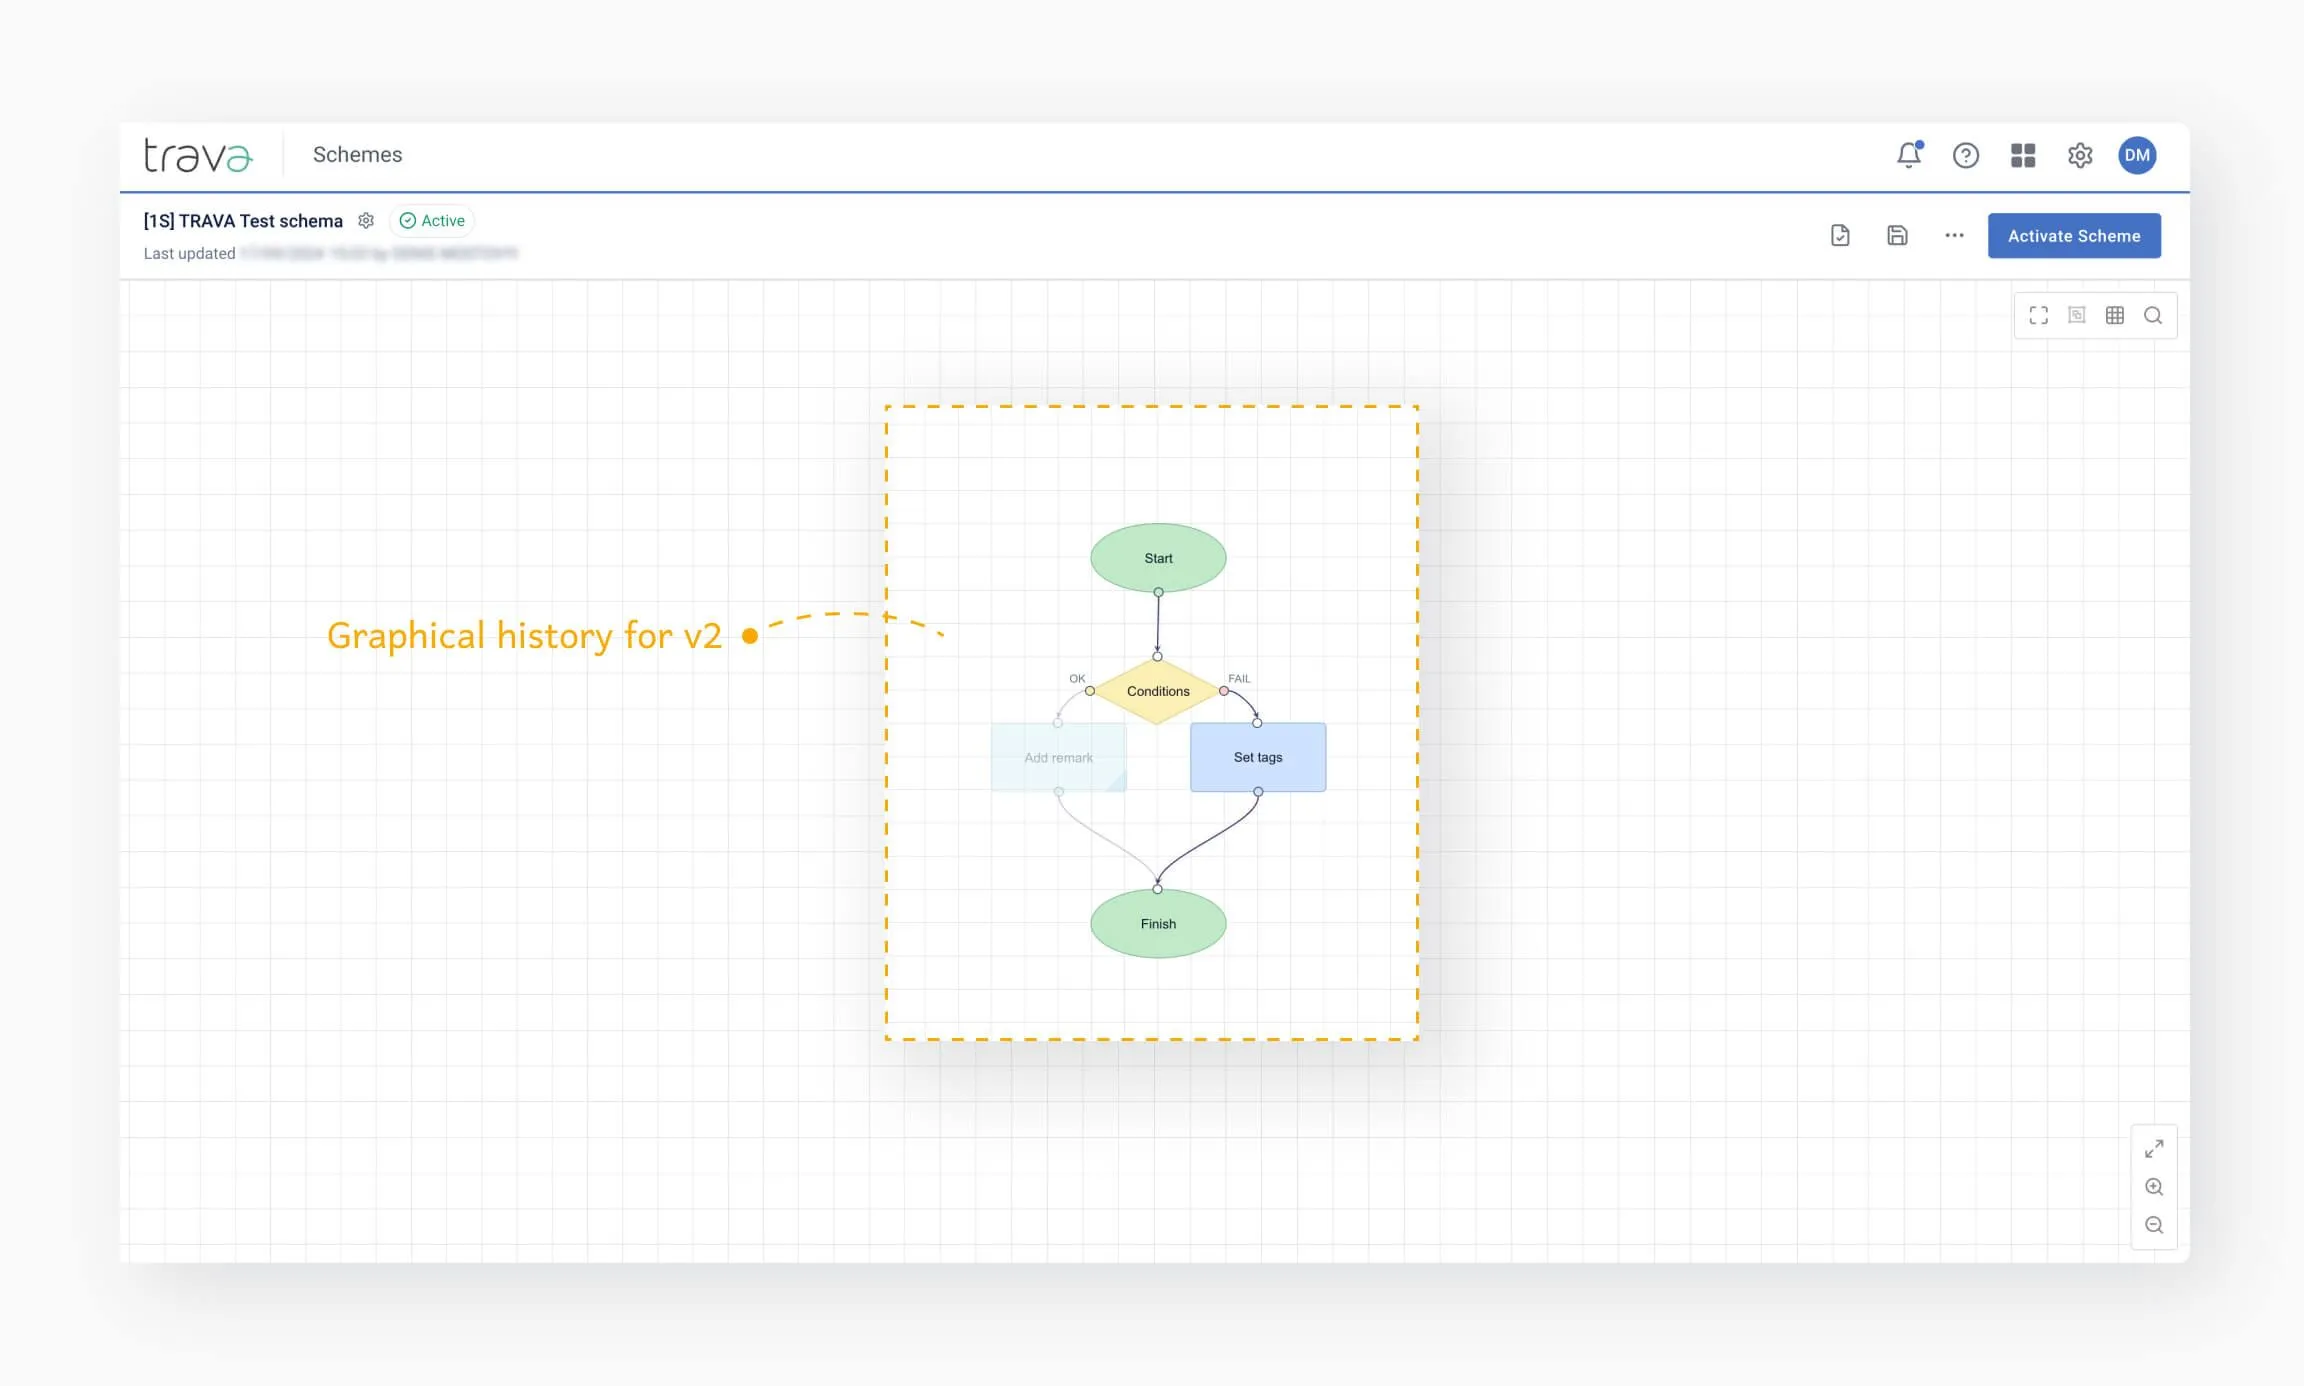
To make changes to the workflow, return to the Schemes list, open the scheme you want to modify, and click Edit scheme.

After making changes, reactivate the scheme. Then, on the Reservation Processing page, select the booking and click Run Now. The booking will be reprocessed using the updated version of the scheme.
Click History on the right – you’ll now see two sessions.
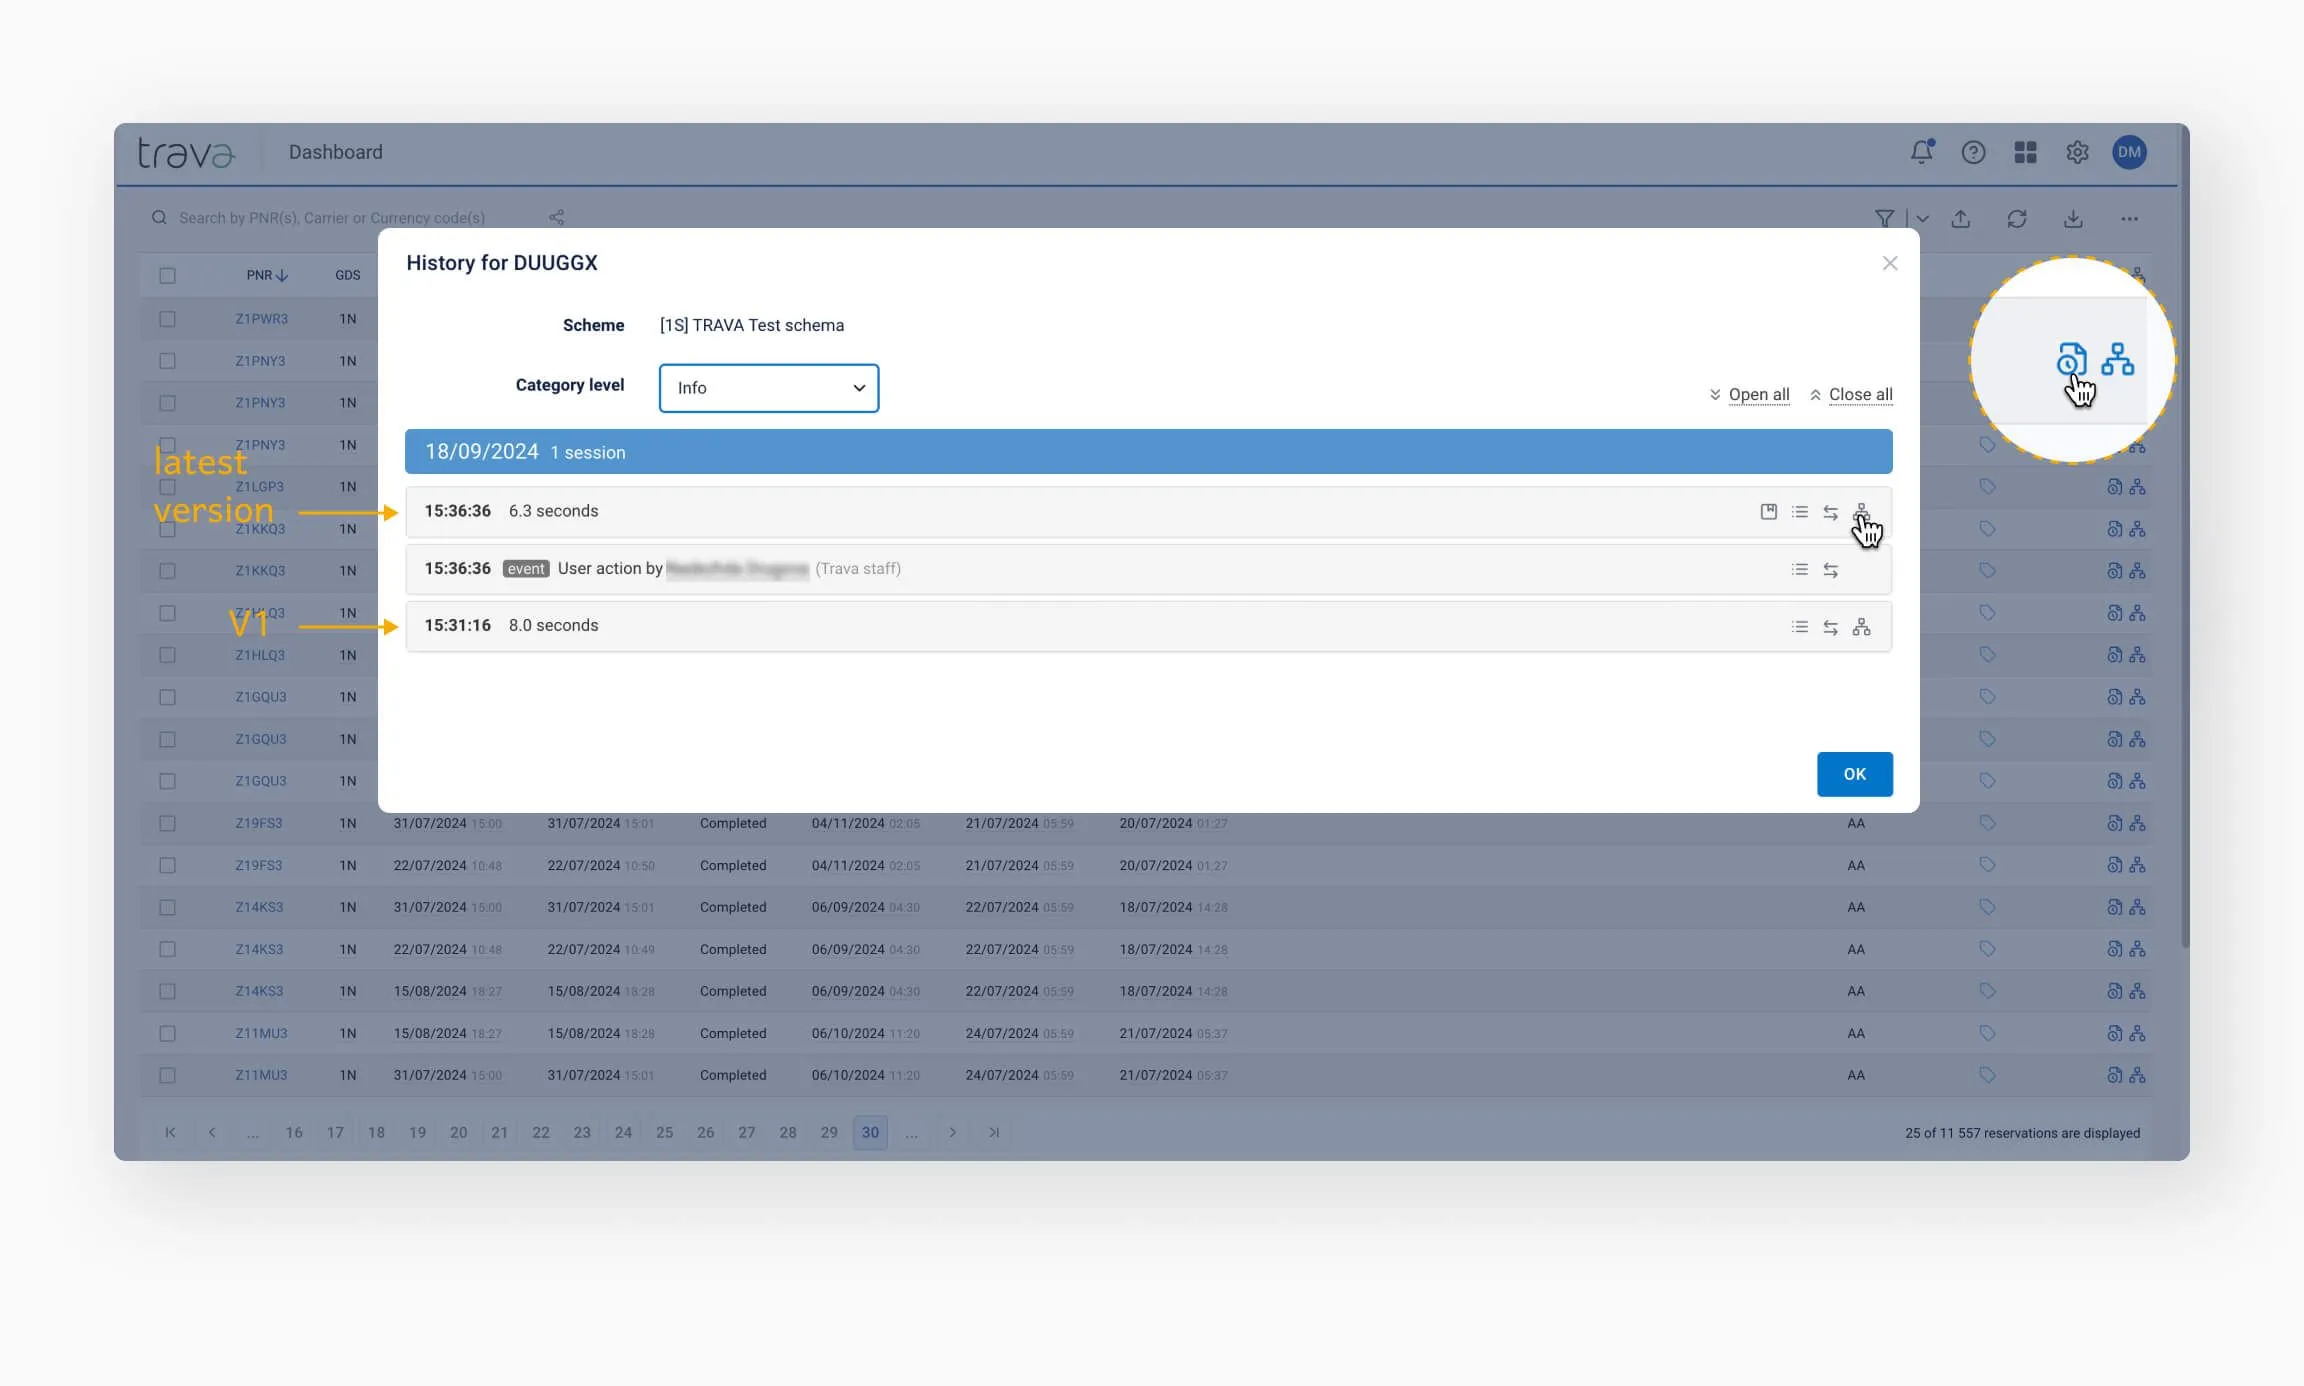
To view how the PNR was processed with the new version, click the Scheme icon at the end of the row for the latest session.
Once you're confident that the scheme is fully assembled and correctly configured, you can connect it to the real PNR source. To do this, update the Start element settings with the appropriate source, then activate the scheme. Bookings will be processed automatically at the interval you've configured.